


nerdstrike
-
Content Count
664 -
Joined
-
Last visited
-
Days Won
13
Reputation Activity
-

 nerdstrike got a reaction from BRZ-123 in GR Yaris who's going for it?
A prefecture is a bit like a county, or perhaps the City of London, in that it has quite a lot of local governance ("office of the prefect"), but defers to the elected national government.
In the UK we're accustomed to factories and shipyards and whatnot being associated with cities rather than counties, but I believe (perhaps wrongly) that the Japanese have more regional pride than the Brits.
-
nerdstrike reacted to Lauren in GR Yaris who's going for it?
I received a notification on Friday night telling me my car is being built!
I'm just a little bit excited.
In other news, got an email from RRG telling me they will have a demo car in for the beginning of November, so I will be first behind the wheel. I really hope it's as good as it looks!
-
 nerdstrike got a reaction from DuncanM in Help *was* needed after spark plug change
Here is a brain dump of all I have learned while trying to do this:
Firstly, the process takes ages. Unless you have magic tools, it will be incredibly slow, like an hour a plug or more as you get tired or drop things
3/8" kit is well suited. 1/2" ratchets are too large. 1/4" helps for the coil pack bolt and other ancillaries that must be removed. Vortex/through sockets are your friends here too as they increase your options. They might let you get a longer handle on a small job, you're going to want that!
A flexible magnet on a stick is absolutely indispensable. Ideally not too magnetic to help with threading the needle. You *will* drop something eventually. Otherwise you need to get the car up on stands so you can poke around the drainage holes or take the undertray off! Otherwise small bits of cloth it towel can be jammed underneath, but I couldn't get full coverage.
There is a tonne of thread on the spark plugs so the combo of socket and extension that works initially can be too long to get out once the plug is loose! Nicely worn extensions will be easier to detach than new ones, and a long flat bladed screwdriver might help depending on your stuff. My halfords advanced 3/8" short extension was too long to separate with screwdriver so I had to man up to detach it from the socket with fingertips of one hand.
Each spark plug requires slightly different tricks! Driver's side is most accessible and the passenger side is always difficult unless you care to mess with fuel lines or aircon. Taking the battery out gives you more elbow room to come in under the hardlines. I've used a mixture of the following tools while trying to find the easiest method:
1/2" ratchet + 3/8" adaptor plus very short extension in to deep 15mm socket. Then remove the insert to get it all the way out before you run out of length to remove anything. Stabilise the turning with a finger to make the ratchet click
3/8" ratchet + short wobble bar plus deep 15mm socket. Crack it loose with the ratchet, then twiddle with fingers. From certain angles it is possible to grip the extension with thumb AND finger! What a treat.
-
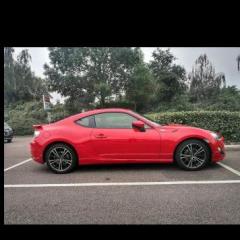
nerdstrike got a reaction from DuncanM in Reserved a red GT86 in Wakefield :-)
You've never respected a cold greasy roundabout as much as on primacy tyres in a tail-happy RWD car. Otherwise it's super fun even in the wet!
See you on the A428 no doubt.
-
 nerdstrike got a reaction from Test Drives Unlimited in Shadow lights!
Paging @Test Drives Unlimited ! I thought I recalled you doing something like this.
-
nerdstrike reacted to vanko25 in Oil Filter Help
When you get the new oil in and the new oil filter installed, prime the oil system by pressing the clutch and accelerator pedals all the way.
That kills the spark and let the engine crank for as long as you need it to get the oil through the engine.
-
nerdstrike reacted to Neil-h in Harrop self fit supercharger kit review
Hi All,
Back at the start of the lockdown I decided I needed a project to look forward to whilst working from home and I'd been toying with the idea fitting a turbo/supercharger for a while. Only problem was a i really fancied doing the installation work myself, so after some research (and a test drive in the Abbey demo car) I settled on ordering the Harrop supercharger kit from @Mark@Abbey M/S . Now it turns out that Abbey don't sell many of these kits for DIY fitment, so i figured I'd write up a bit of a review in the hope others might find it useful and may even have a go themselves in the future.
Existing mods
Prior to fitting the supercharger I'd had a TD manifold fitted and a remap by Abbey which took the car up to about 180bhp at the hubs and around 140ibft of torque. I’ve also fitted several cat backs ultimately settling on the TD super res.
What's included?
So for the money you get Harrops custom built manifold mated to an Eaton TVS1320 blower plus all the bits and pieces required to make it work on the car (including a special tool for reforming the A/C pipe around the supercharger). I have to say on unboxing the kit i was really quite impressed, it includes just about everything you need to get the job done. Complete with a signed off opy of the picking sheet when the kit was put together at Harrop so you can see someone's taken the time to put it all together and you can easily check it's all there. The only bit that wasn't included was the coolant for the charge cooler but that's not the end of the world as it's a standard GM coolant so you can get the anywhere.
In addition Mark also provided; the loan of an EcuTEK programming cable and dongle, a base map to get the car running, distance mapping (more on that later) and a session on the dyno for final map tuning and a power run.
The fitting process
This is the bit i'd imagine will be most of interest to other as there's not an awful lot of info online about it. Now the first thing I must stress is much in the style of the Pirates code (see one of the Pirates of the Caribean films for the full reference), the instructions are really for guidance only. They'll point you in the right direction (usually getting you 95% of the way there) but there will be times where a little bit of thinking is required. Most of those moments centred more around the removal of the OEM items rather than the refitting of the new bits, which in all honest I kinda expected and it wasn't really that difficult. That being said Mark was always at the end of phone when I had bits i wasn't sure of.
In terms of what was required to fit the kit, i did it over the course of a week with the front end in the air on a set of drive on ramps. If you're going to this way it's worth considering fitting the chargecooler/chargecooler pump/pipe work first (the instructions have it last). That way all the work from underneath is done before you start removing things like the fuel rails. Also it's worth following a bit of advice from one of the American forums and remove the undertray all the way back to the footwell, it's sods law you'll drop something and it will almost certainly land on that under tray.
As for tools, the only specialist tools required were the former for bending the A/C pipe out of the way and that was included in the kit (it's worth making sure you have a substantial G clamp though as bending that pipe is hard work). Just about everything else can be done using a socket set and the odd screwdriver/allan key.
The only minor issue i did find was that clearance between the TD manifold and the crank pulley was a bit tight, so we had to grind a little bit off the flange to fit the auxilliary belt. That and getting the fusebox apart to fit the chargecooler pump wiring but that's simply a case of trusting that it's more solid than you think. Once you're happy leavering things knowing what you can get away it comes apart fairly easily.
Mapping
Now the mapping process is something I've never really been involved in before so it was quite interesting. So Mark talked me through the initial process of connecting the EcuTEK software to the car and querying the ECU. He then sent over a base map which allowed me to get the car running and. From there it was a case of going out taking data logs starting keeping the car at low load/rpm initially then gradually increasing load/rpm as Mark tweaked the mapping till we got to a point where i could run it all through the rev range. This was the first point where the supercharger relay began to put a smile on my face, running it all the way through the rev range in third is really quite addictive. The way the torque just builds and builds is fantastic. After that i got the car booked in on the dyno for the final tune and a power run (the results of which are attached), the headline figures being approximately 240bhp (up 60bhp) and 200ibft or torque (also up around 60ibft).
Conclusions
to wrap up, i have to say i don't regret going down the DIY fitment route and i'd highly reccomend it to anyone that's half decent with a set of spanners. Fitting this kit really isn't all that complicated and the feeling of pride when you fire it up for the first time is just fantastic. That and of course you get a car at the end of it with some serious performance, the bit where it really comes alive is the the way it pulls through third/fourth/fifth. Where it used to run out of steam the car now just pulls like a train. With the added bonus that the fuel consumption hasn't taken to much of a hit, granted if you really press on then it drops quite quickly but on a gentle cruise i can still get 32-33mpg.
I'd also just like to say a big thanks to Mark and the team at Abbey Motorsport. They were really helpful through out the process (Mark even delivered the kit personally after Parcel Force decided it was to heavy but didn't bother calling him to say so) and it was good to know that Mark was at the end of the phone should i need some advice.
If anyone has any questions then fire away, i'm more than happy to help.
-
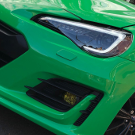 nerdstrike got a reaction from Tweedbean in tweedbean's Porsche RS Green BRZ Build
Super bold colour choice, but great result!
-
-

 nerdstrike got a reaction from Church in ABS/Traction control warnings
I imagine the typical "free safety check" involves peering at the brake pads to see if they can charge you for replacing them.
-
nerdstrike reacted to spikyone in Toyota 86 Gt 2014 Brake modification
The reason you don't need a BBK at the rear is that with greater front braking from a front BBK, you'll get more weight transfer to the front - and away from the rear - during hard braking. This reduces your capacity for braking at the rear, since friction force (between tyre and road) is proportional to normal force (vertical load), and you've reduced the vertical load. Up to a point that's not a problem, as long as the car is still limited by front tyre grip under braking you're all good.
If you then add bigger brakes at the rear, you'll be moving the rears closer to locking again (in reality, triggering ABS). Contrary to what you might expect, a rear BBK will likely increase your braking distances because you'll become limited by your rear tyre grip and those tyres already had less grip than the front tyres. You'll also increase your chance of binning it on track if you try and trail brake!
-
 nerdstrike got a reaction from Tom21 in Burst Hel braided brake line
Until evidence to the contrary, it sounds like a manufacturing defect. I've heard of lines abraiding on the suspension when they're not the right length, but not rupturing like this.
-
nerdstrike got a reaction from Tweedbean in tweedbean's Porsche RS Green BRZ Build
Lots of these bits look great. Is it going to be ok with matt skirts and glossy carbon finish on the wing?
-
nerdstrike got a reaction from Tweedbean in Removing the instrument binnacle cover visor Step By Step Video
How simple!
-
 nerdstrike got a reaction from davbelfast in New car
Quite apart from the fine fine fine massive skids nature of the primacy, they're very robust and that tends to mean you might find old tyres on your buy. An old primacy is not to be trifled with on greasy roads!
-
 nerdstrike got a reaction from cts in Covid lockdown battery issues
Let's be honest, we should be disconnecting our batteries at this time. The car will sit just fine for a number of weeks. It's just a pain to reconnect when you actually need to go somewhere.
Good time to buy shares in battery charger companies...
-
 nerdstrike reacted to cts in Flat battery - locked out - BROKE key
That's at least two of us this week then 🙃 See earlier in thread. For me it was my battery pack jump start booster - which ironically (or not) was not actually any good in my situation (completely flat battery, needs a proper charger instead). Good luck with getting your battery/car back to health too.
Currently I have borrowed a friend's CTEK MXS 3.8 charger on it. All good so far, working it's way through the levels but am able to lock/unlock the car by the fob and no alarm issues. My cheaper 'one trick' trickle charger is on the way.
-
nerdstrike reacted to Stutopia in Stubaru BRZ
Due to the start of what is now 'the crisis' and a spare day a few weeks back, I was lucky enough to get access to a friend's garage space and set my mind to paint correction. I'd seen some minor defects (and one major one) when I was recently getting some strange goop off the passenger door and have been itching to spend some quality time with my new toy - a Rupes LHR 75E Mini. For detailing perverts like myself, the Rupes is the little Bigfoot offering for smaller areas and confined spaces. I used one for a few days a couple of years ago and fell in love, I finally convinced Santa to sort me out last winter.
It's too small for most cars and people, as your only polisher, but despite that, I went for it because it's so light and low vibration that the drawbacks of larger areas taking longer, did not outweigh all the upsides in the trickier bits of our small and intricate panels. I will regret this decision if I ever own a Range Rover, but, lets face it, I will probably just use that as an excuse to buy a big Bigfoot anyway
Back to the task at hand, exploiting an indoor workspace to go after this sort of thing. Nothing really offensive, just the stuff you notice in petrol station, filling up at night under the lights.
The bonnet is a bit of a head scratcher as I have no idea where this has picked up so many defects from. I can only assume it's from washing, but I do try and observe a very gentle wash process. You can see on the spot, the swirls radiating out, accidentally the overhead strip shows what effects this has on larger reflections - they just look dull and dirty.
This was only meant to be a single stage job (I only had 10 hours of time) so it was a small test patch to see what got a reasonable improvement and then blanket job all over. The yellow pad and polish combo from Rupes was fine, expect for one stubborn area on the rear bumper where I have gotten too close to the brambles in the work car park - SHAMEFACE - I know, it's unforgivable. Really hard to photograph this but there were three distinct scrapes all on the crease.
The only 50/50 I took - not so easy to see the difference in the photo, but it is night and day in the video below.
And this is the bonnet...
...which is miles away from the horror show I started with.
Having access to an indoor workspace is an amazing treat for me (especially as it rained most of the day) but having a ramp as well? HEAVEN.
My back was her so grateful for this. As a Johnny Pencilpusher in my day job, a day of physical effort is no minor undertaking
After all the polishing, I laid down a coat of AMMO Reflex, which I am increasingly impressed with. It's so quick and easy to work with and has literally none of the pitfalls of the super strength ceramic stuff that I am yet to be impressed with - sorry I know I'm a dinosaur. Naturally after all that effort I could not resist a very quick glamour shot or two.
If you've stayed with me this far, you may as well lose 90 more seconds on the movie too.
-
nerdstrike reacted to LGE in So - visiting Japan. Tips?
Definitely visit the Toyota showroom/museum in Odaiba as what others have mentioned above.. here's 2 pics to wet your appetite (I went in 2012)
-
-
 nerdstrike got a reaction from spikyone in MartinT's BRZ
Good lord! That lot probably cost as much as your car! You don't need in-car stereo at all - you can probably hear your home stereo from wherever you're driving.
-
nerdstrike got a reaction from Test Drives Unlimited in GR Yaris who's going for it?
They'd better be doing something about the driving position. The previous gen yaris has you up high and with a horrid pedal position. Reminds me of driving a van.
-
nerdstrike got a reaction from Test Drives Unlimited in Buy now or wait?
According to this graph: https://www.howmanyleft.co.uk/vehicle/toyota_gt86_pro_d-4s , the number of GT86 pro's potentially available after 3-year PCP/lease type deals will at most be 200 (but it will be much less). If you waited another year, it would be a similar number. Given the number of Toyota dealers in the UK, it'll be 1 car or less per dealer, ignoring colour and spec. You'll really struggle to find the right car that way! You might see some more Blue Editions if you waited until late 2020.
The GT86 is a low volume car now that the initial sales are over.
-
 nerdstrike got a reaction from VAD17 in Brakes seized?
With respect to freeing stuck brakes, I rode in a LR Discovery shell with seized wheels. We took the pads out and it still wouldn't budge so we towed it down the road to try to free the hubs with me straddling the transmission brake. Three went fairly quickly and rolled, but we went a good 50 metres before the last wheel found a drain cover and finally gripped hard enough to break loose.
In other words, it can take serious effort to free up a wheel, as you are limited by tyre grip. If the tow-truck dragging it onto the trailer didn't do it, then disassembly seems a necessary step.
-

 nerdstrike got a reaction from GravelRash in AIM being pulled during normal driving
Scoobypedia discusses the Subaru knock mitigation algorithm in excruciating detail: http://scoobypedia.co.uk/index.php/Knowledge/SubaruKnockControlStrategyExplained
The implication of your chart (very helpful apart from the axis autoscaling being useless sometimes) is that there are 4 knock events during your drive, possibly corresponding the some abrupt changes in throttle, although without particular pattern. The knock strategy does what it does around these events, but the response is hard to predict due to the complexity of the response.
I can't say whether knock events are common or uncommon having not been able to log this myself.