
Samwise
-
Content Count
273 -
Joined
-
Last visited
-
Days Won
29
Reputation Activity
-

 Samwise got a reaction from will300 in Bringing an 86 back from the dead
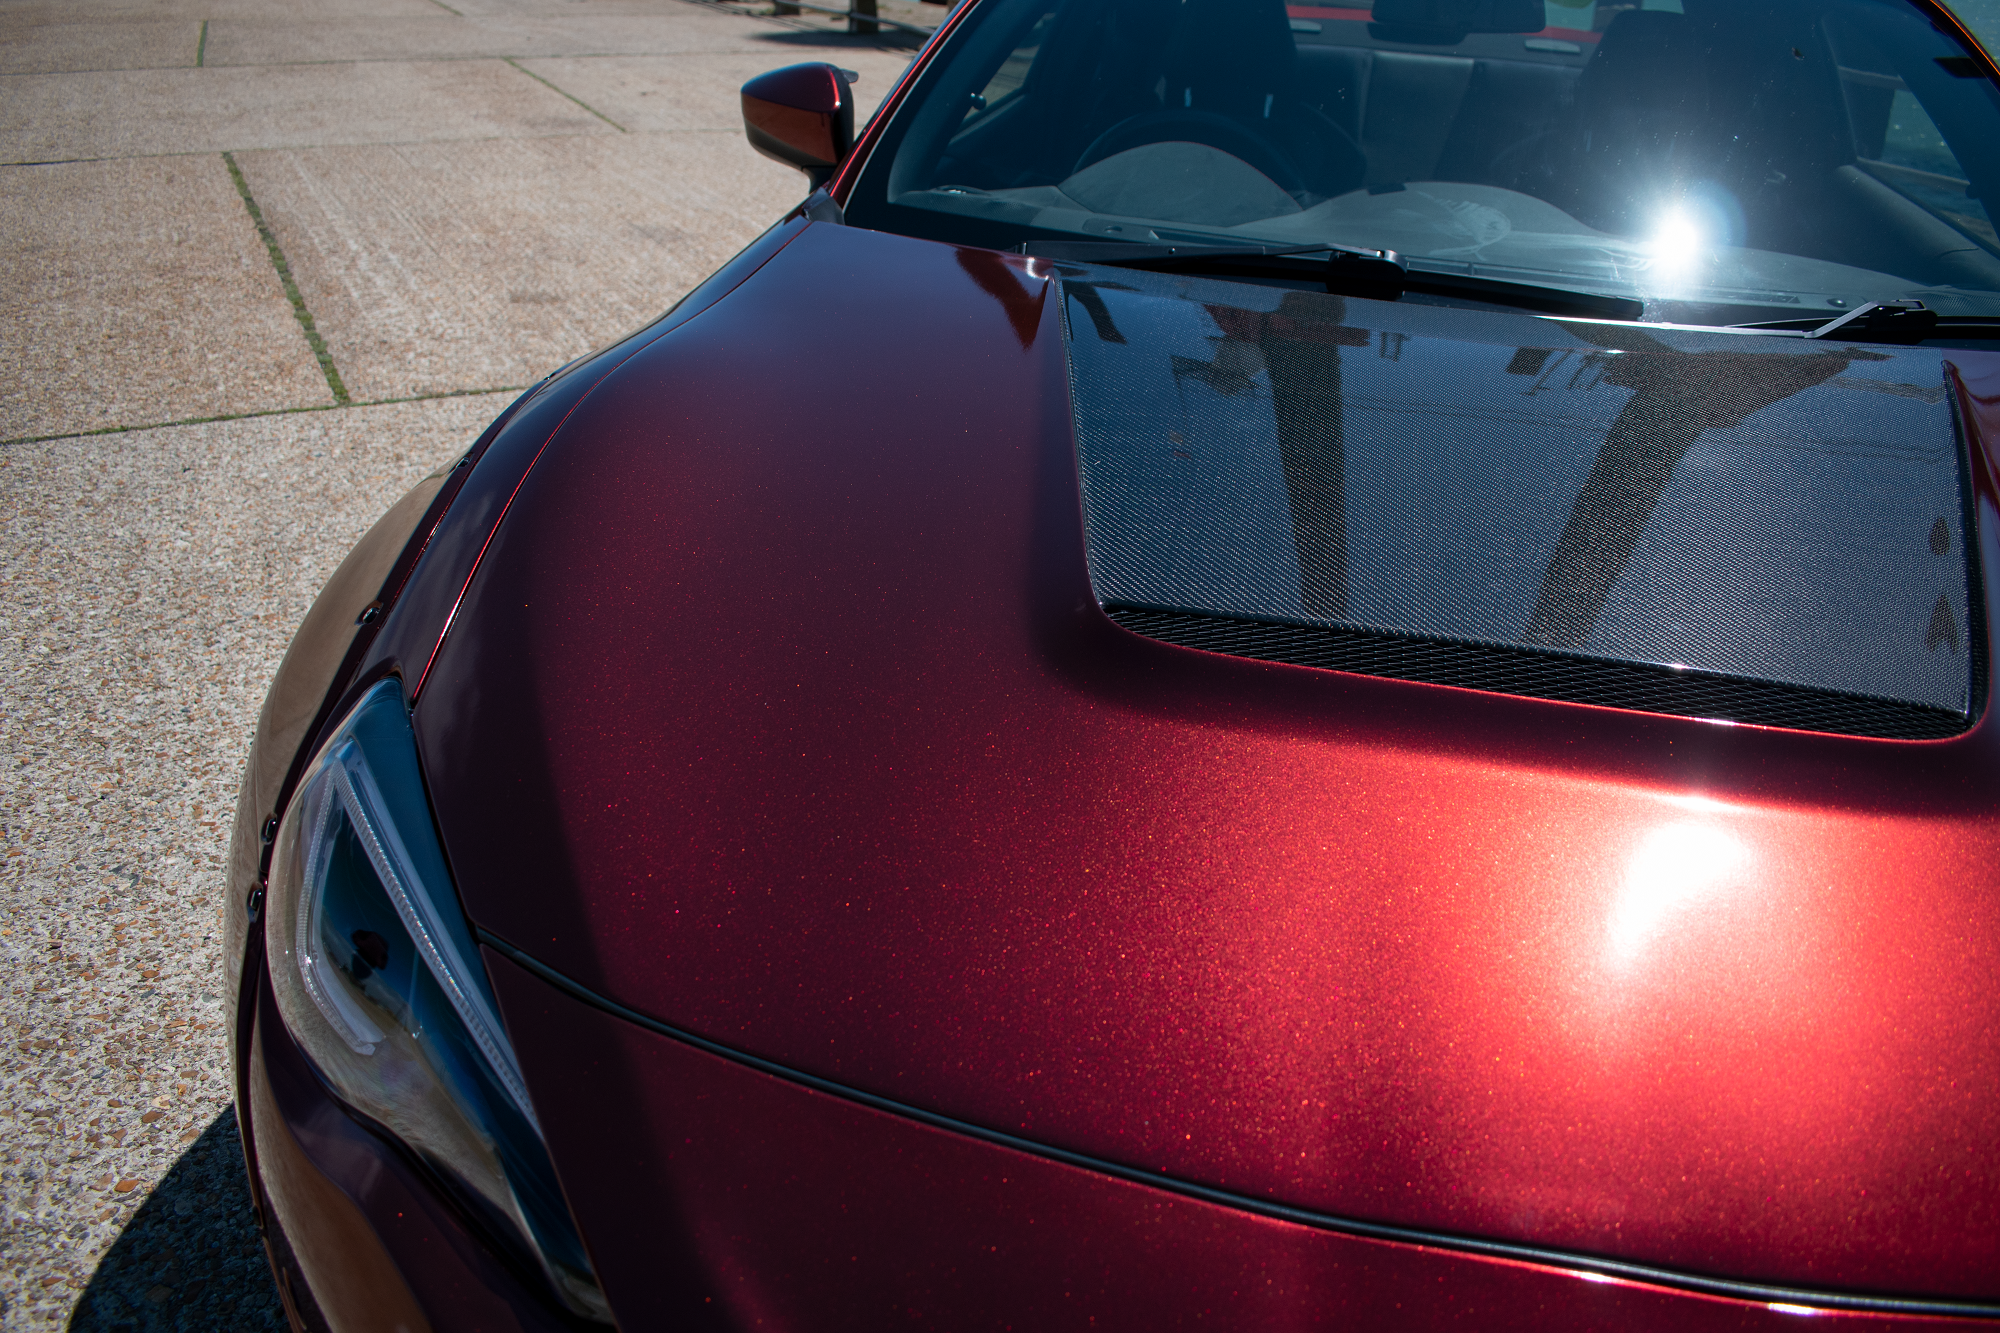
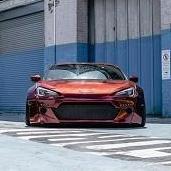
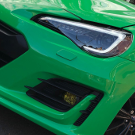
Totally forgot to do an update since last week but the car is now with Monster wraps!
Drove it all the way there without any problems ofcourse, and got plenty of looks on the motorway, it was good fun.
Got a little picture to mark the occasion - I hope the car turns out as "Spiicey" as the Porsche next to it lol
and a small video they put up on instagram as they started the wrap, you can see at the end the colour of the wrap as they've begun doing the door jams
https://i.imgur.com/9iaOqPW.mp4 -
 Samwise got a reaction from Scotty751 in Bringing an 86 back from the dead
I can't wait to see it either. Will be popping up there early next week to drop off the freshly painted rear diffuser as well as a new set of boot hinges (the OEM ones on the car are red ofcourse, from the factory and I can't expect them to wrap something as intricate as a boot hinge so i picked up some new black OEM ones) so when i'm there i'll be getting a sneak peak of how the car is can't wait!
for now there's been some more little videos:
https://i.imgur.com/UPZ6d1J.mp4
https://i.imgur.com/3vHn6xb.mp4
https://i.imgur.com/upGWaTJ.mp4
https://i.imgur.com/NPzT9fI.mp4
It appears they're actually going further with it than originally discussed taking the wrap all the way under the widebody and even wrapping over the sections of the cut arches that have a layer of underseal around them. Ofcourse in reality this doesn't matter either way as the arches cover all of that up but assuming that it doesn't lift or peel at all near the underseal it's good to know no pesky eyes will be able to peek up my arches (that's quite the euphemism) and see the original red under them.
-
 Samwise reacted to Kono in Bringing an 86 back from the dead
aww man the effort put into this REALLY pays off. Looks awesome!
I was never too sure about the V2 Rocket bunny (all pics i see are either photo-shopped to death or have stupid 'stance' wheels at crazy camber angles) but damn this changes my mind for sure.
Good work ^^ cant wait to see more!
-
 Samwise got a reaction from choupolo in Bringing an 86 back from the dead
It was from a recent group buy via the facebook groups but i think it was the D2H kit from these guys:
https://www.gtaretrofits.com/shop/vehicle-specific/frs-brz-gt86/2013-frs-vland-specific-hid-kit/
-
Samwise reacted to choupolo in Bringing an 86 back from the dead
I like look of the VLANDs despite the slightly lesser build quality as you say. I put some on my car recently.
Which HID kit did you go for?
-
 Samwise got a reaction from Stutopia in Bringing an 86 back from the dead
It was something they offered, essentially for free (so they can take some nice glossy pics of the car for social media I imagine as its a change from the usual audi, bmw or tesla) but it'll make the car easier to wash in the future - more protection is never a bad thing but isn't as much functional on a wrap rather than paint.
-
Samwise reacted to BRZ-123 in Bringing an 86 back from the dead
Really good choice of colour Sam . I love Red. If you get a chance, have a look at 3M Satin Smouldering Red. It has a nice Matt finish.
In terms of costs, how much are Monster charging you? and are they doing door shuts to keep the nice look flowing?
-
Samwise reacted to ThatGuyThere in Bringing an 86 back from the dead
Looking awesome.
How does the wrap work with the arches and rivets - will they wrap the metal, and the arches seperately and then they'll be re-mounted? Or wrapped over the joints?
-
 Samwise got a reaction from MartinT in Bringing an 86 back from the dead
Over the recent weekend I was able to have a few friends over to the workshop and over the course of a single very sunny Sunday the whole Rocket bunny kit is now prepped for its wrap.
I'm quite lucky that a couple of my friends have wrapped parts of their cars before and one of them even works in the bodywork department at BMW (We gave him the whole front bumper to do!) so I knew they'd do a good job alongisde me!
We started off by keying up the panels with some 320 grit and getting rid of any motting/orange peel in the FRP as well as any extra blobs of material that were stuck to the surface, followed by a couple of healthy coats of grey high build primer. Once it was dry and ready to sand we applied any filler or knifing putty in areas that needed it, there were a couple of cracks and some scratches or air bubbles that had to be filled and finally all the panels were finished to a wet 800 grit finish which should be plenty for the wrap to adhere to nicely and no inperfections to speak of!
The video for it can be found here:
We all really liked how the front bumper turned out in its sanded back primer look ironically, it sort of looked like a comic book sketch or some kind of video game (If anyone's played Borderlands you'll know exactly what i mean!)
But in just under 2 weeks the car will be off to Monster Wraps in Southhampton to have the wrap applied and I can't wait! I've got some small jobs to get done before then and I need to continue work on the diffuser so that it's ready by the time the car is complete.
-
Samwise got a reaction from MartinT in Bringing an 86 back from the dead
Over the recent weekend I was able to have a few friends over to the workshop and over the course of a single very sunny Sunday the whole Rocket bunny kit is now prepped for its wrap.
I'm quite lucky that a couple of my friends have wrapped parts of their cars before and one of them even works in the bodywork department at BMW (We gave him the whole front bumper to do!) so I knew they'd do a good job alongisde me!
We started off by keying up the panels with some 320 grit and getting rid of any motting/orange peel in the FRP as well as any extra blobs of material that were stuck to the surface, followed by a couple of healthy coats of grey high build primer. Once it was dry and ready to sand we applied any filler or knifing putty in areas that needed it, there were a couple of cracks and some scratches or air bubbles that had to be filled and finally all the panels were finished to a wet 800 grit finish which should be plenty for the wrap to adhere to nicely and no inperfections to speak of!
The video for it can be found here:
We all really liked how the front bumper turned out in its sanded back primer look ironically, it sort of looked like a comic book sketch or some kind of video game (If anyone's played Borderlands you'll know exactly what i mean!)
But in just under 2 weeks the car will be off to Monster Wraps in Southhampton to have the wrap applied and I can't wait! I've got some small jobs to get done before then and I need to continue work on the diffuser so that it's ready by the time the car is complete.
-
 Samwise got a reaction from Lauren in Bringing an 86 back from the dead
Yeah fantastic bit of kit! Wouldn't mind swapping the other arms out for their gear as well if I had the funds but what i've got now will do to allow me to sort out the toe and dial out the negative camber in the rear.
I'd really love SPL's front lower arms to play around with camber and caster adjustment with them but that's a big spend
-
Samwise got a reaction from MartinT in Bringing an 86 back from the dead
Over the recent weekend I was able to have a few friends over to the workshop and over the course of a single very sunny Sunday the whole Rocket bunny kit is now prepped for its wrap.
I'm quite lucky that a couple of my friends have wrapped parts of their cars before and one of them even works in the bodywork department at BMW (We gave him the whole front bumper to do!) so I knew they'd do a good job alongisde me!
We started off by keying up the panels with some 320 grit and getting rid of any motting/orange peel in the FRP as well as any extra blobs of material that were stuck to the surface, followed by a couple of healthy coats of grey high build primer. Once it was dry and ready to sand we applied any filler or knifing putty in areas that needed it, there were a couple of cracks and some scratches or air bubbles that had to be filled and finally all the panels were finished to a wet 800 grit finish which should be plenty for the wrap to adhere to nicely and no inperfections to speak of!
The video for it can be found here:
We all really liked how the front bumper turned out in its sanded back primer look ironically, it sort of looked like a comic book sketch or some kind of video game (If anyone's played Borderlands you'll know exactly what i mean!)
But in just under 2 weeks the car will be off to Monster Wraps in Southhampton to have the wrap applied and I can't wait! I've got some small jobs to get done before then and I need to continue work on the diffuser so that it's ready by the time the car is complete.
-
Samwise got a reaction from Scotty751 in Bringing an 86 back from the dead
So with the Rocket Bunny kit now officially installed I'ved moved on to prepping the car for its wrap.
I've chosen to go with a wrap over paint for a few reasons, the first being cost of course, the next being that i'd like to change the colour of the car (still staying somewhat red) as the original red on the car is very flat and if the rocket bunny panels were matched to it I feel the new curves of the body would be lost in the flatness of the OEM colour and finally if I were to do paint i'd like to go the whole 9 yards and spray the whole car inside & out including engine bay doors, etc.
So with all that in mind I've decided to go for a wrap which i've been in talks with a company down in Southampton called Monsterwraps which appear to do some very good work as well as get great reviews. Not wanting to skimp out on the fitting of the wrap ofcourse or do it myself i'd rather pay a sensible price to get a good job done. However as I mentioned i've been in talks with them to confirm how they would tackle the kit, the Wellnut holes and what prep work I can do to speed up the process as of course the car is far from factory fresh.
With that said the car is now booked in to have the wrap installed the week commencing the 15h of June giving me just over a couple of weeks to get it prepped and ready to go!
Check out the first video related to it below where I talk about the proceses as well as my choice in Colour.
https://youtu.be/fhDIo2cXzVo
As far as colour choice goes i've shared it with a few people but i've not been keeping it much of a secret or such. I wanted to stay close to red and have a nice deep gloss to it which lead me to find KPMF Black Red Iridescent
I think this will look amazing on the car and I can't wait to see it completed!
-
Samwise got a reaction from Scotty751 in Bringing an 86 back from the dead
Another video is up on the channel. I don't think there's much to say about this one other than the fact that i installed the side skirts and by the end of it the car was looking AMAZING. Check it out! https://youtu.be/ewlGILHD83M
-
 Samwise got a reaction from ThatGuyThere in Bringing an 86 back from the dead
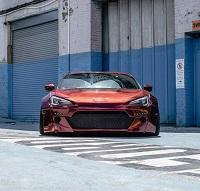
So as last week closed out I got the rear arches installed on the car and the big cuts to the rear body of the car made.
I really can't say I did a good job at it, infact i'm still quite regretful. It's no the end of the world that's for sure and everything is nicely covered up by the arch as well as having the inner and outer skin of the arch closed back up with all new nice sheet metal however it's more the size and quality of the cut im regretful over.
Check out the video to see for yourself where I talk about it in more detail as well! https://youtu.be/aZ0T0BAwiqU Below are a few pictures of tthe finished product however!
-
 Samwise got a reaction from vanko25 in Bringing an 86 back from the dead
I've followed him for years until recently and in that case it's a bit different as Chris from BIFB has often only fit fake v1 kits to his BRZ's which are considerably easier to fit than the v2/v3 and the only real Rocket bunny kit he's used is the Datsun 240z kit which are known to be bad on the rear arch areas as they were likely modelled off a bent car.
DedicationBlog Content is better for an insight in to tthe 86 as BIFB tends to be more on the bodge-job side of things atleast in his earlier content.
-
Samwise got a reaction from Scotty751 in Bringing an 86 back from the dead
Another video is up on the channel. I don't think there's much to say about this one other than the fact that i installed the side skirts and by the end of it the car was looking AMAZING. Check it out! https://youtu.be/ewlGILHD83M
-
Samwise got a reaction from vanko25 in Bringing an 86 back from the dead
I've followed him for years until recently and in that case it's a bit different as Chris from BIFB has often only fit fake v1 kits to his BRZ's which are considerably easier to fit than the v2/v3 and the only real Rocket bunny kit he's used is the Datsun 240z kit which are known to be bad on the rear arch areas as they were likely modelled off a bent car.
DedicationBlog Content is better for an insight in to tthe 86 as BIFB tends to be more on the bodge-job side of things atleast in his earlier content.
-
 Samwise got a reaction from Tweedbean in Bringing an 86 back from the dead
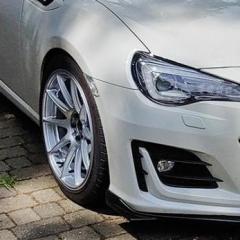
I would say the fit is okay but it's definitely not as clean as i'd have liked. I think alot of the value behind these kits is the style, the fact its from japan, etc rather than the quality but I think that goes without saying. Truthfully they're definitely no better than random other glass fibre parts/kits excluding copied parts which they are probably better than.
Yeah im definitely going to be doing that under the headlights, at this stage im just fitting the kit so that i know all the parts are on the car and fit correctly. When I go back around the car a second time to smooth out mating surfaces, fit my proper hardware, clearance where needed, etc then i'll address the gap under the headlights
-
Samwise got a reaction from will300 in Bringing an 86 back from the dead
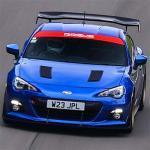
As you can tell it's been full steam ahead on the 86 with the recent goings on and i've managed to get another big step finished at the end of last week just before my birthday - Making the first big cuts on the car and installing the front Arches! It was a big step to get at the car with the angry tools but it went by so quickly and came out quite well. You'll see from the video and pictures just how much I decided to cut away but what isn't quite shown is how many times I went back to tidy up the cuts. So far i'm just going around the car to get the initial cuts sorted, rust proofed and the arches fitted with the supplied self tapping screws (yes, really!) before i eventually go around the whole car once again for a second revision pass where i'll remove the panels, clean up any rough cuts, better rust-proof the affected areas with a proper sanding back, primer and underseal as well as shaving down any high spots on the Rocket bunny panels that can lead to a nicer smoother fit and finish on the kit overall when they're resolved and of course drill out the holes made by the screws using them as guides for my Rubber Well-nuts and bolts! Below is the latest youtube video showing off the whole process: https://youtu.be/2zdG1lK-3uQ And some follow up pictures!
-
Samwise got a reaction from will300 in Bringing an 86 back from the dead
As you can tell it's been full steam ahead on the 86 with the recent goings on and i've managed to get another big step finished at the end of last week just before my birthday - Making the first big cuts on the car and installing the front Arches! It was a big step to get at the car with the angry tools but it went by so quickly and came out quite well. You'll see from the video and pictures just how much I decided to cut away but what isn't quite shown is how many times I went back to tidy up the cuts. So far i'm just going around the car to get the initial cuts sorted, rust proofed and the arches fitted with the supplied self tapping screws (yes, really!) before i eventually go around the whole car once again for a second revision pass where i'll remove the panels, clean up any rough cuts, better rust-proof the affected areas with a proper sanding back, primer and underseal as well as shaving down any high spots on the Rocket bunny panels that can lead to a nicer smoother fit and finish on the kit overall when they're resolved and of course drill out the holes made by the screws using them as guides for my Rubber Well-nuts and bolts! Below is the latest youtube video showing off the whole process: https://youtu.be/2zdG1lK-3uQ And some follow up pictures!
-
Samwise reacted to james_ly in Bringing an 86 back from the dead
Enjoying the videos, they remind me of the DedicationBlog gt86 build vlogs 👍