Tweedbean 151 Report post Posted July 20, 2020 Thanks for the comments, I think the colour works really well. Cant wait to detail the inside and engine bay as those are two areas that are very messy right now but I have a stack of products to make the job easier. Once its ready I want to get an MOT booked in so I can get it back on the road. Also want to play with the facelift screen this week and get the new controller in for it. Share this post Link to post Share on other sites
Sleazyboii 2 Report post Posted July 20, 2020 I had a bit of an issue using with the facelift washer covers and pre facelift washers, if you get yourself a Dremel and a steady hand you can make them work no problem. I ended up cutting part of the plastic away to the point where they wedged on really securely, i'm not sure if the BRZ facelift ones are the same i'm assuming they are. They never once fell off from driving or of the washer jets. Share this post Link to post Share on other sites
Tweedbean 151 Report post Posted July 21, 2020 11 hours ago, Sleazyboii said: I had a bit of an issue using with the facelift washer covers and pre facelift washers, if you get yourself a Dremel and a steady hand you can make them work no problem. I ended up cutting part of the plastic away to the point where they wedged on really securely, i'm not sure if the BRZ facelift ones are the same i'm assuming they are. They never once fell off from driving or of the washer jets. Thanks I've dropped you a dm on whatsapp to see where you cut it. Share this post Link to post Share on other sites
Tweedbean 151 Report post Posted July 27, 2020 Life has got in the way a little over the last week, so not touched the BRZ, however one update I had was a picture from Grigul Design/LederManZ. I sent them a stock BRZ/86 wheel a couple of weeks ago now for them to retrim. Its looking much tastier now, I cant wait to get my hands on it. Due for delivery in the next 3 days: Untitled by James Baker, on Flickr Its looking a top job from what I can see so far with the alcantara/leather mix, red stitching/centre marker, flat bottom and a little bit of extra padding. 2 ThatGuyThere and MartinT reacted to this Share this post Link to post Share on other sites
McDude 40 Report post Posted July 28, 2020 On 6/24/2020 at 10:48 AM, Tweedbean said: Day 105 Yesterday I received a short video of the car in the paint booth. The finish on the paint is spot on, so glossy and it hasn't even been polished yet. Here is that short teaser clip, the colour is hidden for now, reveal coming soon via youtube. Autoworx have done a great job, I cant wait to see it in person and start rebuilding it. They are now painting all the individual bits like doors, bonnet, dash etc, hopefully it should be back with me pretty soon. https://youtu.be/2ov-RKFR19k The build is looking great - I have a question about this picture, I know it's not your car, but do you know what alloys they are on it? Share this post Link to post Share on other sites
Tweedbean 151 Report post Posted July 28, 2020 55 minutes ago, McDude said: The build is looking great - I have a question about this picture, I know it's not your car, but do you know what alloys they are on it? Thanks they are Rays Engineering Volks Racing TE37 wheels 1 McDude reacted to this Share this post Link to post Share on other sites
Tweedbean 151 Report post Posted July 31, 2020 MOT Prep So yesterday afternoon I managed to blitz the car in preparation for its MOT which is booked in for next Tuesday. As its a Cat S it needs a fresh MOT before it gets back on the road and can have its new plates applied to it. I wanted to get the MOT done before I started modding the car, as it will be easier having it taxed/insured and on the road. For example it needs to go to the bodyshop for a final polish now its rebuilt, that will be so much easier and cheaper if I can drive it there myself instead of paying £50 a time to the transport company, plus once thats done I can get the side skirts etc fitted as I didn't want them to have to faff with taping up the new parts to avoid getting polish on them. So dont worry plenty of aftermarket parts coming soon for interior, exterior, suspension and engine bay. I fitted the wheel arch liners so I could secure all the wiring for the new HID kit I fitted previously. I also cleaned up the overspray which ended up on the door glass when the door skins were painted, I used fine wire wool which removed it super easy. I fitted the Geraldjustproject controller for the 2017+ cluster so I can control the LCD screen and at the same time I switch out the grey switches for black JDM ones, I also fitted all my black door handles, gaiter surrounds etc. Fitting video for the controller here: I also sorted the TPMS light which would have impacted the MOT. As my car doesnt have TPMS sensor the car flashes the light thinking they are damaged/faulty, I opened up the cluster, only a couple of clips, lifted the dial face forward and places a piece of foam backed tape across the opening for that single LED so no light can get through. I'm sure this light could be mapped out but this was a quick a free option with the same result, no flashing warning light. Untitled by James Baker, on Flickr I picked up my painted dash and wing mirror caps from the bodyshop, they did a great job so I got those fitted alongside wiring up the new shark fin aerial. I like the contrast of black mirror caps: Untitled by James Baker, on Flickr I hate sending a car for MOT with an untidy interior so it finally got a good clean to remove all the dust and grime from the previous owner: Before: Untitled by James Baker, on Flickr After, notice the dash is in without the hole for the subaru alarm flashy light which I had smoothed over: Untitled by James Baker, on Flickr I also fitted these gates rubber mats, super cheap, £10 from ebay and adds a little splash of colour and a grippy rubber surface. https://www.ebay.co.uk/itm/Gate-Slot-Mats-Fits-2012-2019-Subaru-BRZ-Toyata-86-Cup-Holder-Non-slip-Pads/202795731616?ssPageName=STRK%3AMEBIDX%3AIT&var=502949125979&_trksid=p2057872.m2749.l2649 Untitled by James Baker, on Flickr I addressed the remaining white in the engine bay, as the engine didnt come out the body sprayed as much as they could green. For the rest like the fire wall, I masked bits off, degreased and painted it matt black. In degreased most of the engine bay and cleaned up the battery while it was out. Untitled by James Baker, on Flickr I also wanted to finish off the head unit install: - So I threw in the new USB retention cable which worked a treat, only cost £13: https://www.ebay.co.uk/itm/OE-Car-Stereo-Factory-USB-Retention-Interface-Cable-for-Toyota-RAV4-2012/184019557670?ssPageName=STRK%3AMEBIDX%3AIT&_trksid=p2057872.m2749.l2649 - Wired the reverse camera up, connected to the pink wire in the passenger footwell, 5th wire down on the left in this block to get a reverse signal to the head unit: - I ran the camera cable down the passenger side of the car, under the back seat, through the boot, up into the wire rubbers between the boot and the boot lid, using a coat hanger to pull it through so no wires exposed for the OEM look. I then used a dremel tool to cut a square out next to the boot handle opening button and used the mount that came with the camera to fix it to the inside of the boot handle, I hate reverse cameras you can see from the back of the car, so its tucked away for the stealth look and can only be seen when the boot is fully open. Installed Pioneer Nd-bc8 reverse camera Untitled by James Baker, on Flickr Also the steering wheel retrim arrived back, Grigul Design did an amazing job: Untitled by James Baker, on Flickr I also had to change the battery in the spare remote as it didn't work, so I decided to record a how to video, super easy, it turns out the previous owner had installed the incorrect battery, no wonder it didn't work: https://youtu.be/8HiF4r4Ae7Q Finally I fitted the front removable plate holder and rear plate. Then I took it for a quick drive around the neighbouring car park to check brakes etc work as it was the first time I had driven it more than a couple of meters, all was good and now back in my garage until the drive to the MOT station next Tuesday: Untitled by James Baker, on Flickr Share this post Link to post Share on other sites
MartinT 514 Report post Posted July 31, 2020 I have those rubber mats, too. They're nice and pick out the red stitching in mine. 1 Tweedbean reacted to this Share this post Link to post Share on other sites
McDude 40 Report post Posted July 31, 2020 I love your new wheel - I've just had mine retrimmed almost identically. But you've managed to flatten the bottom, very slick! How are you going to get the plastics to marry up though? 1 Tweedbean reacted to this Share this post Link to post Share on other sites
Tweedbean 151 Report post Posted July 31, 2020 30 minutes ago, McDude said: I love your new wheel - I've just had mine retrimmed almost identically. But you've managed to flatten the bottom, very slick! How are you going to get the plastics to marry up though? I sent the plastics with the steering wheel to ensure they still work. I think they shave the bottom of the wheel and add to the bit above to give that appearance, but I could be totally making that up althought I can confirm the plastics still fit. 46 minutes ago, MartinT said: I have those rubber mats, too. They're nice and pick out the red stitching in mine. That was my thought too Share this post Link to post Share on other sites
Tweedbean 151 Report post Posted August 3, 2020 Nearly Back On The Road So I set out to give a true reflection of what it would take to get the car back on the road. I have done all the work myself minus the frame shop straightening the front end/welding on the new slam panel and the respray itself. If you take out of the consideration any mods I've purchased that weren't needed such as rear lights/headunit/STI parts etc and just look at what it would take to get a similar 86/BRZ back on the road with similar damage I have spent as follows. Exactly as I've done it with facelift front end and new bumper/wings plus full colour change: Total on the road cost: £8930.46 That includes: Crash Damaged BRZ £4200 Used Bonnet £150 Used Crash Bream £50 Used Rad £20 Used A/C rad £20 Used Fans £20 Used Airbox and washer bottle £100 Odd used and new clips, brackets, fog lights, wiring, rear bumper etc £200 New Slam Panel Subaru £306 New Front wings and brackets, top plastic grill trim, 4x rubber bushings for rad assembly Toyota £309 New Vland Headlights £380 New Facelift front bumper with all the brackets, grills etc £617.92 New Headlight rubber seals(BRZ Only) Subaru £58.14 New Headlight washer jet covers Subaru £70 New Various bolts Subaru £29.24 Labour for frame shop to straighten the car £380 Respray in Porsche RS Green £2000 (Note for those that ask why so cheap I did all the labour in terms of stripping the car minus the bonnet/doors/boot lid For that above cost I have a 2013 BRZ with around 40k on the clock, spotless interior, heated seats, spotless exterior which is unique and you wont see another one in that colour, black headlights etc. Yes I could have bought a working 86 for that sort of price (Only seen very rough BRZ's sub £10k) but it would possibly have higher mileage, not as in good condition and certainly not unique. It would also have the pre-facelift front end which im not a massive fan of. So for me I am more than happy with it as it stands and gives me a solid base to start modifying. Getting it on the road even cheaper: Now I could have got it on the road for much cheaper if I had waited around for used parts that matched the body colour and didn't insist on retro fitting a facelift front end. This would have avoided £2000 in bodyshop costs straight away, plus the used body parts would have been a lot cheaper than the new bits I went for like the front bumper and wings. Total on the road cost: £6383.54 That includes: Crash Damaged BRZ £4200 Used Bonnet £150 Used Crash Bream £50 Used Rad £20 Used A/C rad £20 Used Fans £20 Used Airbox and washer bottle £100 Odd used and new clips, brackets, fog lights, wiring, rear bumper etc £200 New Slam Panel Subaru £306 Used Front wings and brackets, top plastic grill trim, 4x rubber bushings for rad assembly £300 New Vland Headlights £380 Used Front Bumper £150 New Headlight rubber seals(BRZ Only) Subaru £58.14 New Various bolts Subaru £29.24 Labour for frame shop to straighten the car £380 Yes I was lucky with some of the used parts coming up super cheap, but if I can find bargains, others can. Sam Nadeem from SJ Autosports is a great source of well priced used parts for 86's/BRZ's in the UK. I did all the work with a Halfords tool kit and a Ryobi impact gun. I've never rebuilt a crashed car before so have learn't a lot along the way. Now its time for its MOT tomorrow, then tax and insurance. Once thats done its off the bodyshop for its final polish now its all back together then modifications begin. Very happy its gone from this: Untitled by James Baker, on Flickr To This: Untitled by James Baker, on Flickr 8 Ignited, Molten86, Lauren and 5 others reacted to this Share this post Link to post Share on other sites
will300 812 Report post Posted August 3, 2020 Fair play for providing a breakdown of all the the costs involved and all the updates 👍 Definitely provides some insight for others who want to invest in a project. 1 Tweedbean reacted to this Share this post Link to post Share on other sites
Kono 14 Report post Posted August 3, 2020 Car looks absolutely mint, also mad props for actually putting the cost of the build so far. Tired of seeing people putting project builds and going on about it being cheap n easy then never putting the cost just saying its cheap XD Hope you enjoying the car looks like all the hard works paid off 👍 1 Tweedbean reacted to this Share this post Link to post Share on other sites
Tweedbean 151 Report post Posted August 3, 2020 1 hour ago, will300 said: Fair play for providing a breakdown of all the the costs involved and all the updates 👍 Definitely provides some insight for others who want to invest in a project. No problem, hopefully between this and the how to videos I've done, if anyone finds it useful then I'm happy 😁 If anyone needs part numbers etc, they are listed throughout the thrad too. 6 minutes ago, Kono said: Car looks absolutely mint, also mad props for actually putting the cost of the build so far. Tired of seeing people putting project builds and going on about it being cheap n easy then never putting the cost just saying its cheap XD Hope you enjoying the car looks like all the hard works paid off 👍 Thanks, its actually been a really easy car to work on, other than the welding, I've managed to get everything done myself by working it out or watching a couple of youtube videos. I also came across things that people dont tend to document, like how to remove the fuel cap, most people wont need to do it unless they are having the whole car painted, most wrap places dont fully wrap inside their so people dont remove them. The hinge is held to the car with two rivets, these have to be drilled out to remove hinge and cap from the car. Then to refit, I tried my own pop rivet gun but it wouldnt quite fit due to the tight angles. So I ended up using a riv nut gun to provide a thread section to then bolt the hinge to the car. I did take off some material off the back of the hinge where it touches the car to thin it out and ensure the additional depth(a couple of mm at most) of the riv nut leading edge didnt stop the petrol cap sitting flush. A blast over with some paint on the back of the hinge ensured that part was sealed and then I bolted it on with normal bolts and washers. Now sits perfectly, this was literally the last bit of body work back on before the MOT. Untitled by James Baker, on Flickr Share this post Link to post Share on other sites
Kono 14 Report post Posted August 4, 2020 :O! Riveted on? That's odd. You did a good job on that tho looks tidy. I always panic about having to cut/drill/rivet anything on my cars because I feel like ill mess it up. Lookslike you have plenty of confidence and the skills to back it up tho 😅 I need to adjust the door on mine, its a CAT S i picked up for £11,000 2018 with only 4.5K on the clock. All the work to get it road worthy was already done (it had a passenger side collision) but the passenger door is scraping the paint a bit on the bottom. Taken it to alignment places and they say the body is fine and wheels alignment too. It did have a buckled wheel and bad front baring but nothing that couldn't be fixed for under £250 which the company paid for. After another 5k miles on it some cracks are starting tho show on the filler on the back arch too >.>. Seeing all your hard work on yours really make me want to get mine in the garage n fix the little issues :D!! Share this post Link to post Share on other sites
Tweedbean 151 Report post Posted August 4, 2020 3 hours ago, Kono said: :O! Riveted on? That's odd. You did a good job on that tho looks tidy. I always panic about having to cut/drill/rivet anything on my cars because I feel like ill mess it up. Lookslike you have plenty of confidence and the skills to back it up tho 😅 I need to adjust the door on mine, its a CAT S i picked up for £11,000 2018 with only 4.5K on the clock. All the work to get it road worthy was already done (it had a passenger side collision) but the passenger door is scraping the paint a bit on the bottom. Taken it to alignment places and they say the body is fine and wheels alignment too. It did have a buckled wheel and bad front baring but nothing that couldn't be fixed for under £250 which the company paid for. After another 5k miles on it some cracks are starting tho show on the filler on the back arch too >.>. Seeing all your hard work on yours really make me want to get mine in the garage n fix the little issues :D!! Thanks yeah I thought the same RE the rivets. Its on the road Well I'm glad to say the BRZ flew through the MOT, with one advisory for a nail in the rear tyre, meh I have new wheels going on soon. So glad to get it to where it is, but this is just stage 1. Stage 2 involves modding it, plenty to come. Therefore its now taxed and insured. Heres a picture as it sits now: Untitled by James Baker, on Flickr 3 Lauren, spikyone and AJ124 reacted to this Share this post Link to post Share on other sites
nerdstrike 186 Report post Posted August 4, 2020 Super bold colour choice, but great result! 1 Tweedbean reacted to this Share this post Link to post Share on other sites
S12vea 2 Report post Posted August 5, 2020 Enjoyed reading the build thread, and love the colour 1 Tweedbean reacted to this Share this post Link to post Share on other sites
Tweedbean 151 Report post Posted August 24, 2020 Thanks, modding has now begun. I have a pile of parts ready to go. Grimmspeed Intake: Firstly I fitted the Grimmspeed intake, a nice and easy install. Out of the intakes for this platform this one seemed to get good reviews and picked up a used on cheap. It has a black wrinkle finish so subtle in the engine bay and makes a nice noise: Untitled by James Baker, on Flickr Grimmspeed Pulley Cover and STi Flexible Strut Brace: Not the best picture, as it all needs a clean due to polish dust from the final polish the bodyshop did but while in the engine bay I also fitted a Grimmspeed pulley cover, again another used bargain and changes up the look of the engine bay in a subtle way. Also features a little tool tray while working on the engine. You can also the see the STI flexible strut brace which came as a package from Japan with my STi exterior parts: P1120709 by James Baker, on Flickr Coilovers, drop links and new wheels: Next up I wanted to fit the Tein Flex Z coilovers and Whiteline adjustable drop links. Great bit of kit, super easy to fit excluding the seized stock drop links which I end up just cutting off as I had the Whiteline to go on anyway. I know is a common issue, easily sorted with an angle grinder and lots of sparks. Out with the old: Untitled by James Baker, on Flickr I did touch up the painted calipers which the previous owner had done, not a big fan of painted stock calipers but didnt have any other colours to hand so atleast they were tidy as I touched up the chips etc: Untitled by James Baker, on Flickr In with the new, dont worry about the wet looking components, it was all getting a wash while I was under there: Untitled by James Baker, on Flickr I now need to give it time to settle before I adjust anything else. I threw on my Rota Grids, I have new black lug nuts coming in the post as well as black centre caps, so excuse the missing items, tyre fitting grease etc. Once settled I will play with the ride height and may even space out the rear wheels slight, lets see Untitled by James Baker, on Flickr Looking forward to finding some time to fit the STi front lips etc in between the day job and DIY which seems to be endless. 1 Lauren reacted to this Share this post Link to post Share on other sites
Tweedbean 151 Report post Posted August 24, 2020 My black lug nuts arrived today, internal drive ones so I chucked them on this afternoon alongside the centre caps: Untitled by James Baker, on Flickr I also gave the car a quick wash so I could coat it in Meguiars ceramic hybrid ceramic wax to give it some protection as I haven't had chance to give it a proper coating of wax just yet: Untitled by James Baker, on Flickr It was nice seeing BRZ alongside my other Porsche RS green car, my R53 Mini: Untitled by James Baker, on Flickr 1 ThatGuyThere reacted to this Share this post Link to post Share on other sites
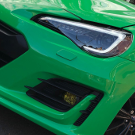
Tweedbean 151 Report post Posted August 28, 2020 This week I managed to find time to fit my STi front lip that came from Japan. It was a bit nerve-racking drilling my freshly painted, brand new front bumper, but needs must. I have to say I am glad I went for the genuine product over the replica pieces as the fit and finish was perfect. No need to paint/refinish the item, all the holes lined up perfectly with the existing holes and the stick on templates made it so easy to line up where to drill the new holes. It uses a couple of clips and rubber well nuts along the bumper to fit, I was really pleased how secure it is. I have the STi sideskirts and rear lips to go on in the next couple of weeks: STi lip by James Baker, on Flickr STi lip by James Baker, on Flickr 1 BRZ-123 reacted to this Share this post Link to post Share on other sites
Varelco 211 Report post Posted August 28, 2020 Fantastic thread, the car looks great, big fan of the BRZ facelift front end. So what made you want to jump back into a twin then? I remember following your thread when you had the white one and the got impression the 86 wasn't your cup of tea? Have you got a thread for the R53? I know nothing about Minis but it looks interesting. Share this post Link to post Share on other sites
Tweedbean 151 Report post Posted August 28, 2020 3 hours ago, Varelco said: Fantastic thread, the car looks great, big fan of the BRZ facelift front end. So what made you want to jump back into a twin then? I remember following your thread when you had the white one and the got impression the 86 wasn't your cup of tea? Have you got a thread for the R53? I know nothing about Minis but it looks interesting. Thanks appreciate that. I fancied another one for ages, but with 3 other cars on the drive, I didnt want to get back into an expensive one. So when this came up for just over £4000, I jumped at the chance to have another go without it needing to replace any other car. As for the two Mini's I have, here are some walk around videos I did a couple of months ago: Today I have been busy sorting out the interior. I had a load of carbon bits to fit such as door sills, window control surrounds, seat heater button surrounds etc. I also fitted my JDM alcantara type material binnacle cover, super easy swap, takes 30 seconds: Untitled by James Baker, on Flickr I also fitted the JDM door tops again in alcantara type material, really please with both these items, this was a door car off job as they are held in with around 7 screws from the back: Untitled by James Baker, on Flickr Next up was my custom steering wheel that I had done, again easy fit. Battery off, screwdriver in 3 holes to release the airbag, disconnect that, 17mm bolt to remove the steering wheel, then reverse it all. Really pleased with it and makes the interior feel so much more modern with these little touches: Alcantara steering wheel by James Baker, on Flickr Alcantara steering wheel by James Baker, on Flickr Share this post Link to post Share on other sites
Varelco 211 Report post Posted August 28, 2020 Nice one i'll watch that later. Where did you buy those JDM door tops? I looked at the post 17 ones but the white stitching doesn't match the pre 17 interior. Share this post Link to post Share on other sites
Tweedbean 151 Report post Posted August 29, 2020 16 hours ago, Varelco said: Nice one i'll watch that later. Where did you buy those JDM door tops? I looked at the post 17 ones but the white stitching doesn't match the pre 17 interior. Thanks, they are from the STi version in the US/Japan. I got mine through JapanParts. On this link have a read, you order each side separately and you have to pick between the red or black stitched versions on the drop down, the description says which has red: https://www.japanparts.com/parts/detail/45802 Share this post Link to post Share on other sites