


GT86Jay
-
Content Count
805 -
Joined
-
Last visited
Reputation Activity
-

 GT86Jay got a reaction from nickfrog in Can't see my brake pad wear
Easiest way is just take one bolt out form the bottom of the top caliber. And loosen the top one. This then lets you just rotate the caliber off over the pad. Enough to pull the pad out.
Doesn't take long once the wheel is off.
-
 GT86Jay got a reaction from nikndel in Nige's GT86
The Toyota Service Sheet shows 60k and they're £13.71 each. Apparently the labour is included in the full 60k service.
-
 GT86Jay got a reaction from JayRTee in R35 GTR Spoiler on GT86 Build
I decided it's got to go Red.
Looking at it from a distance and walking up to it in Asda Car Park the other night made me see it differently.
All red. Then in the future if I want I can buy the Carbon Top sections if I want to go that route.
-
GT86Jay got a reaction from JayRTee in R35 GTR Spoiler on GT86 Build
I decided it's got to go Red.
Looking at it from a distance and walking up to it in Asda Car Park the other night made me see it differently.
All red. Then in the future if I want I can buy the Carbon Top sections if I want to go that route.
-
 GT86Jay got a reaction from Keethos in Hipermax MAX4GT Anyone Got Them Fitted ?
I found it funny how he said £1450 and he'll drive to meet you. But declined your offer of £1400 and you arrange postage. Surely £50 is worth not having to get in his car and spend nearly £50 in petrol coming to you!
Strange person. Note how he also deleted Liam's post about his rules on the forum about photos of the condition of the item you're selling.
-
GT86Jay got a reaction from Keethos in R35 GTR Spoiler on GT86 Build
I agree, The centre piece is only red because it was in the box to get sprayed with the boot lid so the body shop done it.
Either way it'll all be going C7P Red or D4S Black.
On the GTR the spoiler comes out the factory standard car colour.
It seems some people do change them to gloss black for contrast on the GTR.
Just to decide which one....
Few photos of different options see which one gets highest vote...
This guy in the Japan has sort of done what i've done...
Red base - Carbon Black Top...
The same Japan guy also changed his colour after a while....
And made it hydrolic! LOL....
http://www.youtube.com/watch?v=inN9hjpiDek
-
GT86Jay got a reaction from Keethos in R35 GTR Spoiler on GT86 Build
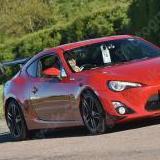
I’ve been on the hunt for a spoiler / wing for the last few months and been looking around. Part of me wanted something small, effective and discrete. And other parts of me wanted to go all out and hang a massive carbon wing off the back of it.
Knowing I didn’t have 400-500bhp to warrant a massive wing. I decided to go somewhere in the middle. And try find a high rise spoiler to sit off the boot lid but one that wasn’t to big.
I’d always had my eye on the Aero spoiler but part of me thinks once they come down in price it won’t be so special and they’ll be common. And the easy option to just bolt it on. I felt anything that was nice or easy was just being done. The TRD ducktail seems to be a common one because its easy to fit, solves the solution to the holes in the spoiler and cheaper to get painted.
There were a couple of other options but nothing really caught my eye. They all had an element I didn’t like, or the mounts looks bulky and horrible. Or the cost of getting them prepped and painted was ridiculous.
Whilst looking around on ebay a GTR R35 spoiler came up and got me thinking. Knowing it probably wouldn’t fit I didn’t get too excited but I knew this was the sort of spoiler and height that I wanted. Fensport actually had a GT86 specific GTR style wing. But the mounts were quite bulky and it was too rounded for my liking. The GTR wing looks very well built and angular. Which works very well.
So I decided i’d buy the GTR Spoiler. The guy on ebay took £80 including shipping for a carbon wrapped 2010 R35 Spoiler. So I took the plunge and went for it.
It arrived and I set out working out how to fit it. It sat on the boot lid perfectly. It lined up with the car perfectly. But the mount didn’t sit flush on the boot lid, as expected. The first bit of the mount sat flush but the GT86 boot lid curves downwards towards the edge and front.
So decided I would need to make some custom brackets to fit it.
First up was to make a Fibreglass Mould of the boot lid….
Taped up the boot lid so that I could remove the mould and it didn’t stick to the paint work…
Then time to apply the fibreglass resin and glass cloth….
To get a rough idea of the size and shape I made some styrofoam templates to get a rough idea.
Obviously one issue that needed to be resolved was the holes in the front of the boot lid which were used to hold the original stock spoiler on.
From the inside I applied a layer of fibreglass to block the hole up. Then added filler of this and smoothed it all out. Once dry I then rubbed it all down and smoothed it over.
At this point I had a boot with no holes, two fibreglass moulds, a very dusty bedroom and a car without a boot.
Next up I placed the fibreglass moulds onto the boot lid and taped them down so they were in place. Added some insulation tape over the whole lot and lined the spoiler up in its perfect position to where it needed to sit on the boot lid. By adding the insulation tape it allowed me to press the spoiler down and create a mark on it ready for drilling.
The spoiler has bolts built in to it which made it easier to line up and lock the spoiler in place. Concentrating on just one bolt for now I removed the other two. Marked the position this bolt needed to go and then drilled through the fibreglass and boot lid.
With the spoiler now lined up on the boot lid and in position with the nut and bolt in the correction location it was time to stick the fibreglass to the GTR mount.
Bolted it up tight and left it to dry.
Filled in the gaps with styrofoam to give the fibre glass some support and a little more shape.
Once all was dry unbolted the spoiler from the boot lid and removed the mounts from the top part of the GTR spoiler. The GTR spoiler is in 3 parts. The two side mounts and the top edge. Which can be taken apart.
I then cut off the excess fibreglass to the rough shape of the existing mount.
Filled all gaps and smoothed with Body Filler.
Next up was hours and hours of smoothing, sanding, filling, rubbing, priming, filling and more sanding. Some sanding done with an electric sander. Sand paper and wet and dry. It was difficult to get both mounts perfect and identical whilst keeping a perfect shape and smooth.
At this point I drilled through the entire mount and added the bolts back in to all 3 locations. With extended bolts. This works well as its then using the original mount as the mounting point and not relying on my new fibreglass mount. My fibre glass mount almost becomes a sandwiched bit between the bootlid and original spoiler mount.
After lots of sanding. lots of concentration, lots of dust and patience I finally had something which looks like it would be acceptable to fit to my car!
Also added in a single cable to make it easy to thread the brake light cable through the mount.
Bit more sanding for good luck..
Next up gave the mounts a good thick spray of filler primer. This showed up all the imperfections and indents and small marks.
So more filling, sanding smoothing and dusty bedroom.
At all times test fitting it on the boot lid to ensure it still fitted and the shape of the mount was correct.
Next up I made the commitment and drilled the other two holes in the boot lid. Added in the bolts, put the spoiler back together and for the first time sat the spoiler with the new mounts on the boot lid..
And it fits! Almost perfect! Couple of 1mm gaps!
So bit more sanding, little filler and a wet and dry sand.
Also in this time I had the boot lid sent off to the body shop to have a full sand fill and respray to ensure the holes were filled. paint was brand new and looked amazing.
Next up you have to drop the drill with your sharpest steel drill piece onto your new full can of primer spray paint. So that it immediately starts pissing out primer all over the place which you try and grab and get outside asap, but fail.
For now I’ve had to wrap the Spoiler as i’ve not had a chance to get it into the body shop for respray and haven't yet added the centre mount to it.
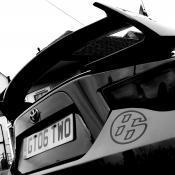
Got it fitted onto the car again and wired in the brake light. Done this by removing the old brake light cable and extending it to the original GTR brake light.
This means i’ll be able to get rid of the after thought 3rd brake light on the rear parcel shelf.
It probably took me around 50 hours to get this on the car. it was 3 solid weekends and a few nights. Hours of sanding, hours of filling and hours of waiting for things to dry. Sore fingers, spray paint everywhere, cut fingers and some stressful / ‘Oh Bugger’ moments. But obviously like everything the first one would always be hardest.
I’ve not driven it much since having it fitted or hard enough to notice a difference. It does feel a bit more planted on the back and can actually feel a slightly different steering feel.
Not sure how much it really says but without the centre mount the middle flexes a fair bit. Looking in the rear view mirror at higher speeds the spoiler is actually flexing in the centre. I reference it with the rear brake light and it probably drops around 10 - 15mm once getting up to speed. So I believe it is actually generating some downforce. Being off a genuine GTR they've’ probably done some research into it having some aero benefits. Probably not enough to notice. But I done this mod more for looks and the appearance. I’ll add the centre mount in soon and see how that changes things.
But next up is to just extend the centre mount a few mm to make it fit better. This will stop the spoile flexing in the centre and stop some ressination you can hear under low RPM high engine load accelerations.
For those of you who are super worried about weights and adding weight you'll be surprised to know the stock GTR spoiler is very well built and only weighs 3kg. The stock spoiler weighs in at 1.8kg. The GTR spoiler with my custom brackets brake light and bolts is 3kg. I can also remove the brake light from the back of the car. So for the added looks, better brake light and maybe extra downforce I don't mind adding 1kg.
Will also be getting it all sprayed in a High Gloss Black to match my wheels and TRD accents.
I might make it red in due course if I feel the black is a little too outgoing and in your face.
Total cost to do this was around £350
£80 for the spoiler (From ebay)
£20 for the Brake Light (From and GTR Owners Club member)
£200 in respray / smoothing of the boot lid. (Local body shop)
£50 in filler, sandpaper and bits etc.
-
GT86Jay got a reaction from Keethos in R35 GTR Spoiler on GT86 Build
I’ve been on the hunt for a spoiler / wing for the last few months and been looking around. Part of me wanted something small, effective and discrete. And other parts of me wanted to go all out and hang a massive carbon wing off the back of it.
Knowing I didn’t have 400-500bhp to warrant a massive wing. I decided to go somewhere in the middle. And try find a high rise spoiler to sit off the boot lid but one that wasn’t to big.
I’d always had my eye on the Aero spoiler but part of me thinks once they come down in price it won’t be so special and they’ll be common. And the easy option to just bolt it on. I felt anything that was nice or easy was just being done. The TRD ducktail seems to be a common one because its easy to fit, solves the solution to the holes in the spoiler and cheaper to get painted.
There were a couple of other options but nothing really caught my eye. They all had an element I didn’t like, or the mounts looks bulky and horrible. Or the cost of getting them prepped and painted was ridiculous.
Whilst looking around on ebay a GTR R35 spoiler came up and got me thinking. Knowing it probably wouldn’t fit I didn’t get too excited but I knew this was the sort of spoiler and height that I wanted. Fensport actually had a GT86 specific GTR style wing. But the mounts were quite bulky and it was too rounded for my liking. The GTR wing looks very well built and angular. Which works very well.
So I decided i’d buy the GTR Spoiler. The guy on ebay took £80 including shipping for a carbon wrapped 2010 R35 Spoiler. So I took the plunge and went for it.
It arrived and I set out working out how to fit it. It sat on the boot lid perfectly. It lined up with the car perfectly. But the mount didn’t sit flush on the boot lid, as expected. The first bit of the mount sat flush but the GT86 boot lid curves downwards towards the edge and front.
So decided I would need to make some custom brackets to fit it.
First up was to make a Fibreglass Mould of the boot lid….
Taped up the boot lid so that I could remove the mould and it didn’t stick to the paint work…
Then time to apply the fibreglass resin and glass cloth….
To get a rough idea of the size and shape I made some styrofoam templates to get a rough idea.
Obviously one issue that needed to be resolved was the holes in the front of the boot lid which were used to hold the original stock spoiler on.
From the inside I applied a layer of fibreglass to block the hole up. Then added filler of this and smoothed it all out. Once dry I then rubbed it all down and smoothed it over.
At this point I had a boot with no holes, two fibreglass moulds, a very dusty bedroom and a car without a boot.
Next up I placed the fibreglass moulds onto the boot lid and taped them down so they were in place. Added some insulation tape over the whole lot and lined the spoiler up in its perfect position to where it needed to sit on the boot lid. By adding the insulation tape it allowed me to press the spoiler down and create a mark on it ready for drilling.
The spoiler has bolts built in to it which made it easier to line up and lock the spoiler in place. Concentrating on just one bolt for now I removed the other two. Marked the position this bolt needed to go and then drilled through the fibreglass and boot lid.
With the spoiler now lined up on the boot lid and in position with the nut and bolt in the correction location it was time to stick the fibreglass to the GTR mount.
Bolted it up tight and left it to dry.
Filled in the gaps with styrofoam to give the fibre glass some support and a little more shape.
Once all was dry unbolted the spoiler from the boot lid and removed the mounts from the top part of the GTR spoiler. The GTR spoiler is in 3 parts. The two side mounts and the top edge. Which can be taken apart.
I then cut off the excess fibreglass to the rough shape of the existing mount.
Filled all gaps and smoothed with Body Filler.
Next up was hours and hours of smoothing, sanding, filling, rubbing, priming, filling and more sanding. Some sanding done with an electric sander. Sand paper and wet and dry. It was difficult to get both mounts perfect and identical whilst keeping a perfect shape and smooth.
At this point I drilled through the entire mount and added the bolts back in to all 3 locations. With extended bolts. This works well as its then using the original mount as the mounting point and not relying on my new fibreglass mount. My fibre glass mount almost becomes a sandwiched bit between the bootlid and original spoiler mount.
After lots of sanding. lots of concentration, lots of dust and patience I finally had something which looks like it would be acceptable to fit to my car!
Also added in a single cable to make it easy to thread the brake light cable through the mount.
Bit more sanding for good luck..
Next up gave the mounts a good thick spray of filler primer. This showed up all the imperfections and indents and small marks.
So more filling, sanding smoothing and dusty bedroom.
At all times test fitting it on the boot lid to ensure it still fitted and the shape of the mount was correct.
Next up I made the commitment and drilled the other two holes in the boot lid. Added in the bolts, put the spoiler back together and for the first time sat the spoiler with the new mounts on the boot lid..
And it fits! Almost perfect! Couple of 1mm gaps!
So bit more sanding, little filler and a wet and dry sand.
Also in this time I had the boot lid sent off to the body shop to have a full sand fill and respray to ensure the holes were filled. paint was brand new and looked amazing.
Next up you have to drop the drill with your sharpest steel drill piece onto your new full can of primer spray paint. So that it immediately starts pissing out primer all over the place which you try and grab and get outside asap, but fail.
For now I’ve had to wrap the Spoiler as i’ve not had a chance to get it into the body shop for respray and haven't yet added the centre mount to it.
Got it fitted onto the car again and wired in the brake light. Done this by removing the old brake light cable and extending it to the original GTR brake light.
This means i’ll be able to get rid of the after thought 3rd brake light on the rear parcel shelf.
It probably took me around 50 hours to get this on the car. it was 3 solid weekends and a few nights. Hours of sanding, hours of filling and hours of waiting for things to dry. Sore fingers, spray paint everywhere, cut fingers and some stressful / ‘Oh Bugger’ moments. But obviously like everything the first one would always be hardest.
I’ve not driven it much since having it fitted or hard enough to notice a difference. It does feel a bit more planted on the back and can actually feel a slightly different steering feel.
Not sure how much it really says but without the centre mount the middle flexes a fair bit. Looking in the rear view mirror at higher speeds the spoiler is actually flexing in the centre. I reference it with the rear brake light and it probably drops around 10 - 15mm once getting up to speed. So I believe it is actually generating some downforce. Being off a genuine GTR they've’ probably done some research into it having some aero benefits. Probably not enough to notice. But I done this mod more for looks and the appearance. I’ll add the centre mount in soon and see how that changes things.
But next up is to just extend the centre mount a few mm to make it fit better. This will stop the spoile flexing in the centre and stop some ressination you can hear under low RPM high engine load accelerations.
For those of you who are super worried about weights and adding weight you'll be surprised to know the stock GTR spoiler is very well built and only weighs 3kg. The stock spoiler weighs in at 1.8kg. The GTR spoiler with my custom brackets brake light and bolts is 3kg. I can also remove the brake light from the back of the car. So for the added looks, better brake light and maybe extra downforce I don't mind adding 1kg.
Will also be getting it all sprayed in a High Gloss Black to match my wheels and TRD accents.
I might make it red in due course if I feel the black is a little too outgoing and in your face.
Total cost to do this was around £350
£80 for the spoiler (From ebay)
£20 for the Brake Light (From and GTR Owners Club member)
£200 in respray / smoothing of the boot lid. (Local body shop)
£50 in filler, sandpaper and bits etc.
-
 GT86Jay got a reaction from Special K in Driving aids mode confusion
You can, click the middle button on the right. Then click messages on the left hand side. You can then read them....
I can anyway with my HTC one M8.
-
GT86Jay got a reaction from Keethos in R35 GTR Spoiler on GT86 Build
Yeah I don't think i'll be getting any substantial evidence soon. Might experiment with water / GoPro videoing see if I can get any sort of idea how air is flowing over it.
Flex might be good. But this is a little too much, and it resonates over bumps and low RPM. I think its been designed to have a centre mount so the side mounts don't take the entire weight so it flexes beyond a point i'm comfortable with. Also think it'll look a lot better.
-
GT86Jay got a reaction from Special K in Driving aids mode confusion
You can, click the middle button on the right. Then click messages on the left hand side. You can then read them....
I can anyway with my HTC one M8.
-
GT86Jay got a reaction from Keethos in R35 GTR Spoiler on GT86 Build
I’ve been on the hunt for a spoiler / wing for the last few months and been looking around. Part of me wanted something small, effective and discrete. And other parts of me wanted to go all out and hang a massive carbon wing off the back of it.
Knowing I didn’t have 400-500bhp to warrant a massive wing. I decided to go somewhere in the middle. And try find a high rise spoiler to sit off the boot lid but one that wasn’t to big.
I’d always had my eye on the Aero spoiler but part of me thinks once they come down in price it won’t be so special and they’ll be common. And the easy option to just bolt it on. I felt anything that was nice or easy was just being done. The TRD ducktail seems to be a common one because its easy to fit, solves the solution to the holes in the spoiler and cheaper to get painted.
There were a couple of other options but nothing really caught my eye. They all had an element I didn’t like, or the mounts looks bulky and horrible. Or the cost of getting them prepped and painted was ridiculous.
Whilst looking around on ebay a GTR R35 spoiler came up and got me thinking. Knowing it probably wouldn’t fit I didn’t get too excited but I knew this was the sort of spoiler and height that I wanted. Fensport actually had a GT86 specific GTR style wing. But the mounts were quite bulky and it was too rounded for my liking. The GTR wing looks very well built and angular. Which works very well.
So I decided i’d buy the GTR Spoiler. The guy on ebay took £80 including shipping for a carbon wrapped 2010 R35 Spoiler. So I took the plunge and went for it.
It arrived and I set out working out how to fit it. It sat on the boot lid perfectly. It lined up with the car perfectly. But the mount didn’t sit flush on the boot lid, as expected. The first bit of the mount sat flush but the GT86 boot lid curves downwards towards the edge and front.
So decided I would need to make some custom brackets to fit it.
First up was to make a Fibreglass Mould of the boot lid….
Taped up the boot lid so that I could remove the mould and it didn’t stick to the paint work…
Then time to apply the fibreglass resin and glass cloth….
To get a rough idea of the size and shape I made some styrofoam templates to get a rough idea.
Obviously one issue that needed to be resolved was the holes in the front of the boot lid which were used to hold the original stock spoiler on.
From the inside I applied a layer of fibreglass to block the hole up. Then added filler of this and smoothed it all out. Once dry I then rubbed it all down and smoothed it over.
At this point I had a boot with no holes, two fibreglass moulds, a very dusty bedroom and a car without a boot.
Next up I placed the fibreglass moulds onto the boot lid and taped them down so they were in place. Added some insulation tape over the whole lot and lined the spoiler up in its perfect position to where it needed to sit on the boot lid. By adding the insulation tape it allowed me to press the spoiler down and create a mark on it ready for drilling.
The spoiler has bolts built in to it which made it easier to line up and lock the spoiler in place. Concentrating on just one bolt for now I removed the other two. Marked the position this bolt needed to go and then drilled through the fibreglass and boot lid.
With the spoiler now lined up on the boot lid and in position with the nut and bolt in the correction location it was time to stick the fibreglass to the GTR mount.
Bolted it up tight and left it to dry.
Filled in the gaps with styrofoam to give the fibre glass some support and a little more shape.
Once all was dry unbolted the spoiler from the boot lid and removed the mounts from the top part of the GTR spoiler. The GTR spoiler is in 3 parts. The two side mounts and the top edge. Which can be taken apart.
I then cut off the excess fibreglass to the rough shape of the existing mount.
Filled all gaps and smoothed with Body Filler.
Next up was hours and hours of smoothing, sanding, filling, rubbing, priming, filling and more sanding. Some sanding done with an electric sander. Sand paper and wet and dry. It was difficult to get both mounts perfect and identical whilst keeping a perfect shape and smooth.
At this point I drilled through the entire mount and added the bolts back in to all 3 locations. With extended bolts. This works well as its then using the original mount as the mounting point and not relying on my new fibreglass mount. My fibre glass mount almost becomes a sandwiched bit between the bootlid and original spoiler mount.
After lots of sanding. lots of concentration, lots of dust and patience I finally had something which looks like it would be acceptable to fit to my car!
Also added in a single cable to make it easy to thread the brake light cable through the mount.
Bit more sanding for good luck..
Next up gave the mounts a good thick spray of filler primer. This showed up all the imperfections and indents and small marks.
So more filling, sanding smoothing and dusty bedroom.
At all times test fitting it on the boot lid to ensure it still fitted and the shape of the mount was correct.
Next up I made the commitment and drilled the other two holes in the boot lid. Added in the bolts, put the spoiler back together and for the first time sat the spoiler with the new mounts on the boot lid..
And it fits! Almost perfect! Couple of 1mm gaps!
So bit more sanding, little filler and a wet and dry sand.
Also in this time I had the boot lid sent off to the body shop to have a full sand fill and respray to ensure the holes were filled. paint was brand new and looked amazing.
Next up you have to drop the drill with your sharpest steel drill piece onto your new full can of primer spray paint. So that it immediately starts pissing out primer all over the place which you try and grab and get outside asap, but fail.
For now I’ve had to wrap the Spoiler as i’ve not had a chance to get it into the body shop for respray and haven't yet added the centre mount to it.
Got it fitted onto the car again and wired in the brake light. Done this by removing the old brake light cable and extending it to the original GTR brake light.
This means i’ll be able to get rid of the after thought 3rd brake light on the rear parcel shelf.
It probably took me around 50 hours to get this on the car. it was 3 solid weekends and a few nights. Hours of sanding, hours of filling and hours of waiting for things to dry. Sore fingers, spray paint everywhere, cut fingers and some stressful / ‘Oh Bugger’ moments. But obviously like everything the first one would always be hardest.
I’ve not driven it much since having it fitted or hard enough to notice a difference. It does feel a bit more planted on the back and can actually feel a slightly different steering feel.
Not sure how much it really says but without the centre mount the middle flexes a fair bit. Looking in the rear view mirror at higher speeds the spoiler is actually flexing in the centre. I reference it with the rear brake light and it probably drops around 10 - 15mm once getting up to speed. So I believe it is actually generating some downforce. Being off a genuine GTR they've’ probably done some research into it having some aero benefits. Probably not enough to notice. But I done this mod more for looks and the appearance. I’ll add the centre mount in soon and see how that changes things.
But next up is to just extend the centre mount a few mm to make it fit better. This will stop the spoile flexing in the centre and stop some ressination you can hear under low RPM high engine load accelerations.
For those of you who are super worried about weights and adding weight you'll be surprised to know the stock GTR spoiler is very well built and only weighs 3kg. The stock spoiler weighs in at 1.8kg. The GTR spoiler with my custom brackets brake light and bolts is 3kg. I can also remove the brake light from the back of the car. So for the added looks, better brake light and maybe extra downforce I don't mind adding 1kg.
Will also be getting it all sprayed in a High Gloss Black to match my wheels and TRD accents.
I might make it red in due course if I feel the black is a little too outgoing and in your face.
Total cost to do this was around £350
£80 for the spoiler (From ebay)
£20 for the Brake Light (From and GTR Owners Club member)
£200 in respray / smoothing of the boot lid. (Local body shop)
£50 in filler, sandpaper and bits etc.
-
 GT86Jay got a reaction from GT86-Ian in My car for sale on pistonheads
Keeping it forever is the only valid way to not care about depreciation.
-
GT86Jay got a reaction from GT86-Ian in My car for sale on pistonheads
Keeping it forever is the only valid way to not care about depreciation.
-
GT86Jay got a reaction from GT86-Ian in My car for sale on pistonheads
Keeping it forever is the only valid way to not care about depreciation.
-
 GT86Jay got a reaction from chillismoke in Reverse Camera Plug and Play Kit - £75
No problem,
I wasn't expecting them to arrive so soon. I paid for a 3 -5 day service and they've arrived on the 3rd day so impressed!
Instructions are just being finalised then they'll be a link on here to them. Hopefully this evening / tomorrow.
-
GT86Jay got a reaction from Special K in Reverse Camera Plug and Play Kit - £75
Of course. Yours is here ready. Will PM you about potential fitting dates.
-
GT86Jay got a reaction from Keethos in Reverse Camera Plug and Play Kit - £75
Hi Guys,
Sorry for the silence last few days, Been dealing with a family illness in hospital. Super sudden and all hectic! Anyway I took Tuesday off work to get all the camera kits built, harnesses made and instructions sorted. They're now all packaged up and ready to ship! Shipping has been organised and dropping them off tomorrow evening at the Parcel depot. Due to Qty they're being sent on a 3 - 5 day shipping schedule. Regards Jay -
 GT86Jay got a reaction from Polishingpedlar in Ginger TRD
It's available in any colour if you're willing to pay enough money to order the kit in separate and get it sprayed.
It just won't be genuinely registered as a 'TRD'
-
 GT86Jay got a reaction from Pitman in Plan for TSS 2015
Sounds like a great idea!
I too have similar plans to buy something I can crash and not worry to much! Currently looking at a MR2 Mk1 myself. One that's already in the TSS and well known to Adrian. It competed in the TSS last year.
But I totally understand what you're saying regarding crashing the GT86. I could never push my GT86 on track to be competitive in the class that i'd be in.
-
 GT86Jay reacted to Riceburner in MY15 GT86
Its arrived
Cant register it untill monday
I will post pics after PDI & valeting on Monday
Right Mod Number 1 Blitz intake.........!!!
Number 2.............
-
GT86Jay got a reaction from Pitman in My drive in the HKS GT86 (With a supercharger)
To follow on again, I agree.
The difference between the new V2 and V1 is light and day. So much better response, more power, smoother and awesome delivery.