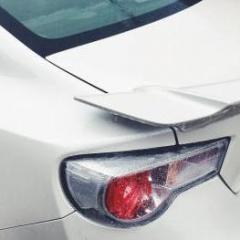
undercharged 17 Report post Posted June 18, 2016 After only 2 months of owning the car, I have a tail light full of steam devaporating on the clear housing and precipitating into a tiny lake on the bottom. Looking at numerous images of lightly and heavily tuned Toyotas and Subarus I am now starting to realise that stock units are rare. I do actually like the look of Valentis with matching lower piece, but not in this topic. Let's imagine our goal is to keep the car it it's perfect stock form as a showpiece. How do I dry the inside of the tail light in the most effective way, and how do I seal it? Share this post Link to post Share on other sites
long-gone 152 Report post Posted June 18, 2016 Get it replaced under warranty. Share this post Link to post Share on other sites
rob275 1817 Report post Posted June 18, 2016 Remove them from the car and either air dry them out or place them in the oven on a low heat. Then just put them back on the car but don't over tighten them as this is what causes them to get water in them. 1 undercharged reacted to this Share this post Link to post Share on other sites
nikndel 509 Report post Posted June 18, 2016 Put some sealant under the black trim of the lights to divert the,water over the lights not down the back of them I showed Kevin Atkins this and it solved the same problem with his Buddy Clubs 1 undercharged reacted to this Share this post Link to post Share on other sites
undercharged 17 Report post Posted June 18, 2016 9 hours ago, daidaiiro said: Get it replaced under warranty. Unfortunately my car is 6 years old and imported from another country because GT86 isn't officially sold here. Though odometer reads only 5000 km at the moment and it makes water in the taillights a strange unpleasantness. Share this post Link to post Share on other sites
Captain Duff 79 Report post Posted June 18, 2016 As has been said this is a standard (and common) warranty fix as it just needs a new gasket, although given the amount of water in there (and despite the fact that it can be dried out) I would be tempted to try for a new complete light unit. Very often the problem is that the lights get screwed on too tight which then means the sponge rubber of the gasket is not allowed to do its job properly (although the design is inherently iffy so far as potential water ingress is concerned). However if you do decode to get after-market lights such as Valenti's (I've got them and love them) then the first point I'd make is that it is one of the simplest DIY mods to do - just peel back the carpet behind each light (after levering out the plastic clips) and remove the 4 retaining bolts, unclip the wire and gently pull the unit out horizontally (they have a little plastic positioning pin on each unit in addition to the 4 bolts so don't yank as this could snap off). Before you refit with the Valenti's I would do an added bit of prep - the Valenti gasket is perfectly adequate in terms of thickness, but comes supplied loose, so for added water resistance I would highly recommend getting a small tube of weatherstrip adhesive to glue it on and create a very good watertight seal, this video shows the best technique for this - https://www.youtube.com/watch?v=eF62JXlSufM - I also smeared on some silicone grease on the top part of the gasket where it fits against the panel to further deter any water forcing its way through where it hits the lights at the top edge, but that may be OCD overkill! Tighten the new units so they are firm and not wobbling, but don't over do it as it will mess up the gasket seal. Dead easy, 30 minutes to swap over the pair max 1 undercharged reacted to this Share this post Link to post Share on other sites
Gringosteve 213 Report post Posted June 18, 2016 New rear OEM clusters are just short of £400 a throw so aftermarket all the way! _____________________________________ www.tuned.org.uk Share this post Link to post Share on other sites
S18 RSG 429 Report post Posted June 18, 2016 I mean, I have some OEM rear clusters in my garage, never had a condensation problem in 25k miles. Although I imagine it may be cheaper for you to go aftermarket, because shipping to Kazakhstan is probably gonna cost a bit. 1 undercharged reacted to this Share this post Link to post Share on other sites
Captain Duff 79 Report post Posted June 18, 2016 1 hour ago, Gringosteve said: New rear OEM clusters are just short of £400 a throw so aftermarket all the way! _____________________________________ www.tuned.org.uk The OEMs are free under warranty if water damaged though... Share this post Link to post Share on other sites
Captain Duff 79 Report post Posted June 18, 2016 7 hours ago, undercharged said: Unfortunately my car is 6 years old and imported from another country because GT86 isn't officially sold here. Though odometer reads only 5000 km at the moment and it makes water in the taillights a strange unpleasantness. How can a car that has only been in production since 2012 be 6 years old? Share this post Link to post Share on other sites
Gringosteve 213 Report post Posted June 18, 2016 1 hour ago, Gringosteve said: New rear OEM clusters are just short of £400 a throw so aftermarket all the way! _____________________________________ www.tuned.org.uk The OEMs are free under warranty if water damaged though... I know I had both of mine replaced _____________________________________ www.tuned.org.uk Share this post Link to post Share on other sites
Kodename47 446 Report post Posted June 18, 2016 Just get new gaskets from Toyota if not under warranty or go one better and spend £30 and get the complete kit with neoprene gaskets and sealant from gaaketninja. Job done. 2 Gringosteve and undercharged reacted to this Share this post Link to post Share on other sites
undercharged 17 Report post Posted June 19, 2016 3 hours ago, Captain Duff said: How can a car that has only been in production since 2012 be 6 years old? My bad, the car is actually 2012, so 4 years old. Share this post Link to post Share on other sites
Nicebiscuit 655 Report post Posted June 19, 2016 Simply install a small tap under each light. Hey presto. A handy drink dispenser. Sent from my iPhone using Tapatalk 3 Herbie86, undercharged and Gringosteve reacted to this Share this post Link to post Share on other sites
undercharged 17 Report post Posted June 19, 2016 21 minutes ago, Nicebiscuit said: Simply install a small tap under each light. Hey presto. A handy drink dispenser. I prefer sipping my mojito through a straw. 1 Gringosteve reacted to this Share this post Link to post Share on other sites
Nicebiscuit 655 Report post Posted June 19, 2016 Mojitos, mmm. Perhaps we've hit on a new competition idea for the next meet. Rear light cocktails... Sent from my iPhone using Tapatalk Share this post Link to post Share on other sites
long-gone 152 Report post Posted June 20, 2016 On 18/06/2016 at 9:58 PM, Gringosteve said: New rear OEM clusters are just short of £400 a throw so aftermarket all the way! _____________________________________ www.tuned.org.uk A set of used here: CLICK. Share this post Link to post Share on other sites
undercharged 17 Report post Posted July 11, 2016 Followed the advice of knightryder and ordered a kit from Gasket Ninja a while ago. The thickness and quality is promising. Tails removed, cleaned, fully dried inside and out and ready for further work. The rear looks clean without them. Showers are forecasted later this week, so my update on the outcome will follow. 1 Keethos reacted to this Share this post Link to post Share on other sites
Herbie86 5 Report post Posted August 5, 2016 I have not investigated the problem but could you use a bead of silicone rubber on the edge of the plastic? Smear the mating metal surface thinly with vaseline to prevent the silicone sticking there. Before the rubber cures, fit the lights just firmly enough to ensure the silicone makes contact all round. Wait until the silicone is cured then tighten the lights a little more to compress the rubber a little. There was a couple who did not know the difference between vaseline or KY jelly and silicone rubber. Every time they made passionate love their windows fell out. 1 Gringosteve reacted to this Share this post Link to post Share on other sites