
Jay Bamrah
-
Content Count
360 -
Joined
-
Last visited
-
Days Won
7
Posts posted by Jay Bamrah
-
-
19 hours ago, gavin_t said:Wait until you fit bigger wheels, crud everywhere
 . I was thinking of getting some PPF film on the rear arches at one point
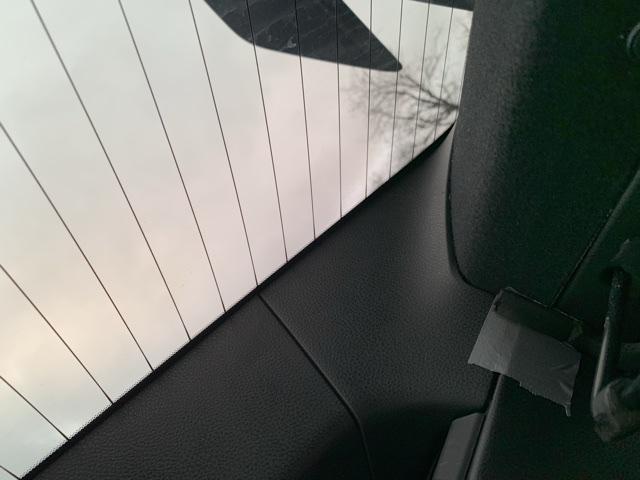
Is there no real solution? My fear is small stones will make long scratches down the side or my car
-
9 minutes ago, spikyone said:Yeah, no worries, will get some pics when I can - might be tomorrow. I haven't forgotten about offering you a ride out in it at some point too, I didn't travel at all over Christmas and obviously we're in lockdown, but if you're still interested we can arrange something when lockdown eases.
I was upset I thought I missed my chance😂 send me a message here or PM and il be free whenever you are around!
-
I know theirs 1000 posts on this but I think the more people that post on it the better. Each post might have something of value to someone so I wanted to as well.
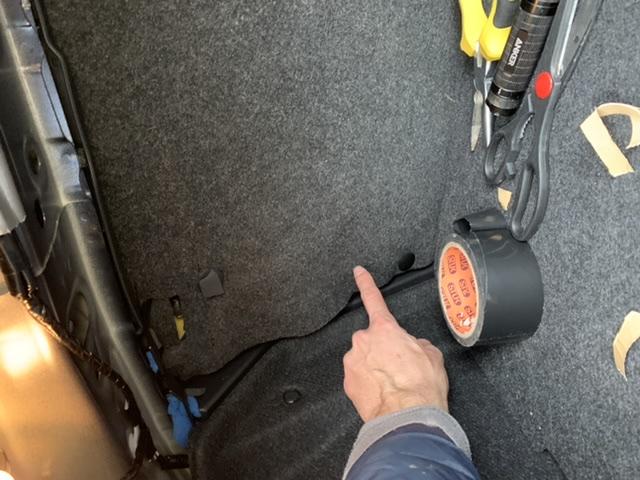
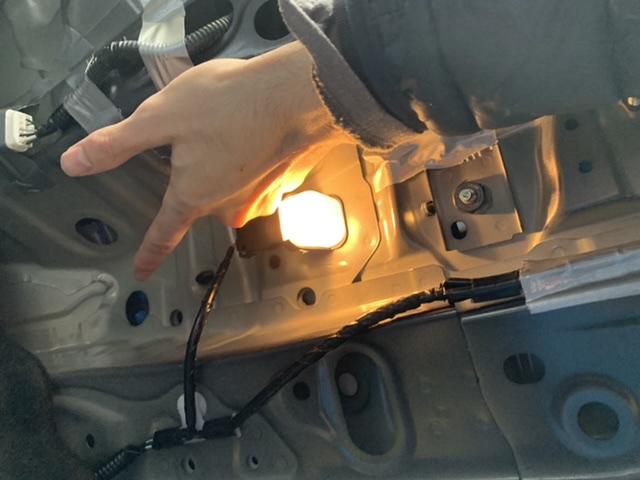
first rattle is here this is what it looks like exposed...
The plastic clips rattle here so I used adhesive foam on the bottom of them(link at bottom to cheap foam)
Next rattle is this ...

the exposed part is made of plastic and so I put adhesive foam here (this is the bottom of the back seat)
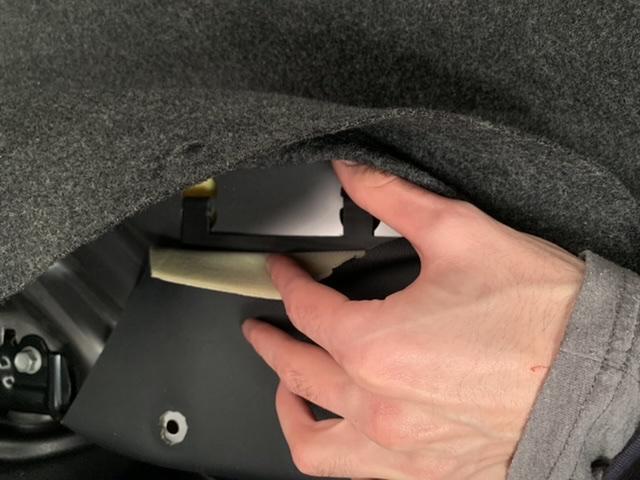
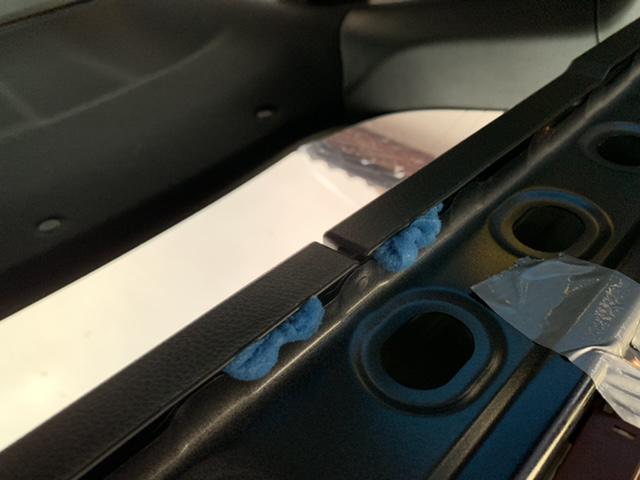
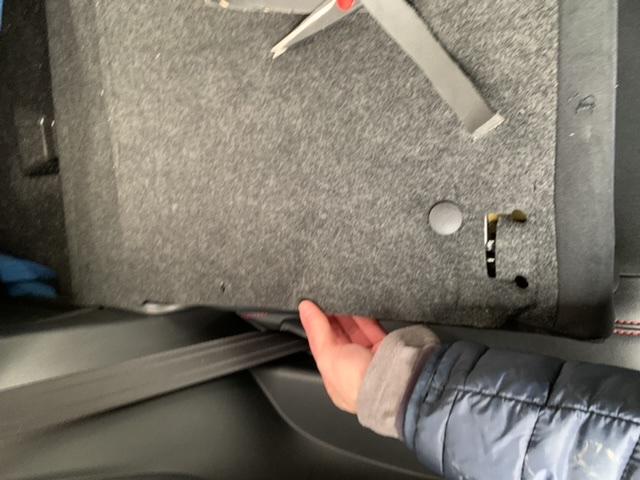
next is here ...
This corner piece on both ends rattles against the glass window, I filled behind it with foam. The hole here is what hole you need to push foam through to fill it, i recommend you put your finger in first to feel where it needs to go, photo of hole is below...
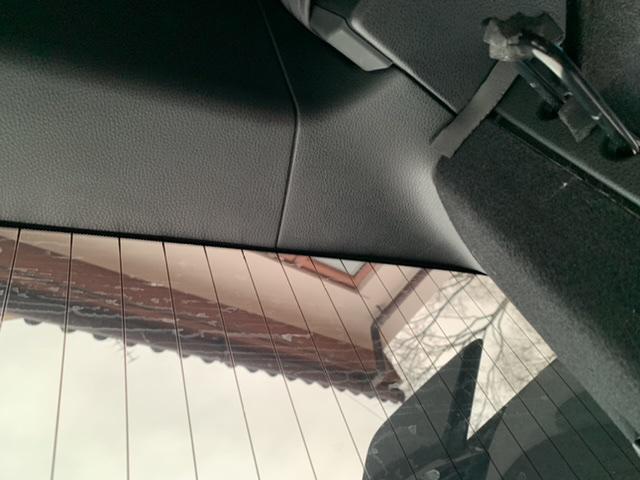
next is here...

(at the top of the window that plastic piece) the roof liner is lose you can easily get small chunks of foam and push them in there hidden...
next place ...
this area in general, I know it looks ugly how I did it but it’s all invisible when the seats are back so I don’t care, I just made it tight as hell, no movement..
next...
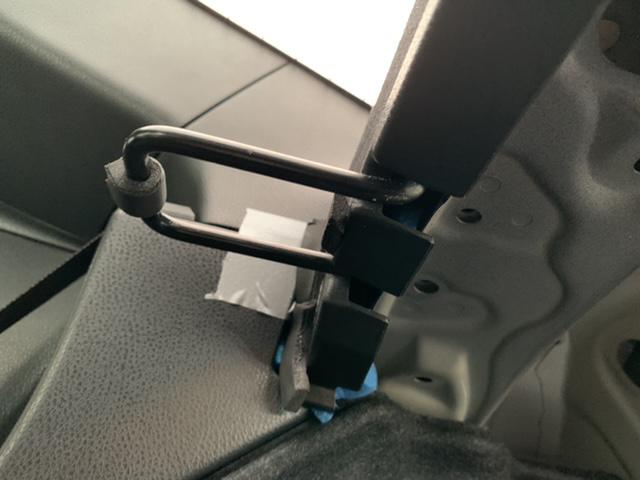
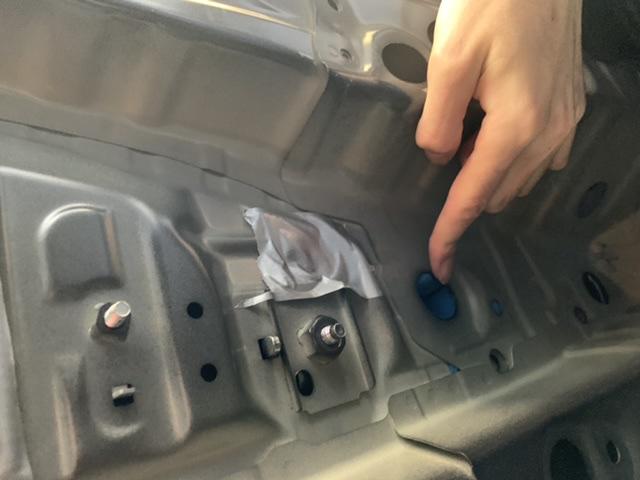
this is where the break light is... that piece, I put foam on the edge where it sits against the back seats as it was plastic on metal and had movement...
next...
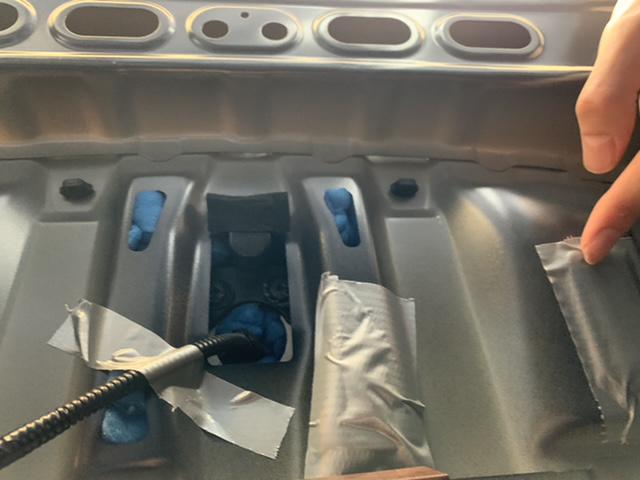
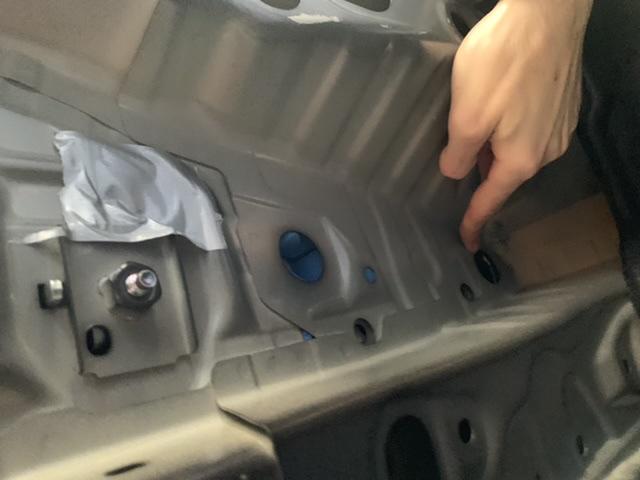
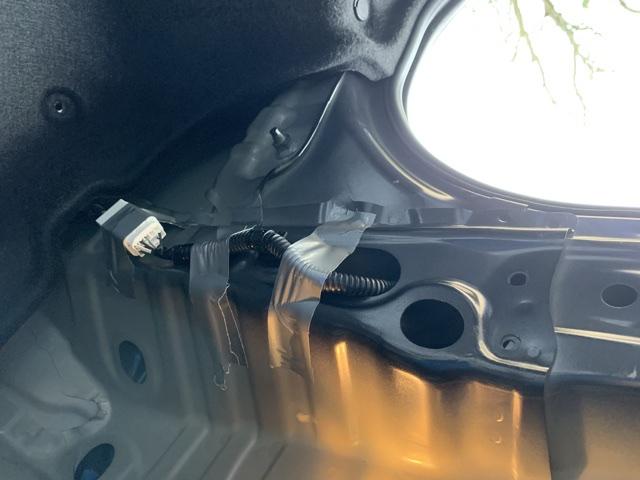
next is all of the holes in the boot, this pushes the third break light up so it can’t vibrate on the glass window. I filled every hole and put duck tape there to make sure it doesn’t pop out. Also every cable here I made tight so they can’t move about
here is one extra photo
Next part...
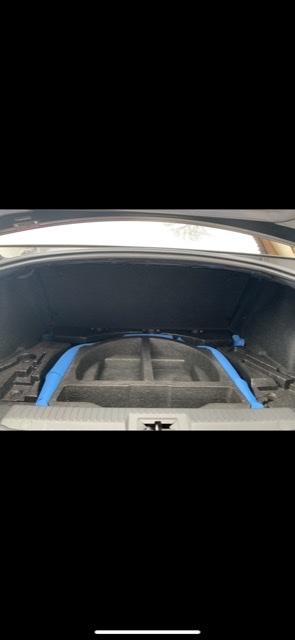
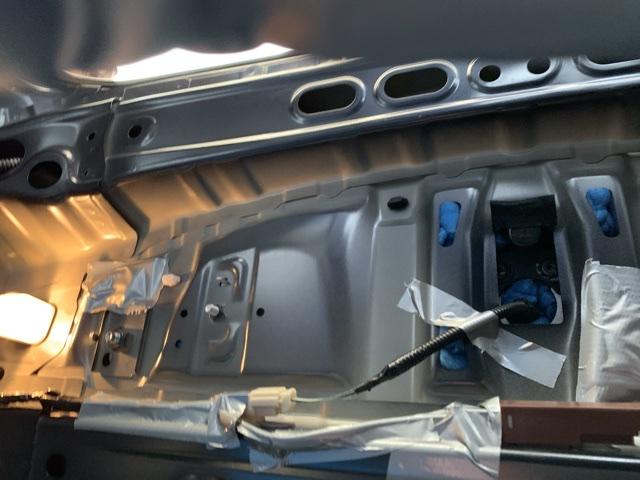
this is the obvious part, I put foam where the wheel arches are and then I put adhesive 3m foam EVERYWHERE after that, im sorry I have no photo of that but you know what I mean, the entire boot is covered in 3m adhesive foam.
Hope I had some stuff useful to you.
THIS IS THE FINAL LOOK FROM BOOT...oh I also did that part on the boot door I just took that off and put foam underneath, makes opening and closing the boot feel nicer too

hope I can help someone
——————————-THE END——————————

-
Just now, spikyone said:Agree with @jw191, I have the OEM ones on mine too, they're discreet and effective. No idea why they weren't fitted as standard. You can get them direct from Toyota through eBay, or cheaper assuming these are genuine as it says on the listing:
Can you when you have time send some close up shots of them on your car I would really appreciate it thanks!
-
4 hours ago, Rich196 said:I have done the above, i wrapped it in electrical tape until it was a tight fit, rattle gone.
Thanks for the idea bro. I finished every sound deadening in my car just the doors left officially from like an hour ago! Il let u guys know how I ended up doing it
-
16 hours ago, jw191 said:I’ve had the OEM flaps fitted for over 3 years. I like them on my black car. Quite subtle.

Where are those from they’re small and I like that
-
11 hours ago, Lordyboi said:It's a little hard to explain, I discovered what was buzzing after searching "gt86 door rattle and watching the video I linked, go to 1:40 they show what I mean. In the video they somehow remove it from the plastic piece that screws into the door card. I was too scare of breaking the clips when I tried to remove it so just wrapped mine in a load of electrical tape which seem to have done the trick for now but I think I'm just going to glue it in place when I next have the door cards off but its up to you what you choice to do.
The tolerance in the two plastic pieces is shocking and when the volume of the speakers is even moderately loud the control box vibrates like mad making an irritating buzzing sound. Make sure you do the window controls on both door cards as they both vibrate.
I'll try and explain better if this still isn't enough
")
Oh no I see where he put the foam now okay thankyou! I will do that when I get my speakers changed all together, either that or when I wrap the door handles satin black
-
Hey, does anyone have the HT AUTOS side skirts and front lip? If so perfect, if you have another brand then still useful. Can you explain to me if I need to drill holes in my car to fit it or can I just screw it into pre existing holes? Like how does it work? Also for those rear ones that go on the back bumper
thanks
additionaly if you have the HT autos kit I would appreciate any photos, as I like this kit but their isn’t many photos of it.
-
2 hours ago, Lordyboi said:I'm currently in the process of doing this my self, currently only have some CCF and a little sound deadening mat. Nothing rattles now but road noise is unbearable, so im going to put in MLV in under the carpet and door cards in the summer when its warmer.
Here are some good links I've been using, might as well save you the time:
https://www.ft86club.com/forums/showthread.php?t=53511
https://www.flickr.com/photos/86194869@N08/sets/72157633425405068/with/8711031372/
https://www.ft86club.com/forums/showthread.php?t=35604
materials:
https://uk.rs-online.com/web/p/acoustic-insulation/8814557/
These aren't the cheapest materials so do look around but they'll give you a feel.
In sort different materials block different wave length of sound (vibrations, road noise, wind noise all have different wave lengths) there is no one material fits all unfortunately. The forums I linked above do a good job of explaining what materials should be used where.
Do note that they will add weight, MLV will add the most mass by a mile but it the best a blocking road noise and worth it to stop my ears from bleeding.
Also I have the focal speaker package, Kenwood head unit as well as some better 3 1/2 inch speakers in the rear, great sound and more powerful but they cause my door cards to vibrate and rattle when a song with bass comes on. So the door cards they're coming off in the summer to address this. Just food for thought.
Finally when you have the door cards off tape/glue/wedge something in between the housing of the window controls and housing they sit in. You'll thanks me later.
Hope this all helps
Hey, thanks so much flr all that. I have sound deadened the entire car now except the headliner which I’m not going to do, and then I haven’t done the doors yet as il do them while upgrading the speaker system. Can you try reword what you mean by the window controls, I have heard about this but do you just tighten the screws holding it in or put foam between the controls and the door??
thanks
-
1 hour ago, Lordyboi said:Yeh typically they send you a letter when they have your item on UK soil and then you have 3 weeks or so to pay import and then they'll ship it from your local depot to your door. Alternatively if you see your package is at your local depot on their tracking app before you receive the letter you can pop in and see if they'll give it to you early.
This is what I did, I was driving by my local parcel force depot and went in and asked and they were happy to give it to me but now thinking about it this could be why I didn't get away with import as they probably looked a little closer at my parcel as I was asking for it from the front desk apposed to a robot/computer sorting it and missing the import charge, but that just a guess.
No if you've got your parcel and they sent it directly to you with out sending you a letter saying you need to pay import then that's fine, if you don't pay import they don't fine you they just send your parcel back to where it came from.
Has happened to me as well when I ordered something that cost £30 I paid no import. Again im just guessing here but if they have a high volume of parcels they might not be able to check them all ect.
I bought a £25 item and paid £25 for shipping then paid another £25 for import duty so it’s karma for that scam😂
(the MTEC clutch spring)
oh and thanks for the re assurance !
Lordyboi reacted to this -
2 hours ago, Lordyboi said:Just checked, they put £109 for me also but according to .GOV website you've got to pay tax on anything over £15 so I guess yours slipped trough the crack. lucky!
Oh that’s badass haha. I might sound stupid here but I get a letter to pay import fees before I am allowed to have delivery of my item if I’m right? That’s how it was with my MTEC clutch spring anyway. What I mean is I’m not going to in a month get a fine for not paying or something without realising? Haha
-
Example of what I mean here

-
1 minute ago, Church said:Hmm, my thoughts on mudguards ..
Stock are cheap and look good on car, but i'm slightly worried, that such plastic mudguards can be easily brake. Should be easy to buy at any toyota/subaru dealership, or if you find part numbers, order online wherever cheapest. IIRC there might be different ones for restyle & prerestyle, due different rear bumper, but not sure. And it may differ between gt86 and brz.
I have rally armor ones .. look good .. but i hate one bit .. their construction includes aluminium bracket, that sits a bit below bumper bottom. So it's easy to bend/break off those brackets if you eg. park near kerb in reverse with wheels till stop. Needed to rebolt back few times due that.
IIRC rokblokz mudflaps don't have such bracket, simply stiffer rubber part, and they also have shortened version for lowered cars. I don't have own experience with these though.
Thankyou bro I’ma go look into them both
-
18 minutes ago, Church said:Slightly curious. Stock wheels or aftermarket, more spaced out ones via width or offset?
Fully stock wheels spacing etc bro
-
4 hours ago, Lordyboi said:I read somewhere that if you email them and ask them to put a lower price on the paper work attached to the box you'll pay less import tax/no import tax. If true I wish I'd known about it sooner as I got stung with a £50 import fee when I bought mine from speedline but even with import cost included it was still cheaper then buying from a UK based company.
What price did they put on the paper work? Flr me it was £109 they put the price of only one tail light not two. I paid £0 import tax to the UK and I didn’t even ask them to do it for me
-
14 minutes ago, Whizo said:Here’s the ones I’m after but not at that price!!
https://www.amber-performance.co.uk/product.php?xProd=26254&xSec=8595
Yeah they’re nice but like u said you’re paying 67.5 % more that’s assuming free delivery too. personal preference but I do prefer when the valenti v2 main light goes all the way round the unit vs only 2/3s round in the revo one
-
22 minutes ago, Whizo said:Bloody hell thats an amazing deal. The newer model the Revo 3 are just over £600!!!
Is that including the 4th break light? I don’t have that only the two main tail lights. If it is £600 without the 4th break light that’s insane money! Well everyone’s value to money is different but to me it is anyway haha
-
1 minute ago, Whizo said:They make a huge difference mate, so much better than the standard lights.
Did they cost £200 all in, what about import taxes, VAT etc?
I love the look of these but I’m also tempted by the Revo 3 version. More expensive though.
Well I thought import tax too but I haven’t been asked to pay any it was 270.98 dollars to the penny converted is something like £199 all in
-
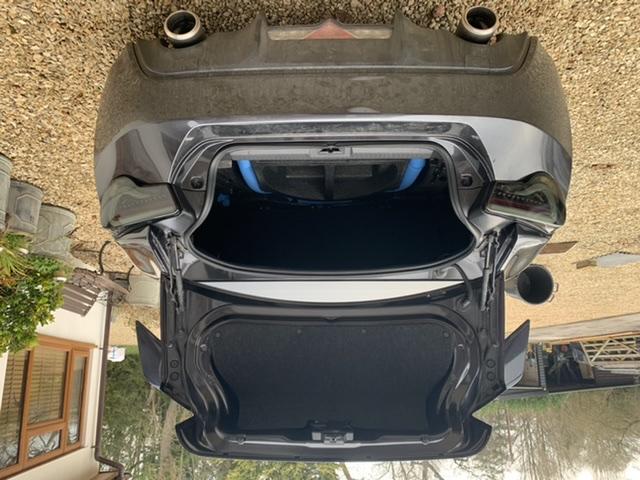
26 minutes ago, Kodename47 said:Yes, how do you know you've sealed it and the boot isn't going to flood
")
That’s a really good point actually, it’s so cold now where I live so il test them tomorrow when the water won’t freeze !
-
Just now, Kodename47 said:Done the hose test?
Haha no I was just going to come back in a week after it’s rained or something, is this a recommended test to do?😂
-
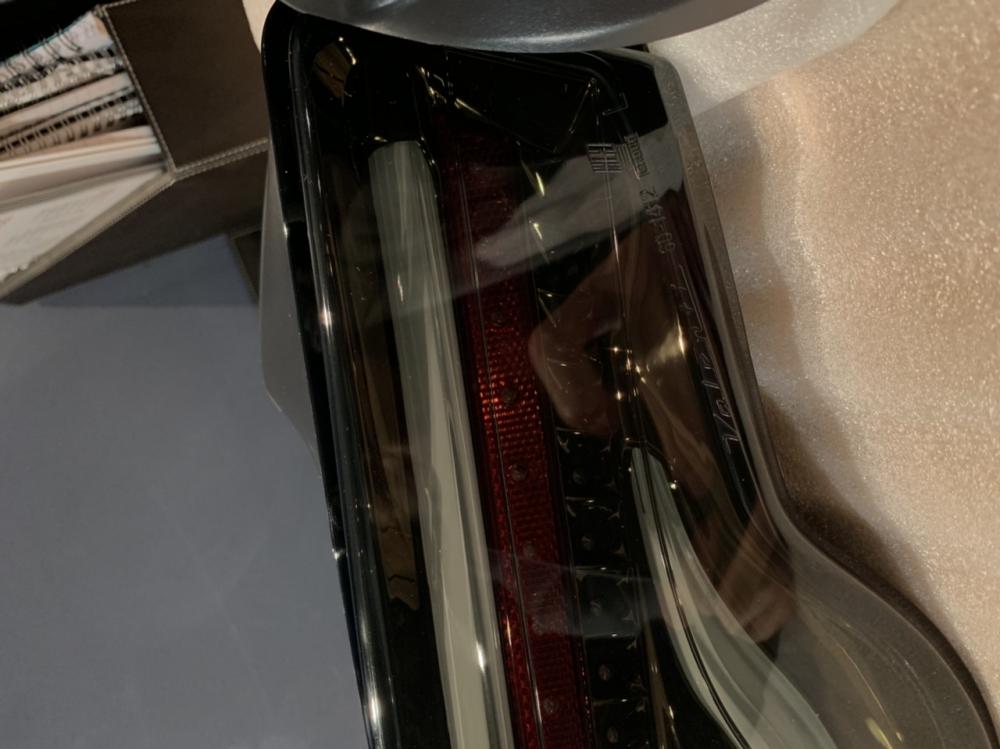
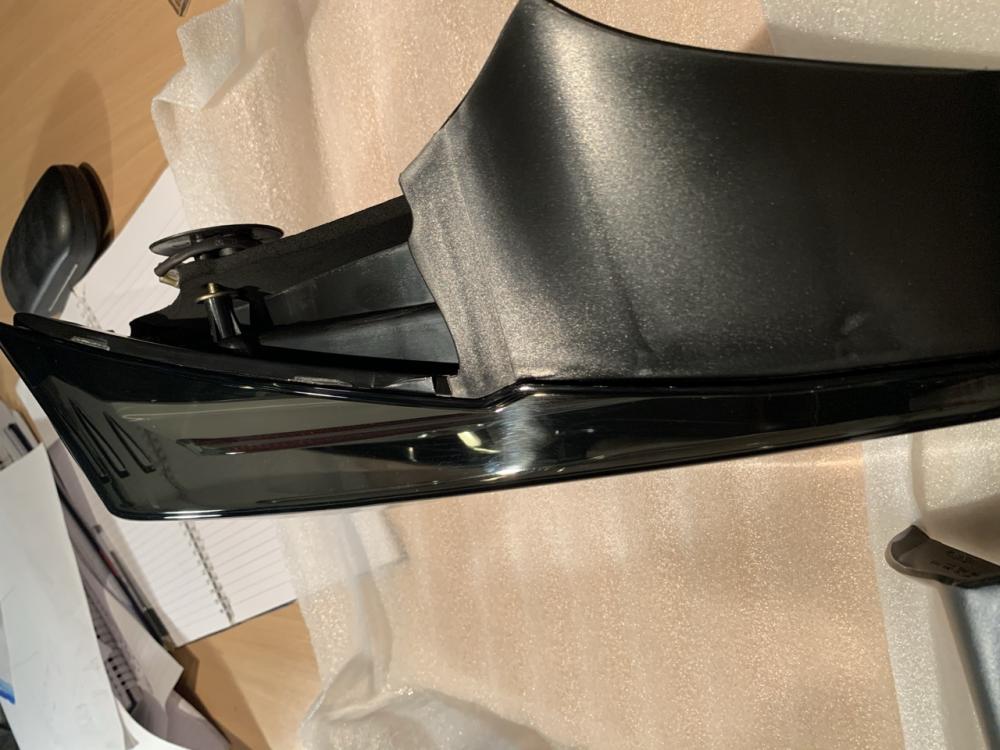
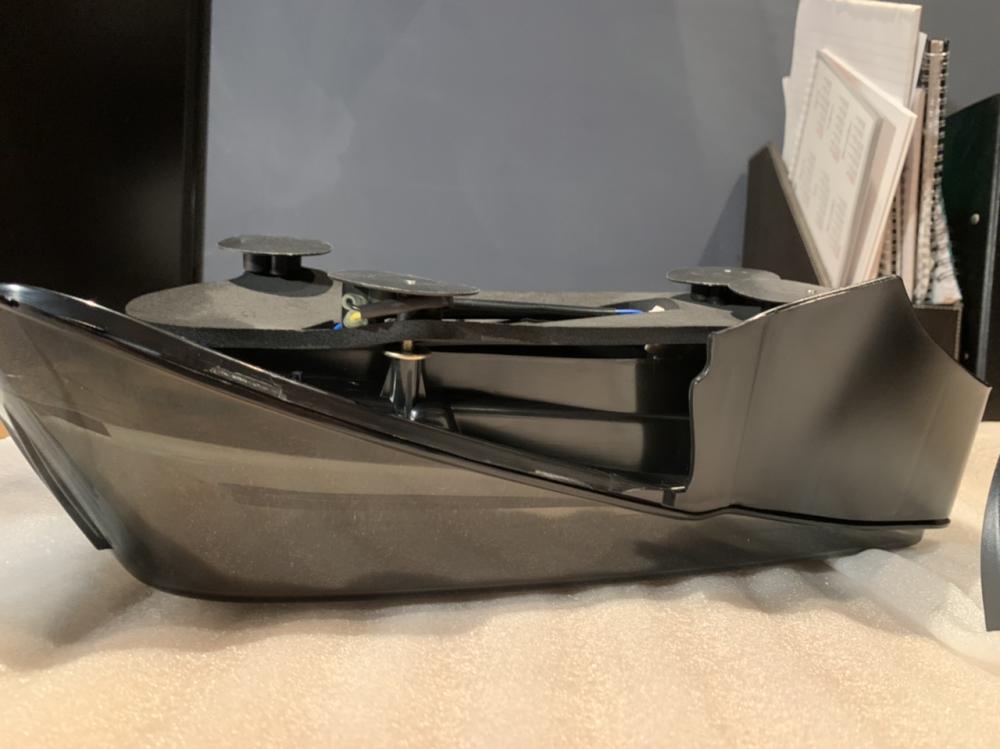
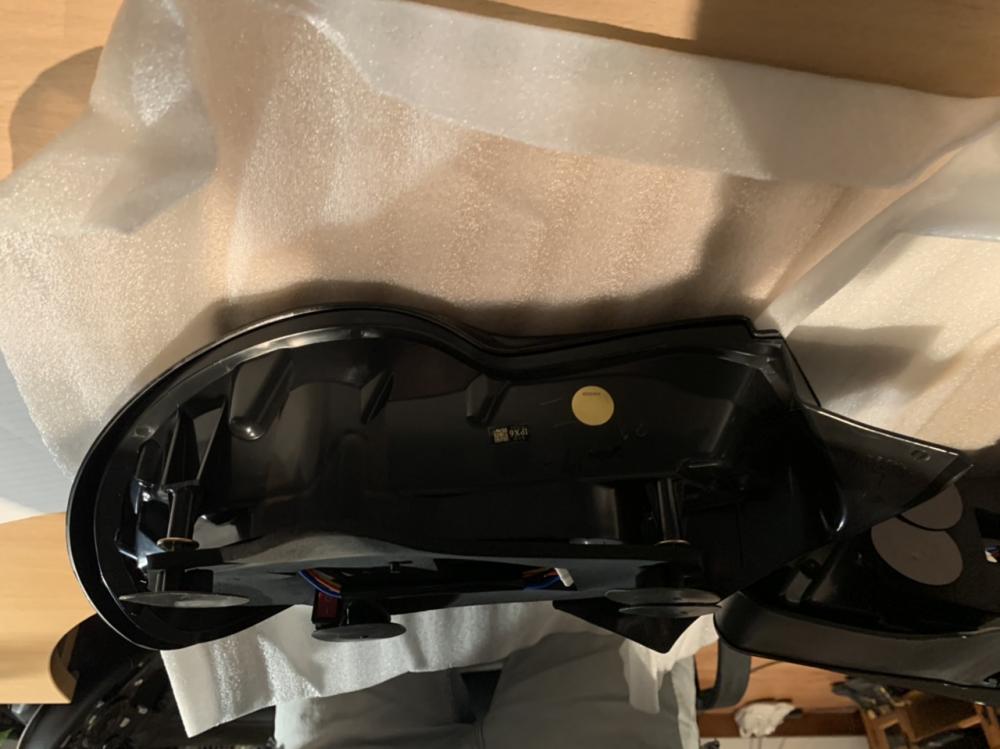
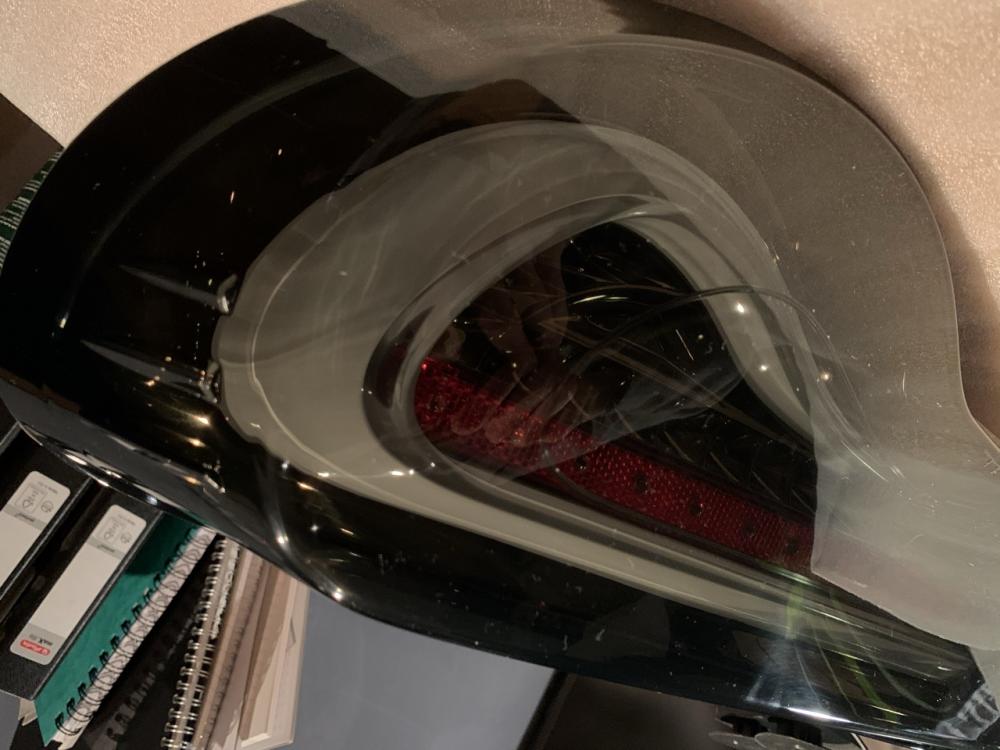
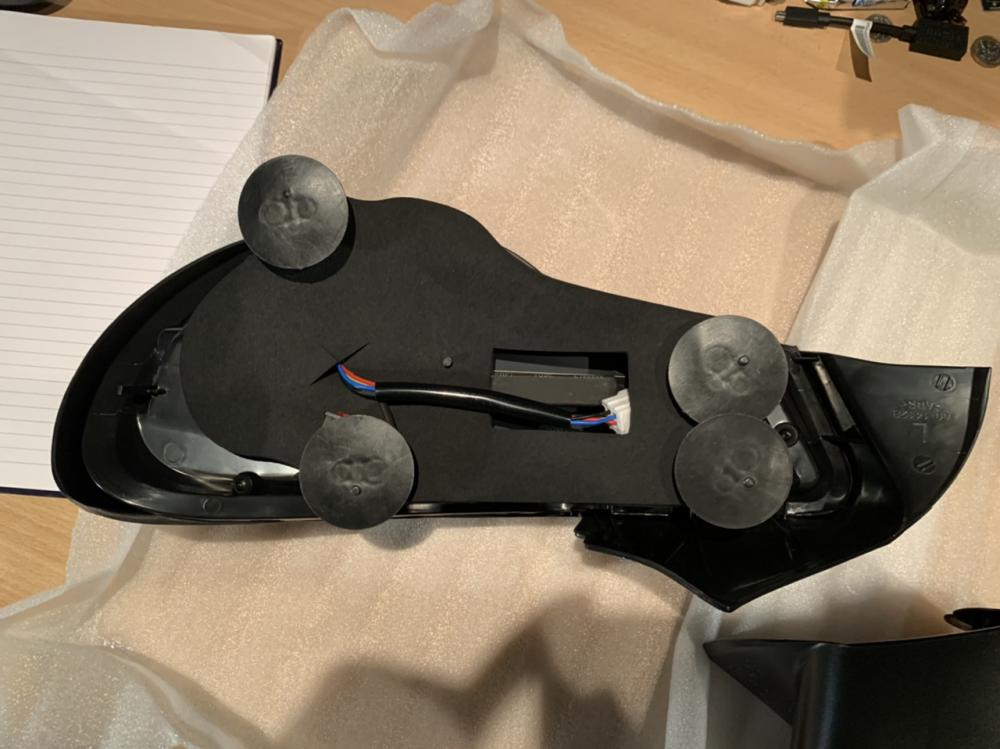
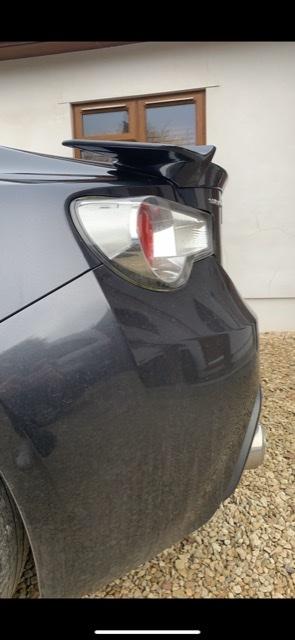
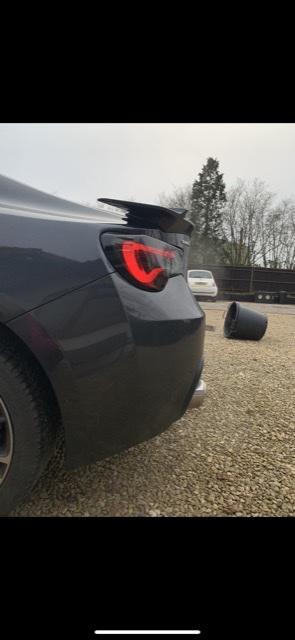
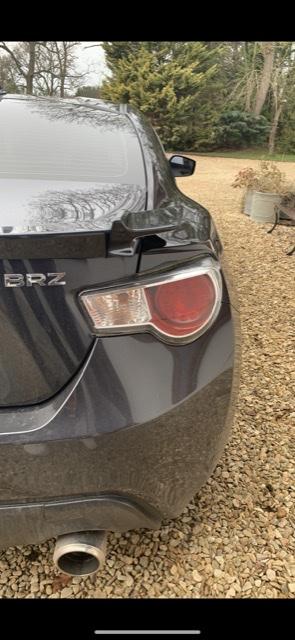
On 1/7/2021 at 7:50 PM, Jay Bamrah said:Hi, I ordered some black and gold valenti sequential tail lights from the speedline after seeing a gt86 owners review on them. I wished it had some photos of the tail lights so thought il post this for anyone else in the future looking.
One question I did have if anyone would know is, is there any part to the light I should sealant for condensation reasons / any advice installing it to prevent condensation please.
here’s some photos of the tail lights, from what I see they’re authentic it took 7-8 weeks to arrive from Taiwan to the uk that’s over xmas period + corona and customs delay. You can track your order most the way and Thespeedline reply to emails if you have any questions in about 48 hours.
All inclusive cost 271 dollars
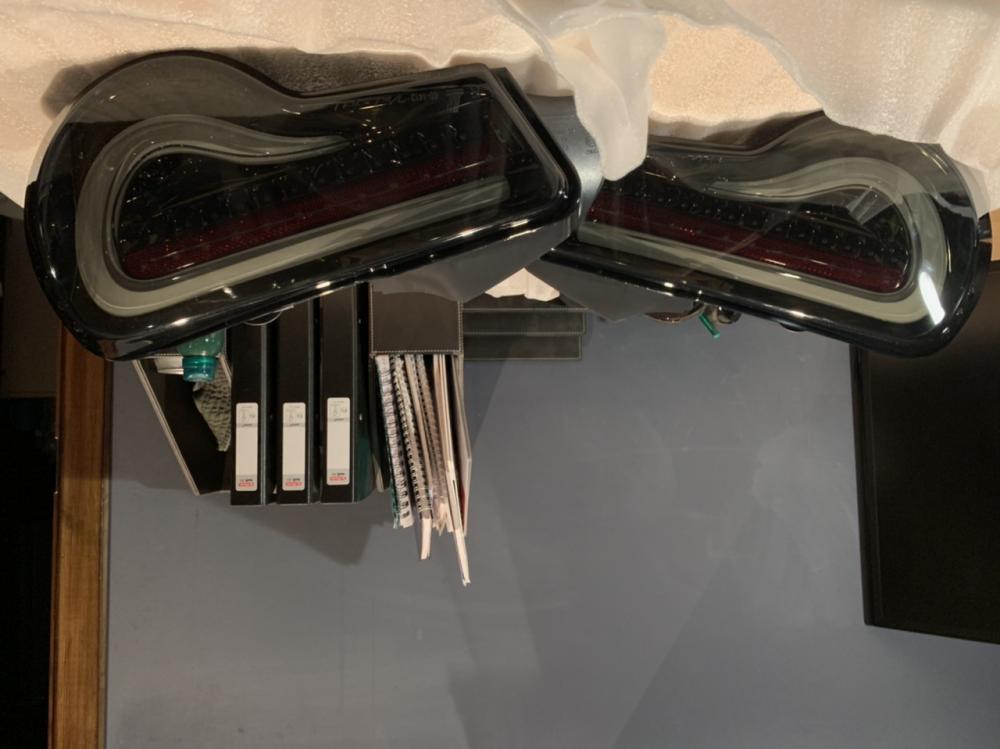

thanks guys

-
On 1/3/2021 at 11:47 PM, BaltimoreGer said:Ya, I am planning to get started on that hopefully this spring/summer, just saving up to do it properly now.
Hey please can I have a photo of the receipt
-
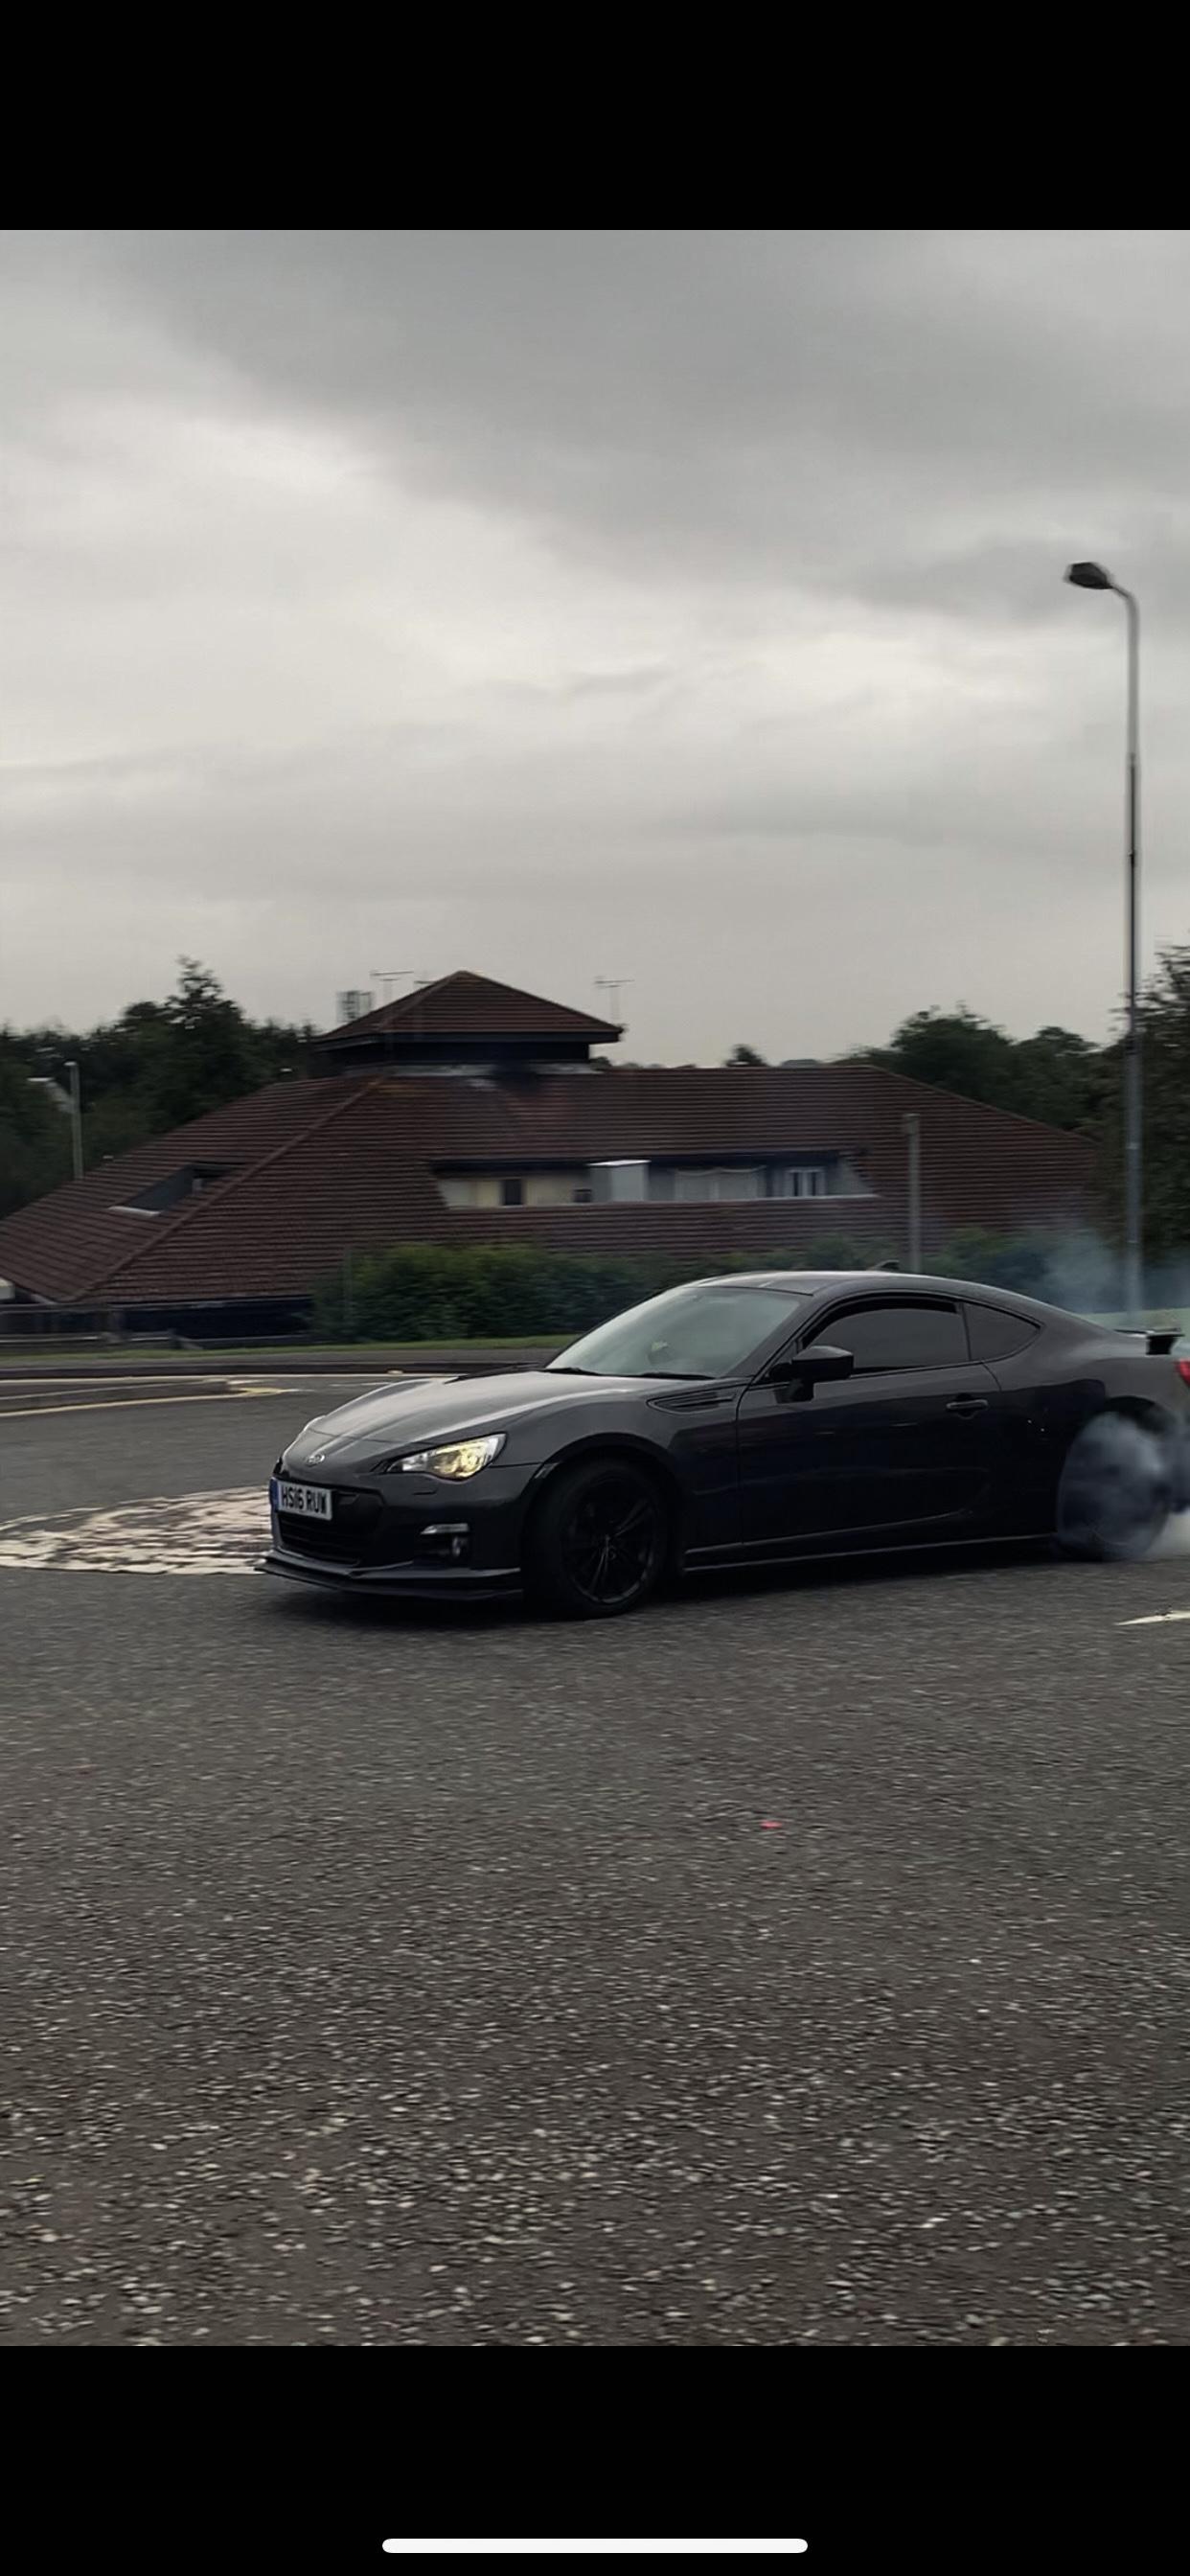
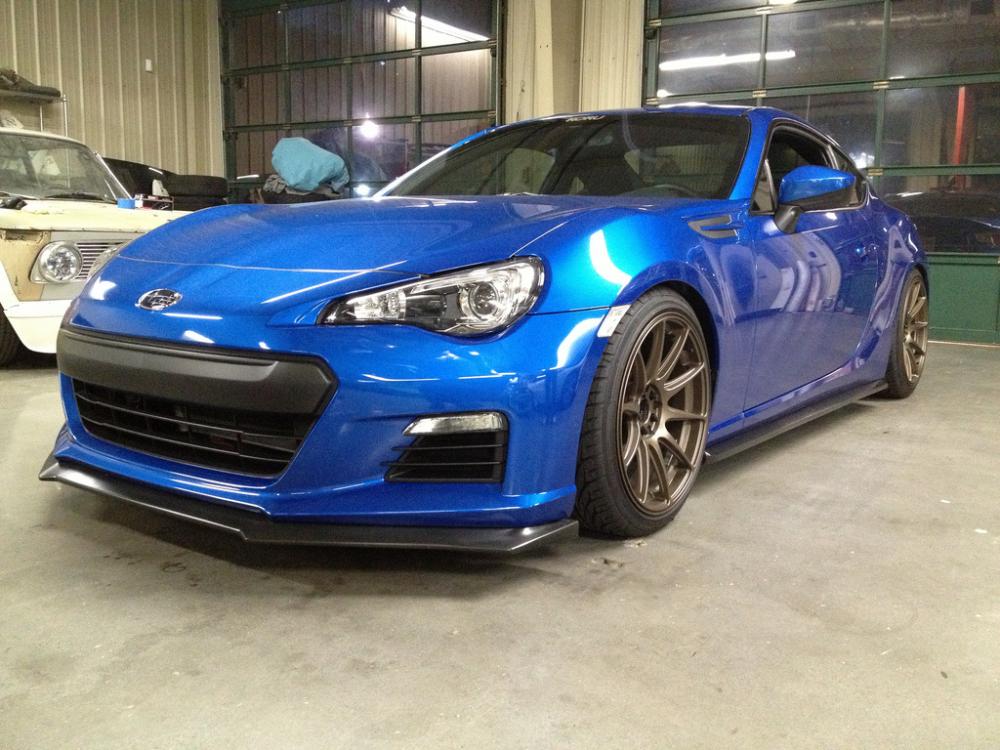
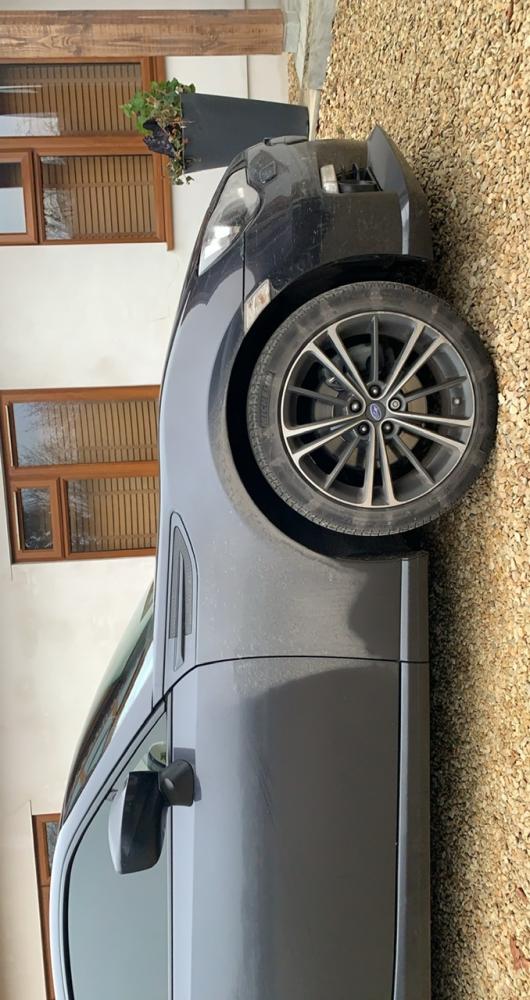
Hey, I have had my BRZ for a month now and have noticed the tyres in comparison to my last car (vw golf) spit loads of road debris on the side of the car, so much I can wash it and one drive later the doors are covered.
my main fear is long term scratches from small rough road debris ruining the paint on the side of the car.
does anyone recommend any mud guard/flap to look at? I’m thinking once I get side skirts front lip etc they won’t look like they stick out the side of the car so much as they will kind of stick out as much as the side skirts if that makes sense.
any ideas are helpful thanks guys
-
1 minute ago, 86iain said:Mine must have been on well over a year, and zero condensation.
Damn zero that’s impressive as stock ones always seem to have condensation and I can’t see any difference between the two really


BRZ mud guard
in GT86/BRZ General Chat
Posted · Report reply
Oh yeah I see what u mean thanks!