


smudge
-
Content Count
2394 -
Joined
-
Last visited
-
Days Won
8
Posts posted by smudge
-
-
34 minutes ago, Luke said:Shame you can't add a viewing window through the back seat. It looks the part so should work very well.
I've come to the conclusion on this build, that it's easier to pay a little extra for bits that will work properly. Parts that are designed to replace OEM rather than having to alter/modify existing bits, will generally work be easier to install and work better in the long run also.
The previous guy wanted to cut corners wherever possible, I'm prepared to spend a bit more to get this done properly now.
TommyC reacted to this -
Just now, dom2497 said:Part porn!
Sent from my SM-G950F using Tapatalk
Shame it gets hidden out of sight!
-
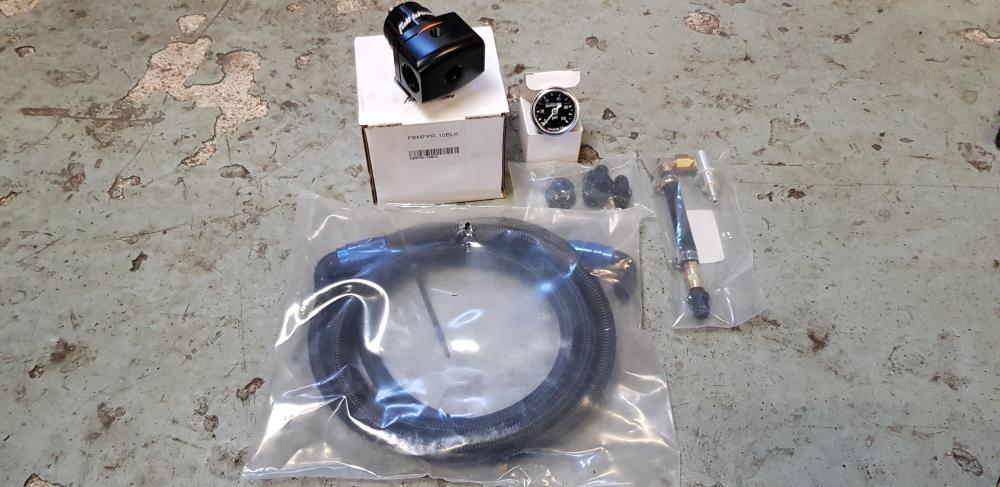
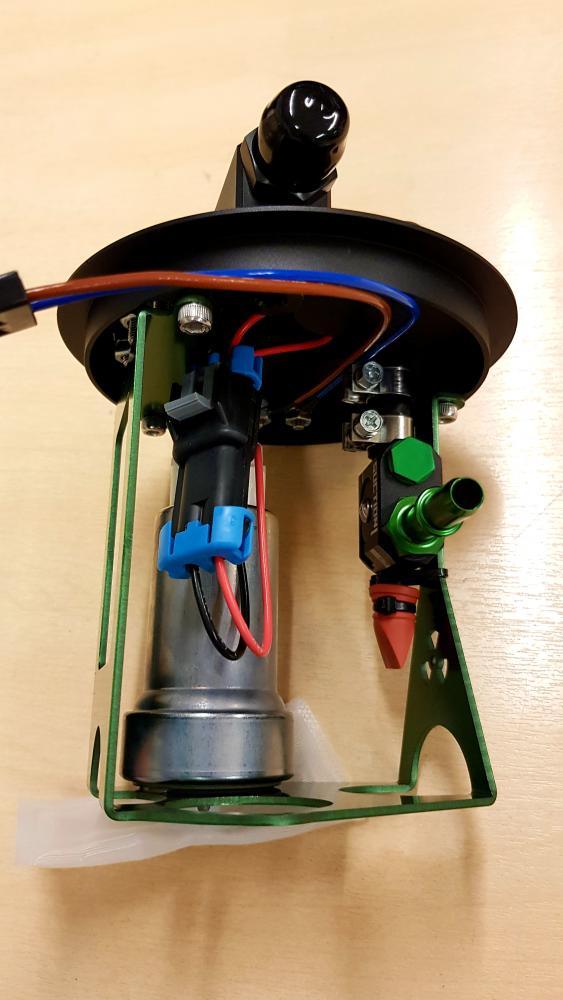
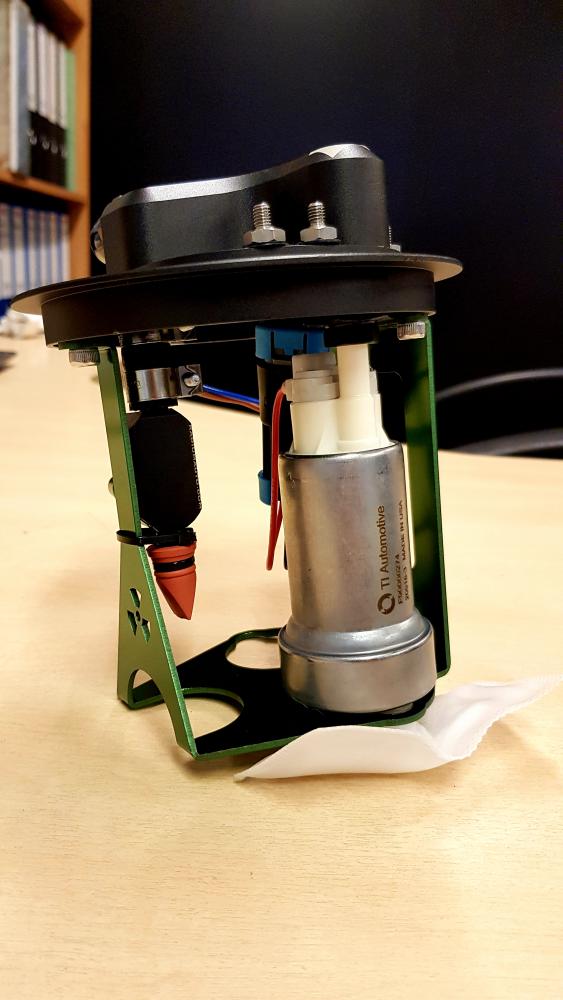
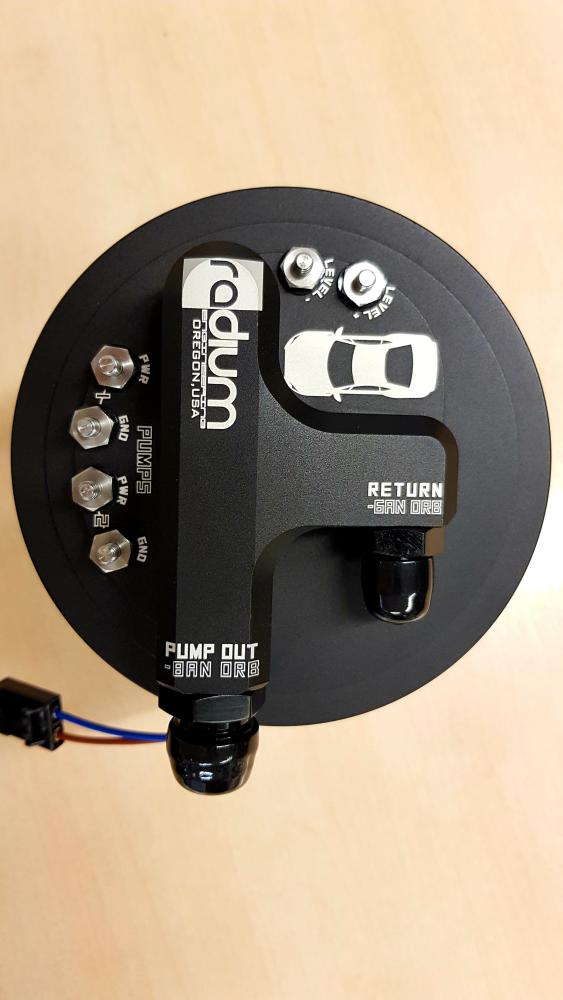
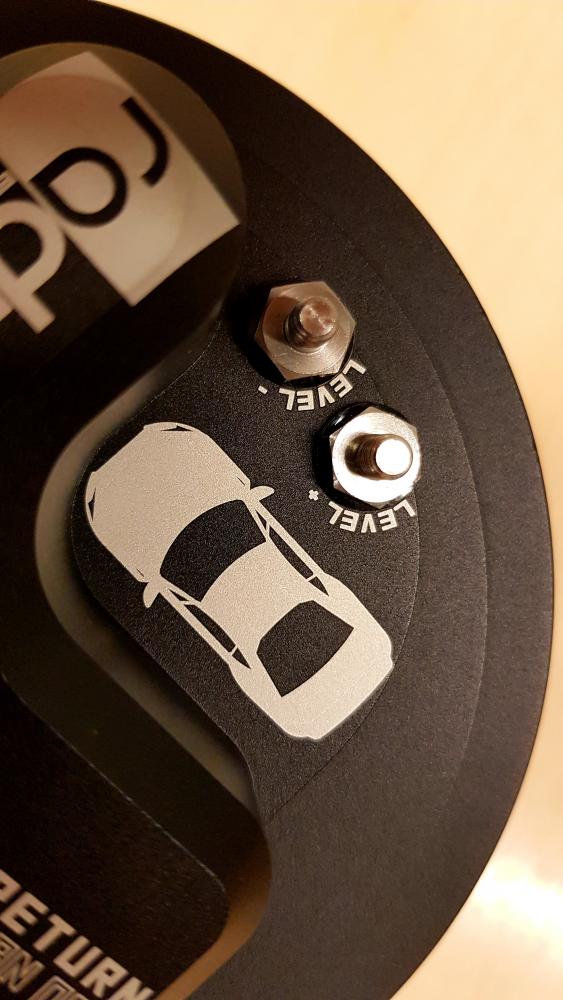
Turns out that the FBM fuel return kit was a piece of crap. No instructions for install and the only possible way to install the return line into the OEM fuel basket was to cut holes...
After asking FBM for instructions and some assistance, I got nothing. So promptly returned the item along with a shitty email about their poor product and even poorer customer service.
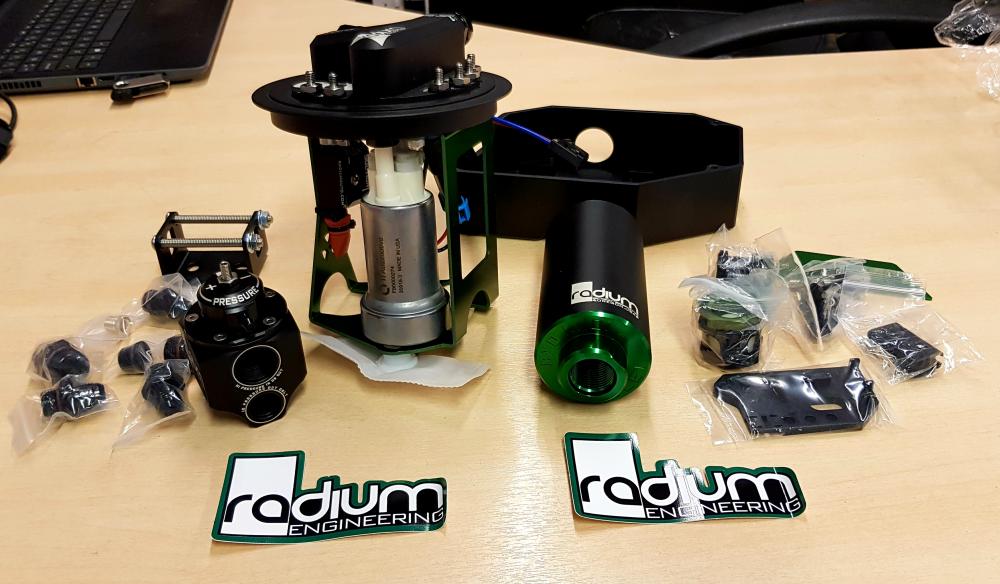
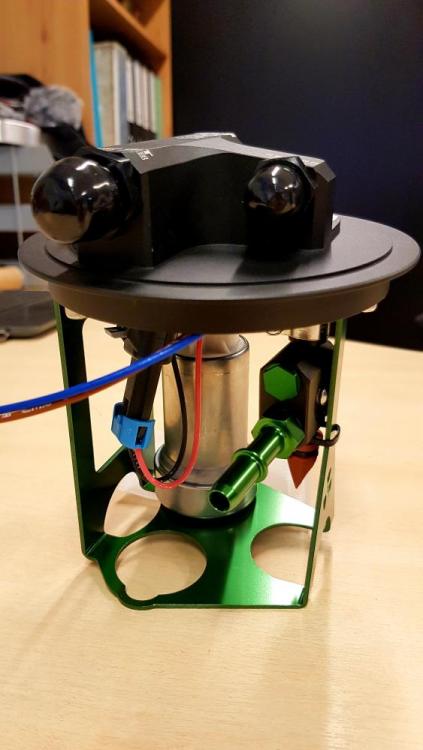
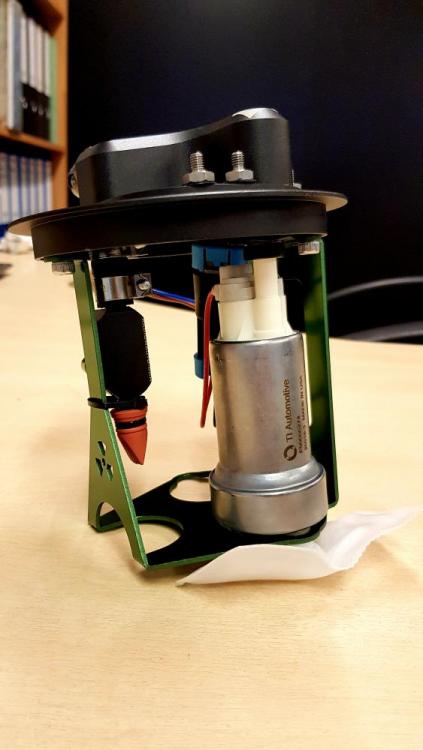
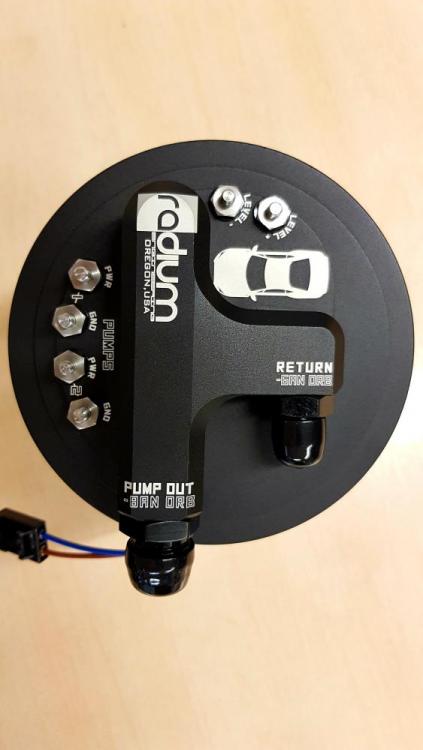
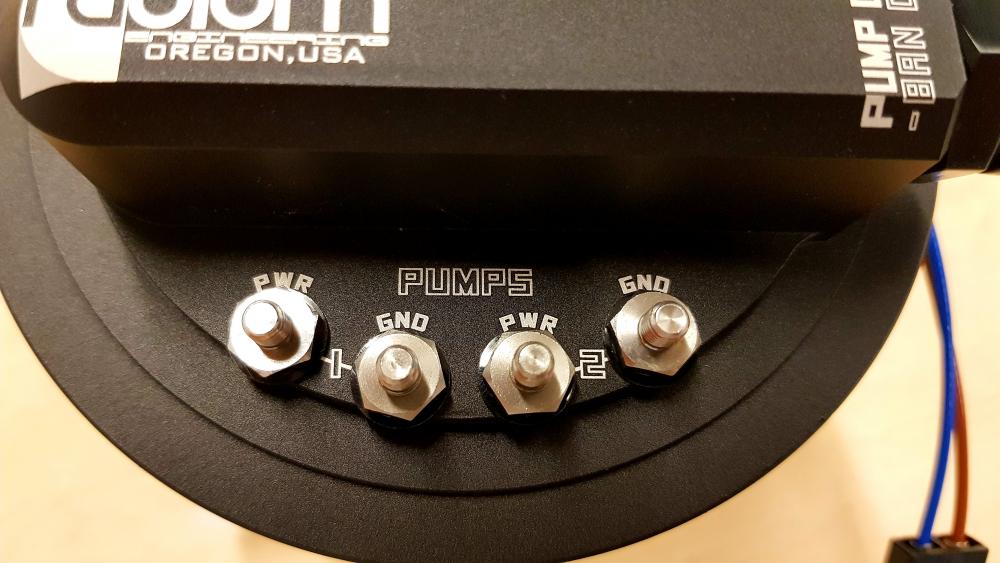
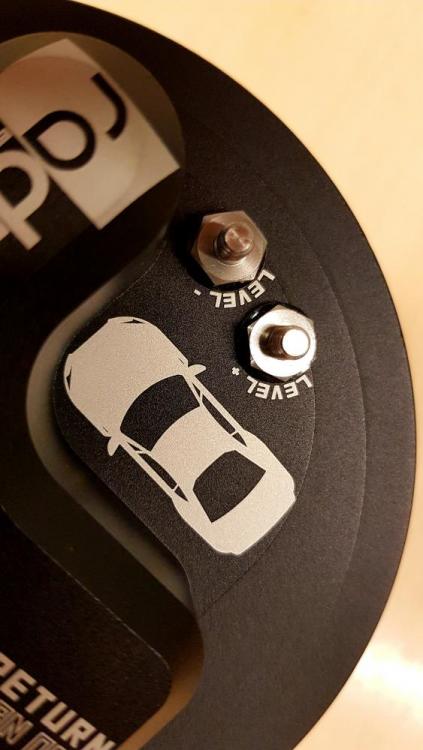
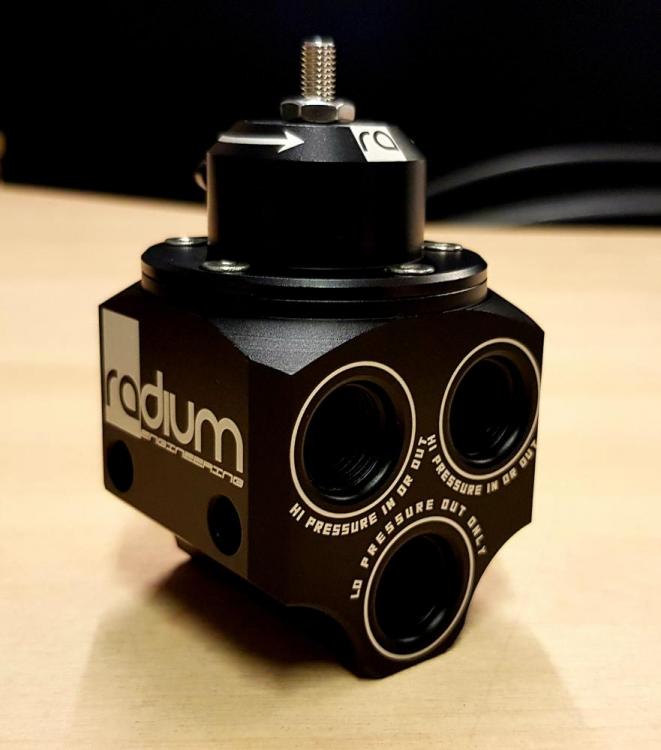
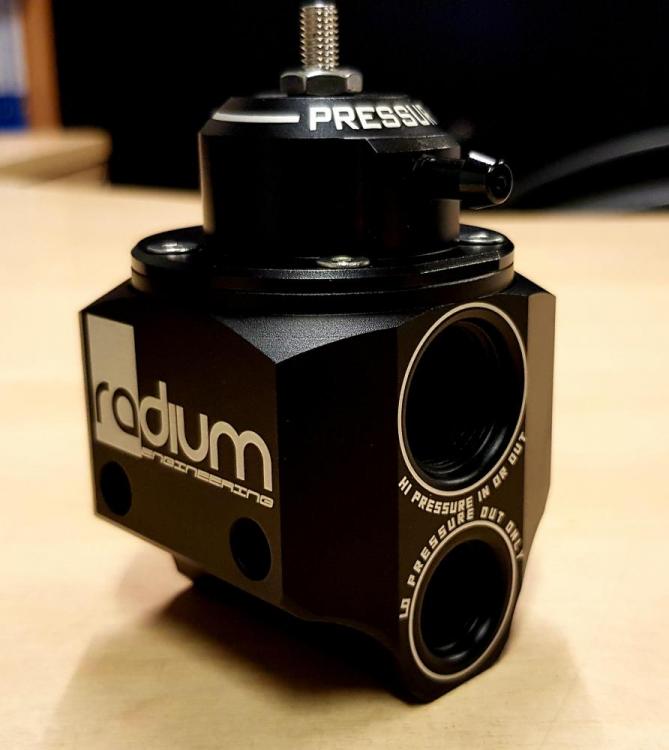
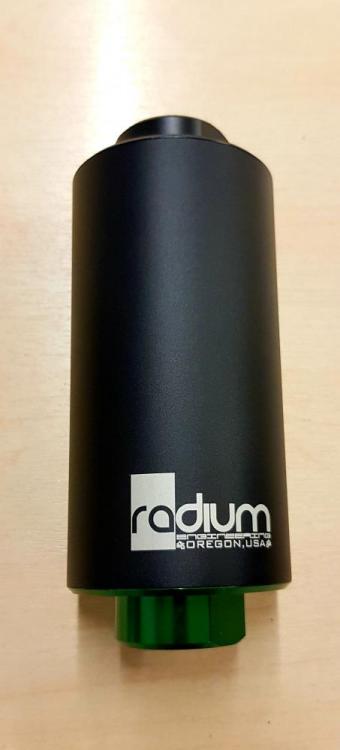
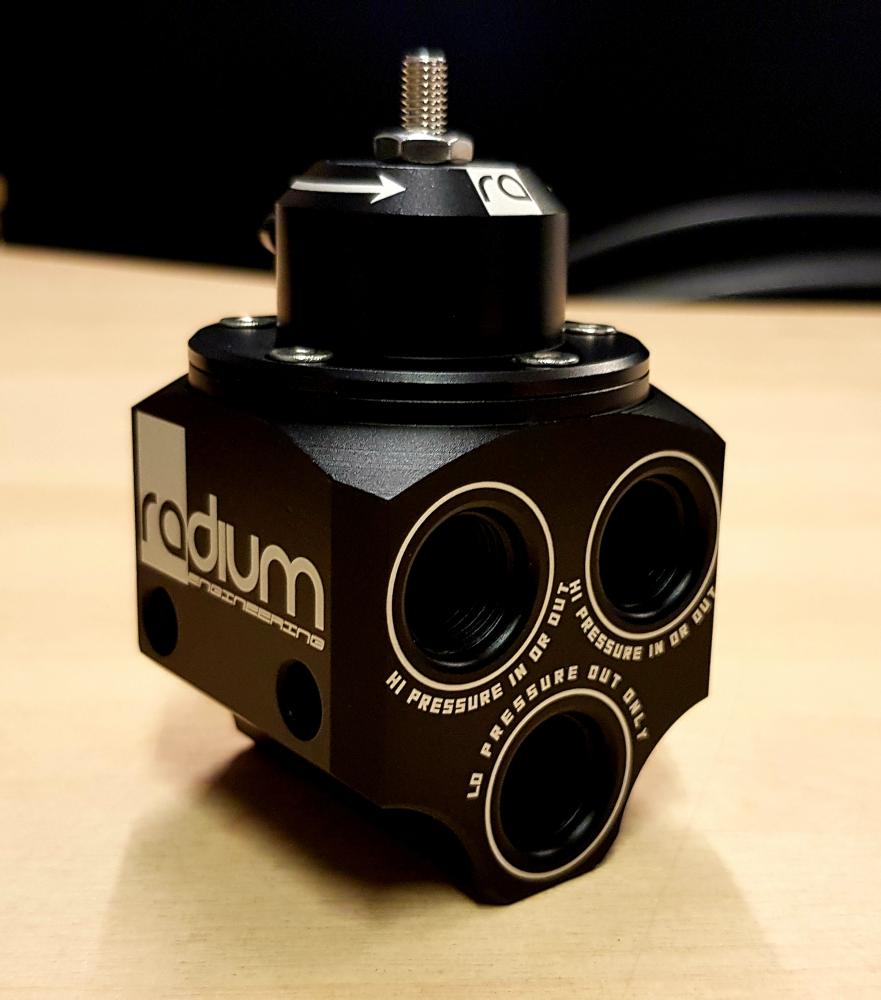
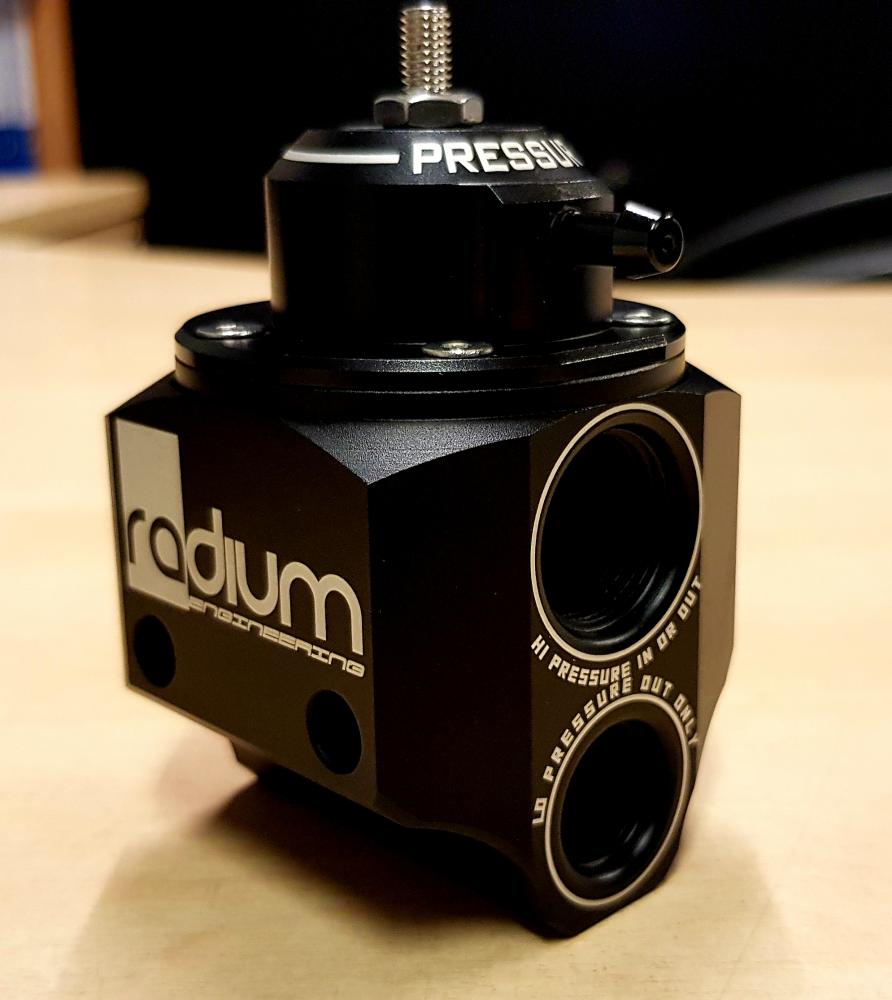
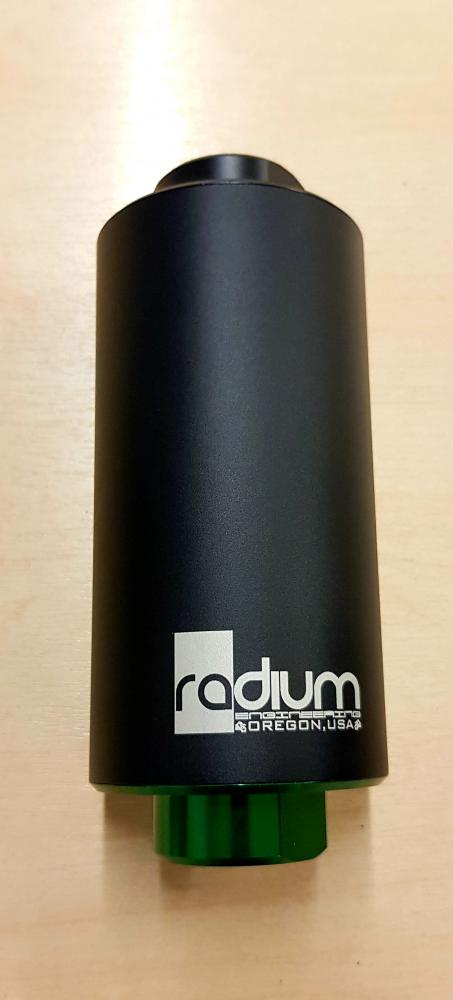
We still needed a fuel return system for the 1UZ and I came across a beautiful piece of kit from Radium Engineering. A little pricey, but it fully replaces the OEM fuel hanger and basket meaning that it simplifies the whole install process. Unboxing it today, I was amazed at the quality of all the pieces. It's almost too pretty to stick back into the fuel tank where it'll never be seen again

Also chose to upgrade the fuel pump to a 450lph unit as the 255 I originally has would be on it's limit for the 1UZ.


 willfmair, Mark-in-Stoke and TommyC reacted to this
 -
Last set sold for £150...just FYI
-
Just now, KevinA said:Hope you can give me some competition in TSS F1 Pro ?
I have no idea what class I'd be in mate. I asked Adrian the other week but he didn't manage to clarify for me yet
-
1 hour ago, Luke said:The question is will you get it running before the new year. Saw another LS swap from Poland the other day. Will be interesting to see what yours sounds like in comparison.
It'll sound very different to an LS. The 1UZ is a lot more "violent" sounding in my opinion.
Just hop on YouTube if you're intrigued by the noise they make, plenty of vids on there
")
-
33 minutes ago, dom2497 said:Great news, light at the end of the tunnel now? Just curious, are you running a wider set of wheels at the front because of the swap or just for the lolz?
Sent from my SM-G950F using Tapatalk
Certainly hope so!
The front is more aesthetics really. I still probably won't go wider than 9.5J with a 255 tyre, otherwise it'll just tramline everywhere. I saw the wings come up at a decent price and I always liked the looks of them, so took a punt.
Just means I'll have to go wider on the rear now
 dom2497 reacted to this
 -
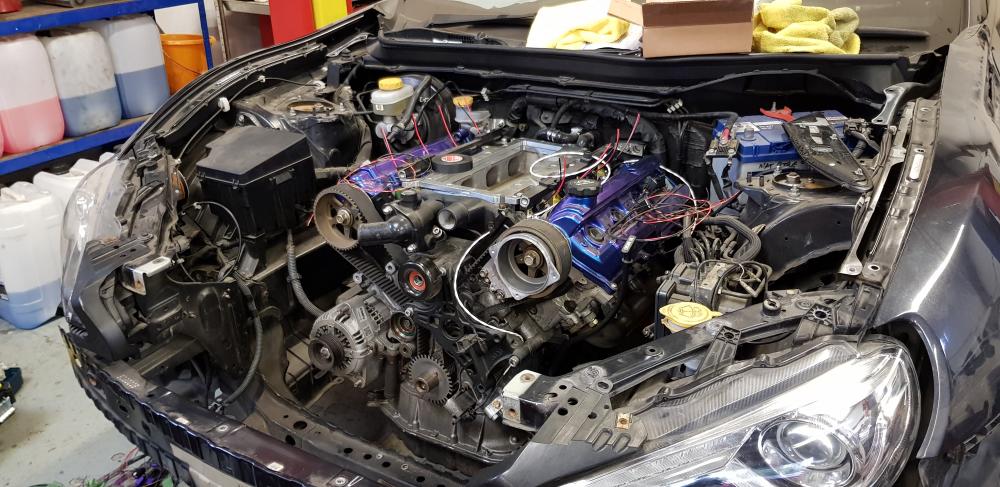
And the finished product.
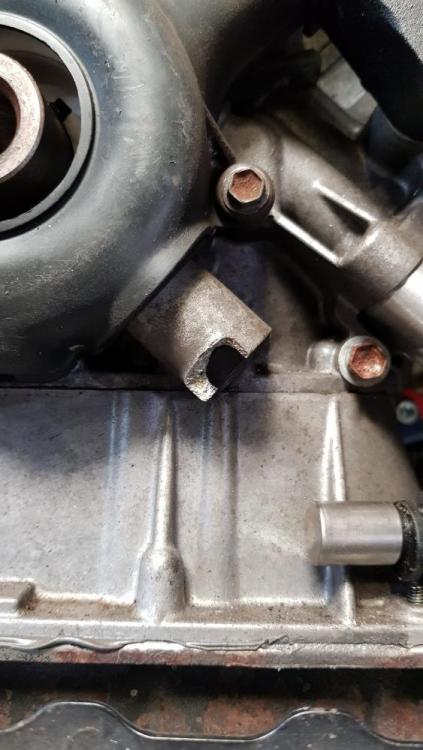
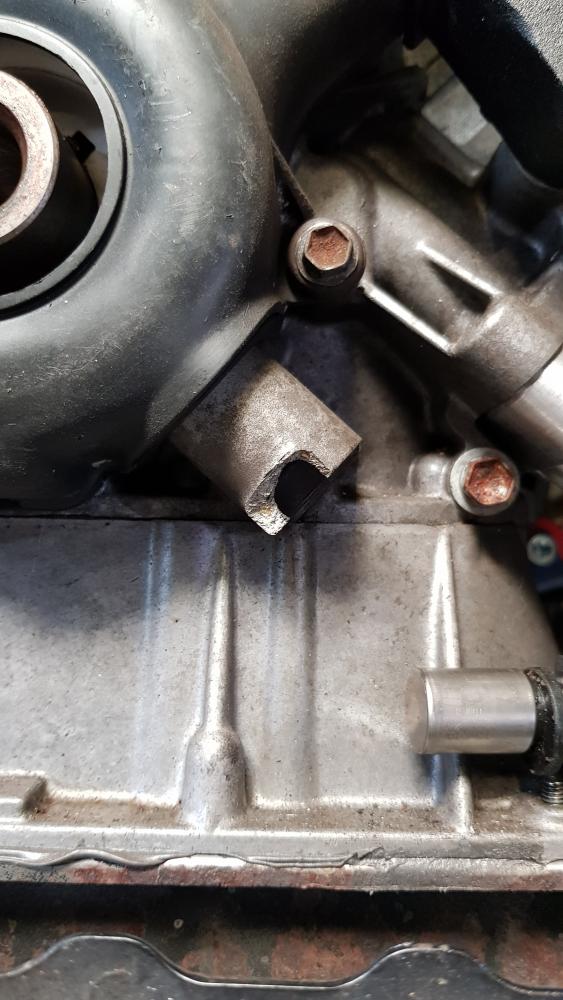
Just a couple of small changes to be made to the engine itself now, like a new oil pump housing as it was previously damaged by the crank sensor mounting (no idea how, but very annoying) and also new front plate as the previous garage had got rid of the AC pump mounting points.
I can't think Chris @ Phoenix Engine Management enough for all the recent work. He's been amazing at restoring my faith in this build and has come up with some amazing solutions to get things moving again!


 Lauren reacted to this
 -
1 hour ago, Luke said:What sort of wheels are you going to fit that you can't get in 5x100?
Not decided yet, but just gives me such a bigger choice range
-
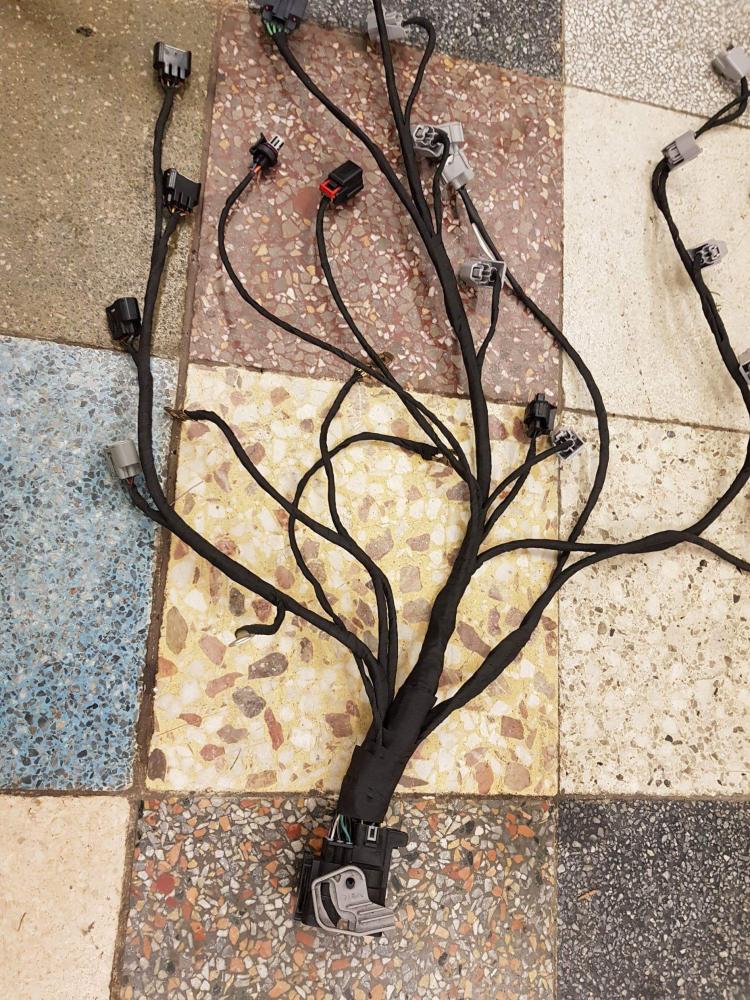
7 minutes ago, Luke said:That loom looks incredibly simple laid out on its own. Will it hook up to the factory ecu and work with the dials?
We use the OEM AC1 block connector to repin this loom into, but the Motec does the magic in making it all work.
Factory ECU is long gone.
Luke reacted to this -
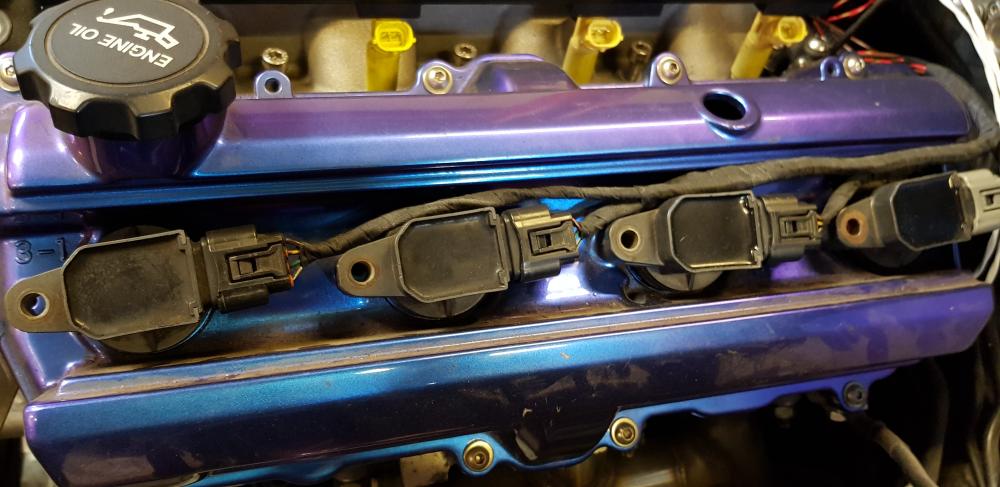
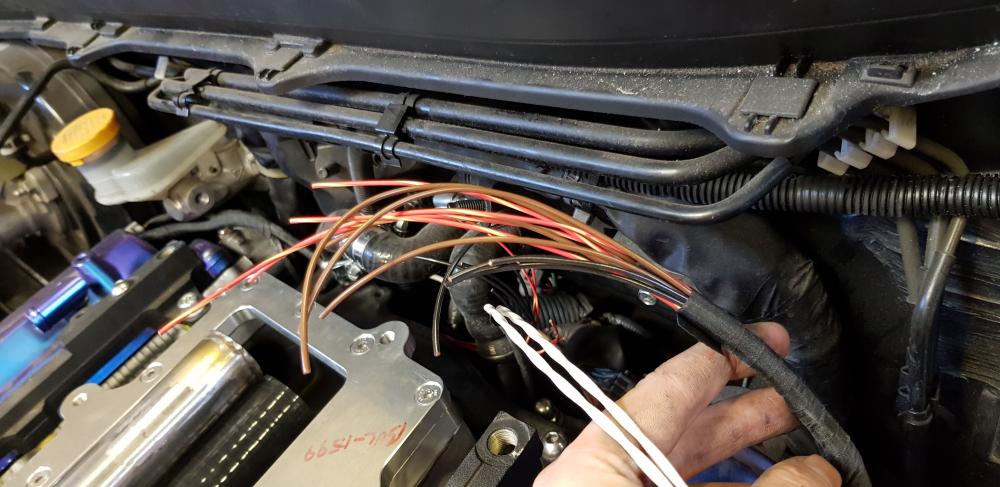
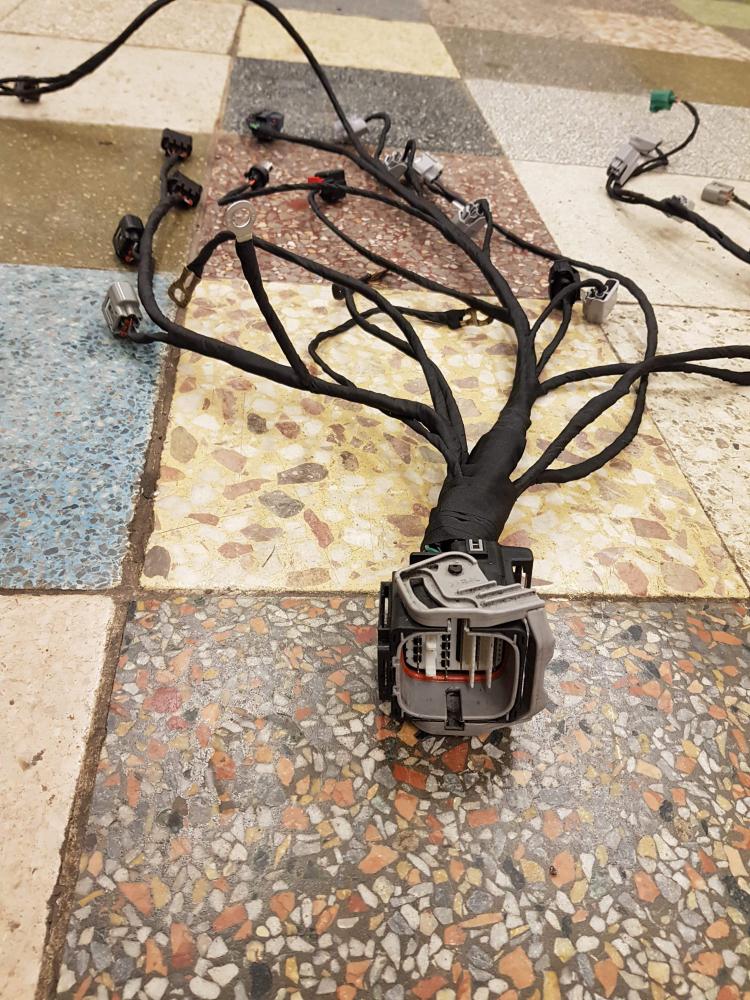
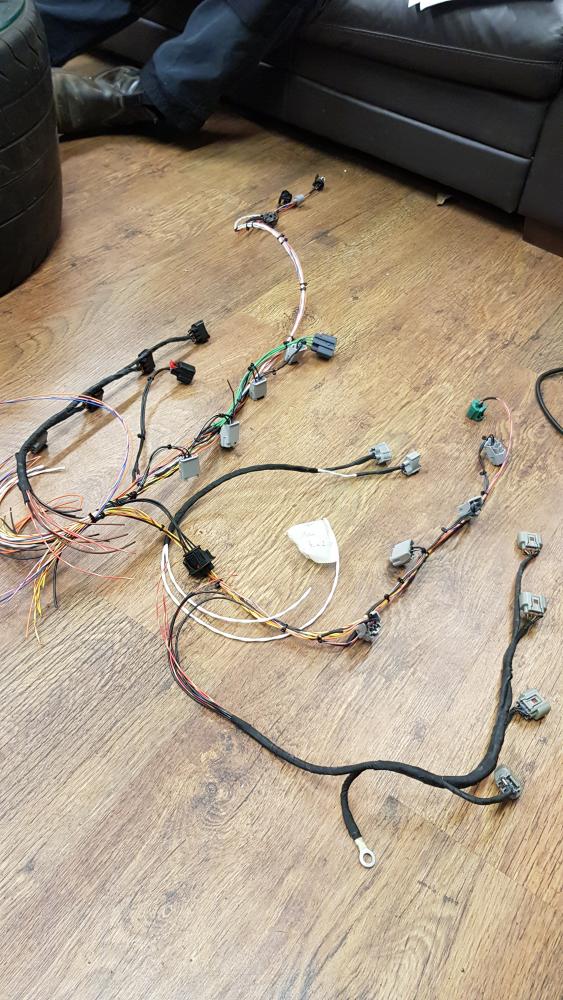
A proper, hand made, custom engine loom with OEM Denso connectors! Not the shitty, cheap Chinese, off-the-shelf job that was originally given to me as a "custom" loom

Getting close now...
 TommyC reacted to this
 -
23 hours ago, dimitris said:this car its so amazing
do you have this beast or you selle it?
Was sold ages ago
-
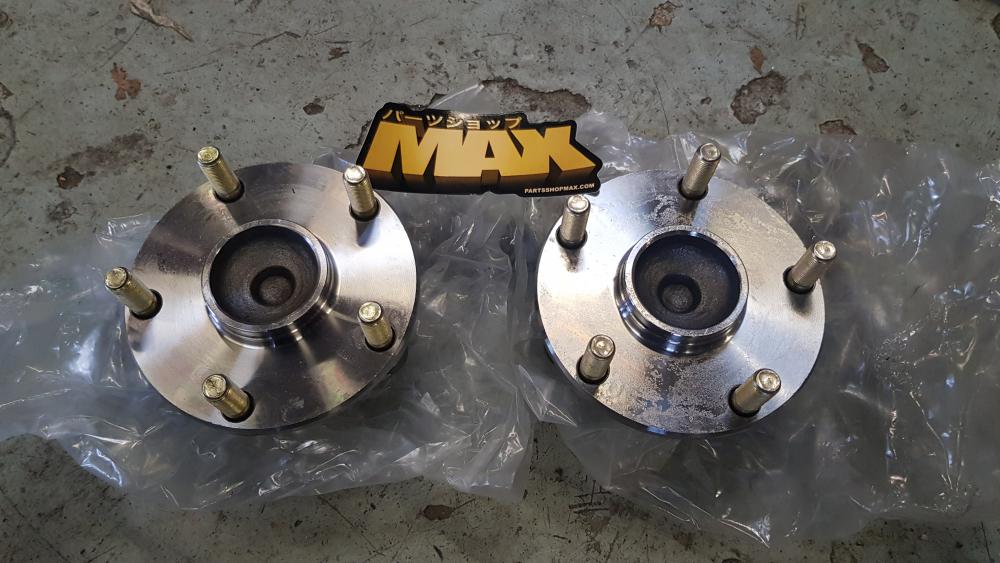
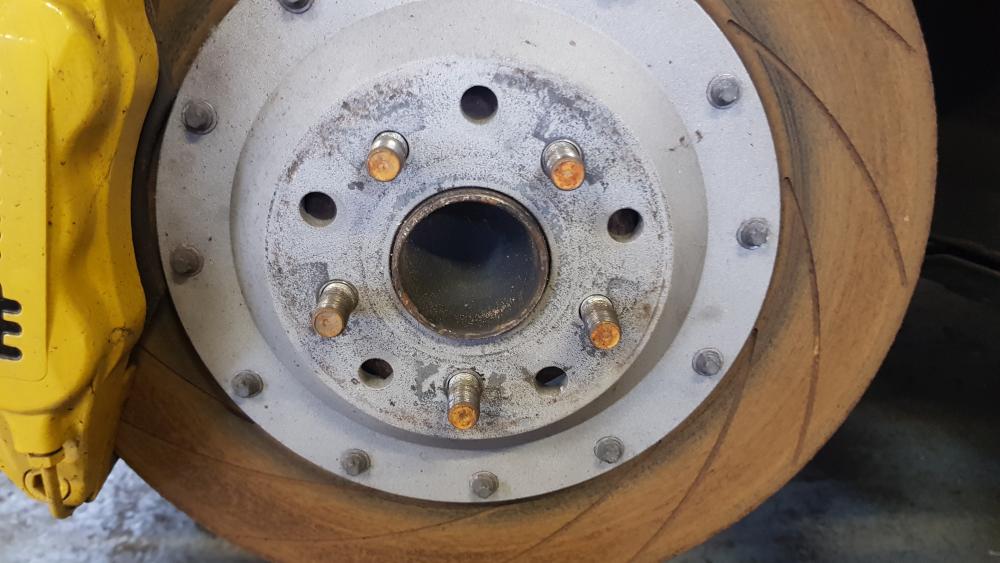
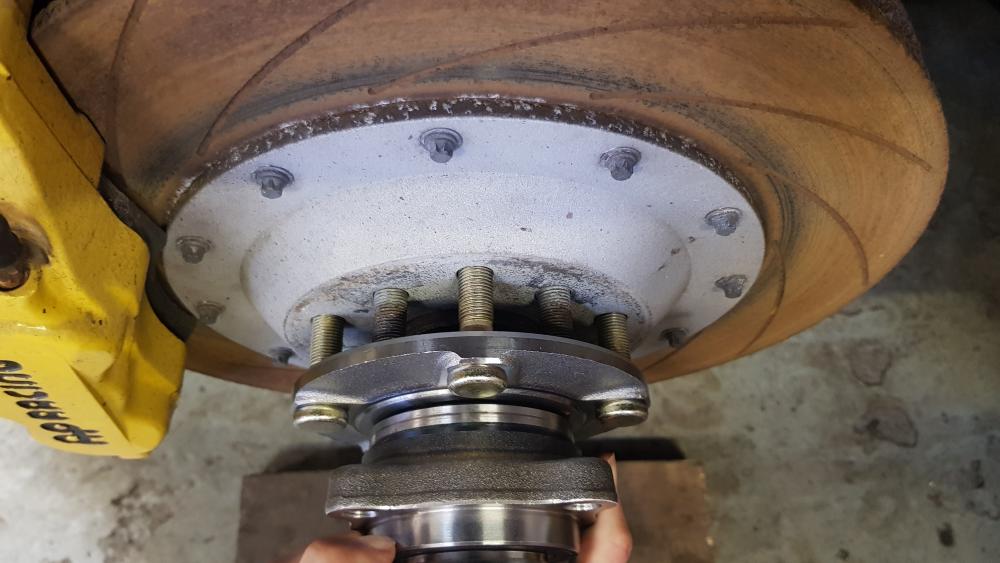
Another cool little mod turned up today, some 5x114.3 hubs! No longer will I be limited to the crappy 5x100 PCD which is typically associated with VAG cars

And, lucky for me, I rediscovered that the bells on my AP Racing discs are dual-drilled. 5x100 and 5x114.3. Result!
-
54 minutes ago, Varelco said:Great perseverance Smudge, hope it all works out for you. Can imagine this has given you some grey hairs!
Nope, just less hair
-
1 minute ago, Dave86 said:Did you get the £2k you wanted from this Nev creature? Which company was he so I know to never go near it being bor far from Brands?
Nope. I'm still putting a case together to take it through small claims court once I know exactly how much I've had to spend to correct his negligence
-
Just now, Lauren said:Ah that's good news, I could never have a car again without AC.
I realise now that I let Nev dictate what HE wanted to do rather than working to what I wanted...
Lauren reacted to this -
1 minute ago, Lauren said:Progress at last, does this mean you will have AC again?
Yep. Only reason Nev chopped it out to begin with is because it got in the way of his supercharger location, which never would have worked anyway as the oil reservoir needs to be mounted lower down than the charger to make the pump system work...
We were going to use the OEM AC pump and build a bracket to mount it onto the block, but makes more sense to use the original 1UZ AC pump as the pipes will need manipulating anyway.
-
5 hours ago, Luke said:So those wings allow a wider wheel at the front? Does the vent behind the wheel improve performance or is it aesthetic 'because race car'?
Yep, 30mm wider each side.
And think it's more for looks. Can't imagine a vent doing much behind the front wheels
-
1 minute ago, Samwise said:Out of curiosity what kind of power are you looking for once done?
I didn't think the internals of the 1uz were very happy much after 300-350 but I wasn't sure if you had addressed that already in an earlier post.
The early 1UZ that I have, has the thick Rods and can take up to 600ish before the heads need work.
The later 1UZ and subsequent 2UZ and 3UZ have much thinner rods and can only do about 400 without needing internal work.
We're aiming for about 450 with the M122 charger.
Luke and TommyC reacted to this -
1 hour ago, Luke said:Rebuilding the loom from scratch is brave but probably the best decision all things considered. Glad things look like they could finally be coming to an end. The block does sit quite far back against the firewall but it looks so right sat in an 86.
Means we know EXACTLY what's been done. It's a long winded and expensive route to take, but well worth it in the long run.
Sick of the previous garage cutting corners. Going all out to make sure this works as we want it to now.
dom2497 reacted to this -
Right. Let's give this a bit of a revival
After sorting out a load of the mechanical issues, we got a wiring specialist in to sort out the loom. In theory, the M150 takes care of all the CANBUS system so you just need to repin the engine loom into the OEM connector in the engine bay. Everything should then run as normal.
Unfortunately, the engine loom that was supplied as a "custom made" job for my car was nothing more than a cheap, Chinese, off-the-shelf piece of crap. The connectors barely stay together, the pigtails would simply fall out and nothing was the right length. So the wiring specialist had a hard time working with this and also didn't have much knowledge of the engine itself. So every visit became a torrent of questions, wasting further time and not really making any progress.
So I called up a guy called Chris from Phoenix Performance who specifically deals with wiring for 1UZ engines. After a 30mins chat on a Thursday night, Chris travelled up from Bristol to Surrey on Saturday morning to form a plan with us at Carson Performance. Within minutes, he had chucked the "custom" loom in the bin and had started on his own from scratch! So exciting to see someone finally make some real progress and be able to give us some expert advice on what's best. At the end of the day, we had the following tasks completed:
- new coil on plugs installed with proper OEM Denso connectors, all wired up properly
- alternator all wired into the battery and properly earthed
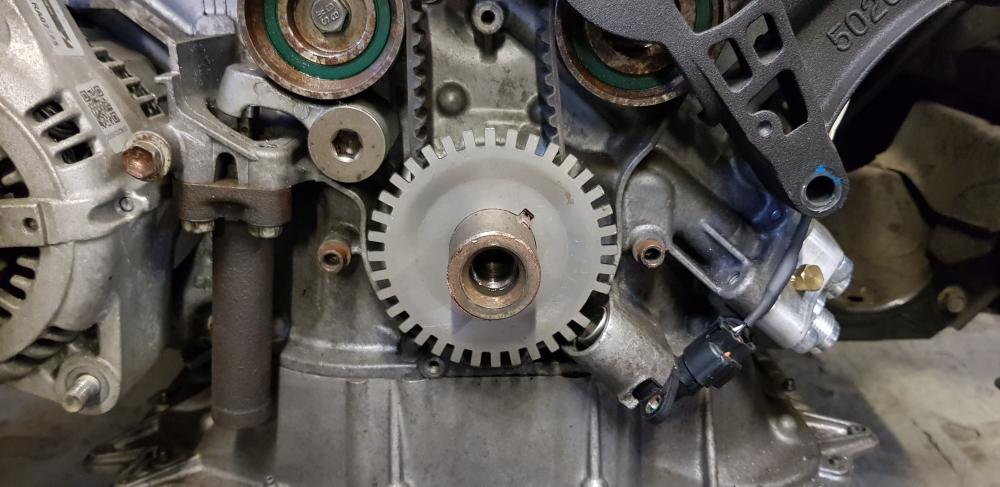
- flywheel trigger installed and sensor wired in
- cam sensors wired in
With a new list of what else is required before his next visits on 8th and 9th November:
- purchase new OEM injector connectors from Toyota
- purchase knock sensor mounting bolts from Toyota
- re-install AC compressor as we don't have the original Rotrex taking up that space in the engine bay
- install flanges in exhaust for O2 sensors (which connect straight to the Motec)
- purchase return fuel system with external fuel regulator and fit
- complete radiator and cooling system fitment
So with everything crossed, Chris can return on 8th/9th Novemebr and put a full 2 days into finishing off the custom loom, all repinned into the OEM block for the M150 to work it's magic and get everything running!
After EVERYTHING that's happened, I'm not holding my breath. But with Simon at Carson taking care of the mechanical stuff and Chris from Phoenix taking care of the electrical, it finally feels like we have a proper plan of action to get this thing back on the road. Watch this space!
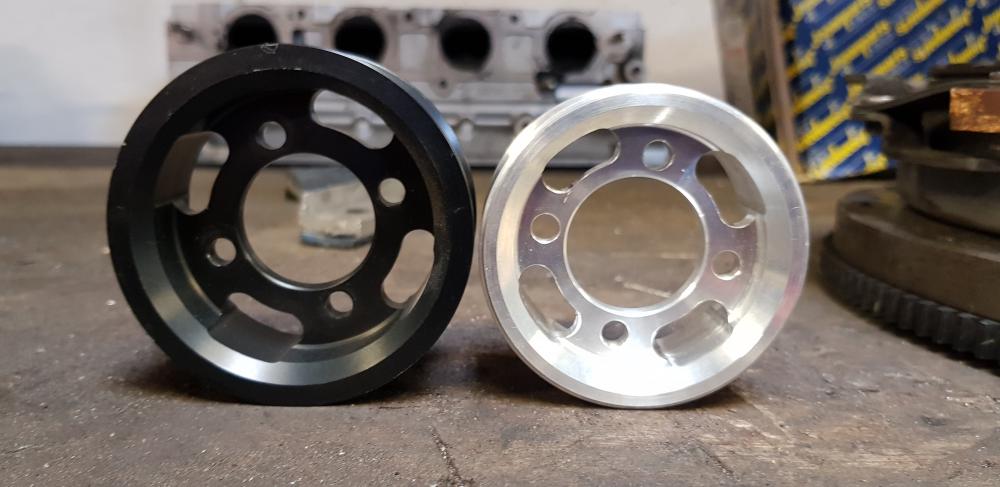
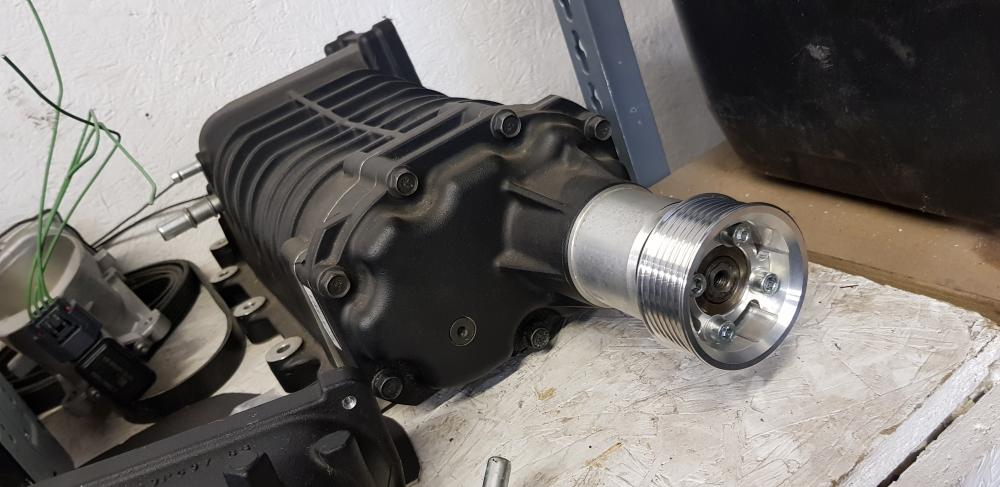
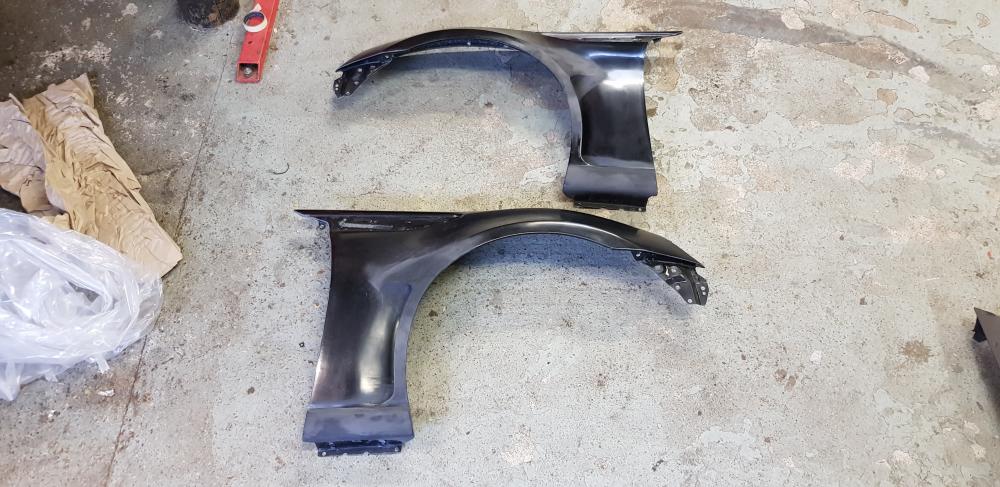
Today, I also changed the pulley on the Eaton M122 supercharger to a slightly smaller one to make around 1bar of boost when it's running, and also did a test fit of some Todoroki front wings I recently purchased. These keep an OEM look to the car but give an extra 30mm over the standard wings!
 TommyC reacted to this
 -
58 minutes ago, will300 said:To be fair to @Lucas@PartBox he did post it in the Social Events forum last month....
Fair enough. Not like my car would be ready anyway
-
Bit short notice!
-


What supercharger? (Maybe turbo)
in GT86/BRZ General Chat
Posted · Report reply
@Mike@TD.co.uk is your man! They're turbo kit has been very well received