


BOBEL
-
Content Count
82 -
Joined
-
Last visited
-
Days Won
13
Posts posted by BOBEL
-
-
Thankfully these gearboxes are actually pretty straightforward to work on, it’s not actually too bad a job..only tricky bit was getting the two rebuilt shafts back into the box, it’s quite fiddly on your own.
-
It’s been a while since I’ve update this thread, and that’s mostly as the car has been running without fault, the only issue that’s been niggling for the last while is a crunchy shift on 2nd gear, something that becomes audibly worse as gearbox temperatures rise during a session on track.
I was pretty sure the issue was a worn synchro even through the gearbox already had carbon synchros installed by PAR Engineering when the straight cut gearset was originally installed by them. I intended on farming out the job of rebuilding the gearbox but pickings are slim here in Ireland and I couldn’t find anyone that instilled any confidence when I spoke to them so decided I’d just go ahead and do it myself.
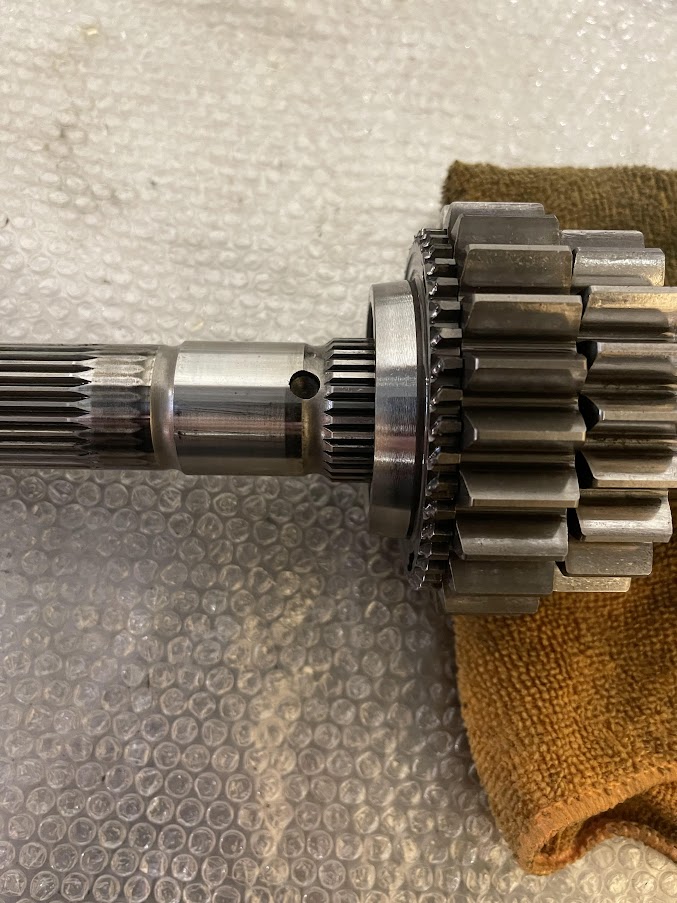
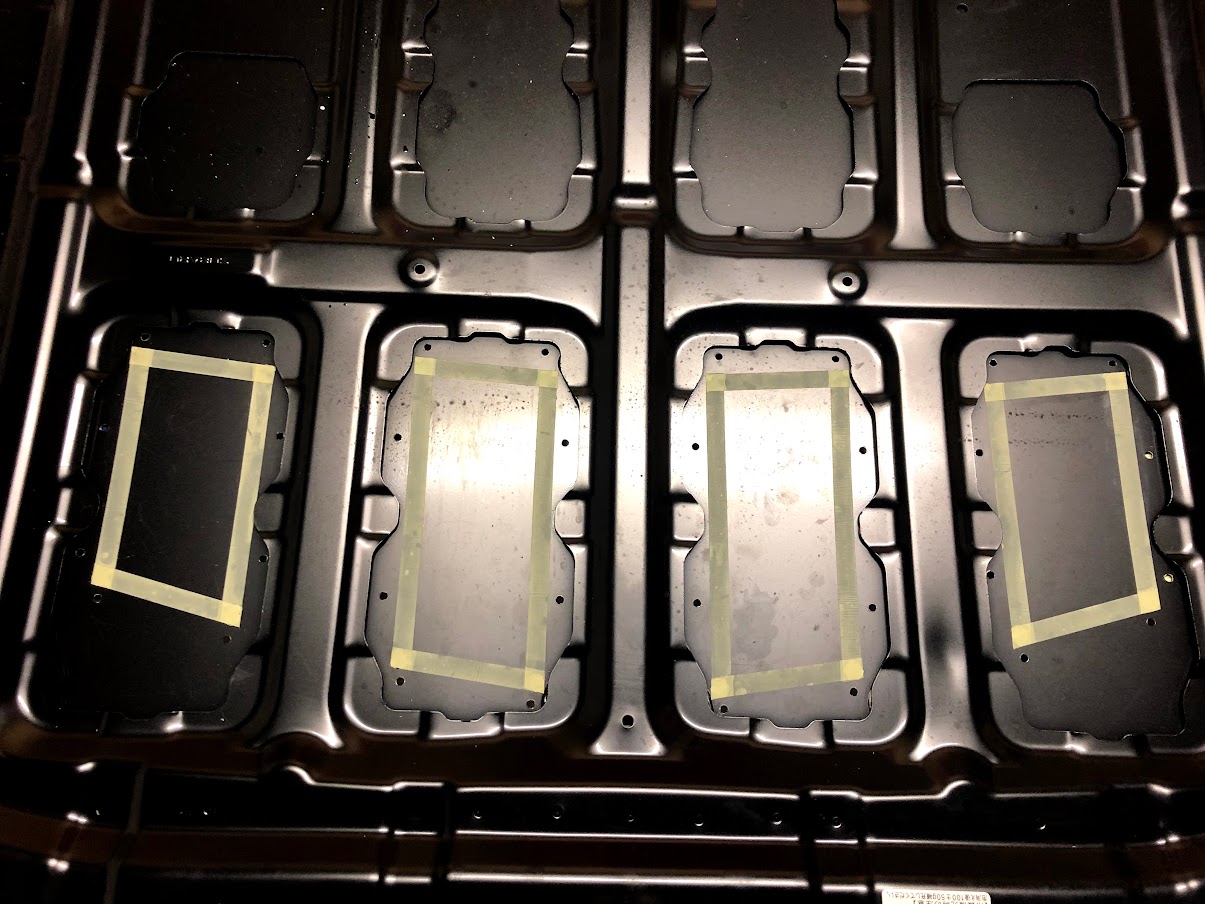
The patient on the operating table
For the most part the gear sets, shafts and synchros were in good order with the exception of 2nd gear. Unfortunately it appears the carbon synchro had delaminated and in turn the poor alignment had pretty much damaged all the engagement teeth on the gear itself. Its hard to see from the photos but the damage was sufficient to warrant a new 2nd gear from PAR Engineering which took a number of weeks to arrive.
Damaged 2nd Gear
Once the new 2nd gear arrived it was time to put it all back together
Thankfully with that lot completed and a couple of track-days since reinstall under my belt I can say that 2nd gear changes are now butter smooth
-
-
Hi
I did not personally look into the FA20DIT front cover but I know one US company did and it is not a direct fitment and I believe they did not pursue it.
There is a larger capacity Reimax oil pump that requires some matching of the oil pumps rear cover to fit, so that could be an option for you?
So far so good, engine is holding up fine, oil pressures with latest mod look decent, however my car is a dedicated track car so it’s not seeing a lot of mileage so can’t speak to longevity to be fair. -
Pretty cool stuff throughout. Missed this thread until now. Have to ask though, with all this effort why did you choose the only SC known for repeated failures?
Yes agree they have a questionable reliability but my preference was a centrifugal charger with air-air intercooler so choices are quite limited, I also love the power delivery and think it really suits the car, but perhaps my mind will change when it come time to replace it ThatGuyThere reacted to this
 -
Its been a little while since my last update but finally lockdown restriction lifted here in Ireland and I got to a track day this weekend to test my most recent changes and most importantly the oiling modification.
After downloading the data it looks like the modification has yielded the result I was looking for and has raised the oil pressure at the mains. It was hard to do an exact head to head comparison, trying to finding two laps with the exact same oil temperature but these two are relative close (the post Modification one actually being a few Degrees hotter)
Oil pressure & Temp Post Modification
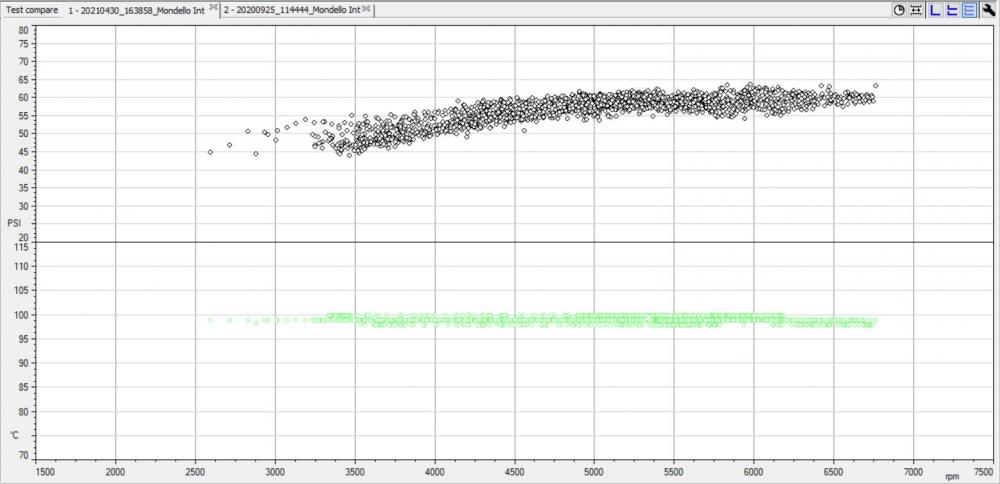
Oil Pressure and Temp Pre-Modification
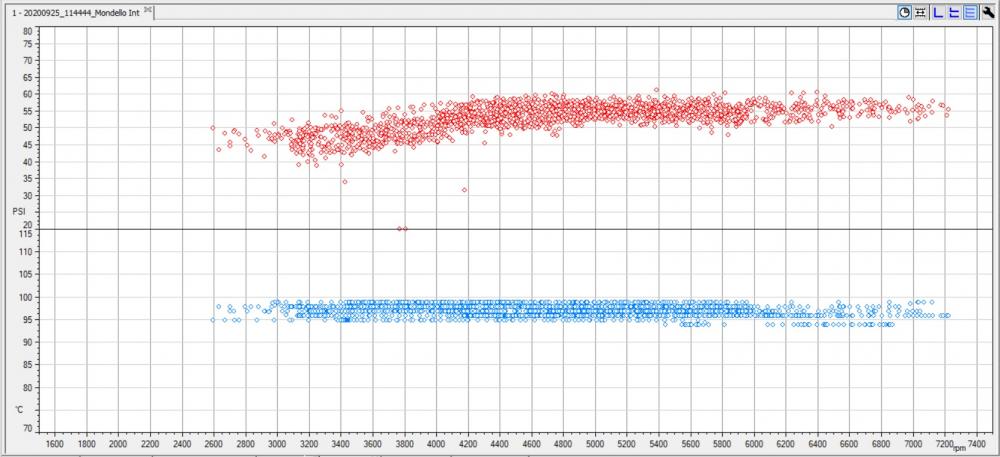
When overlaid you can see that pressure at the mains has consistently increased.

I'm happy pretty with the results at the mains, but I also logged the oil pressure in the front cover and turns out the pressure delta was minimal so the heads are certainly getting enough oil too.
Oil modifications aside, I also ran the car on 255 section Nankang Ar-1s this weekend on the new 8.5j Konigs, compared to my usual 225 R888s on 7.5J Ultraleggeras and the grip was immense, however I think I'm at the point of needing to change the ARBs though as I'm getting a bit too much lean through a couple of corners.
-
Yes running a Motec M150
I think Verus have some good info on their site on the benefit of the vents and temps at coil packs etc
-
Yep pretty much, I would imagine you are reading +10psi on mine as all my reading are from the mains, but I’ll know for definite once I gather more data from both locations.
Yes I have a IAT sensor just before the throttle body, I must check my data logs and see what it’s currently reading, but I should be able to show pre and post vent install alright.
I’m really hoping the vents will actually have an impact on the coolant temperatures as I think the post radiator air flow is very constricted with OEM setup, the front splitter should increase flow through the rad too but I guess the data will tell all. -
Yes I probably will revert to original setup just to measure the exact difference, I imagine it is most likely +10psi at the front cover, and that would line up pretty close to your own figures @ 100 Deg C
I’m running the HKS cooler with 5W-40 oil so I imagine we would be quiet similar minus the oil pump difference, although I’m not sure that’s netting me much by the look of it.
-
The last few weeks have been relatively quiet so I took the opportunity to fit the last Verus piece which was the steering rack limiters, pretty simple job which involves slipping some C-shaped spacers around the rack by sliding the rubber boots on either side back, should hopefully stop my wider front wheel from contacting the chassis on full lock.
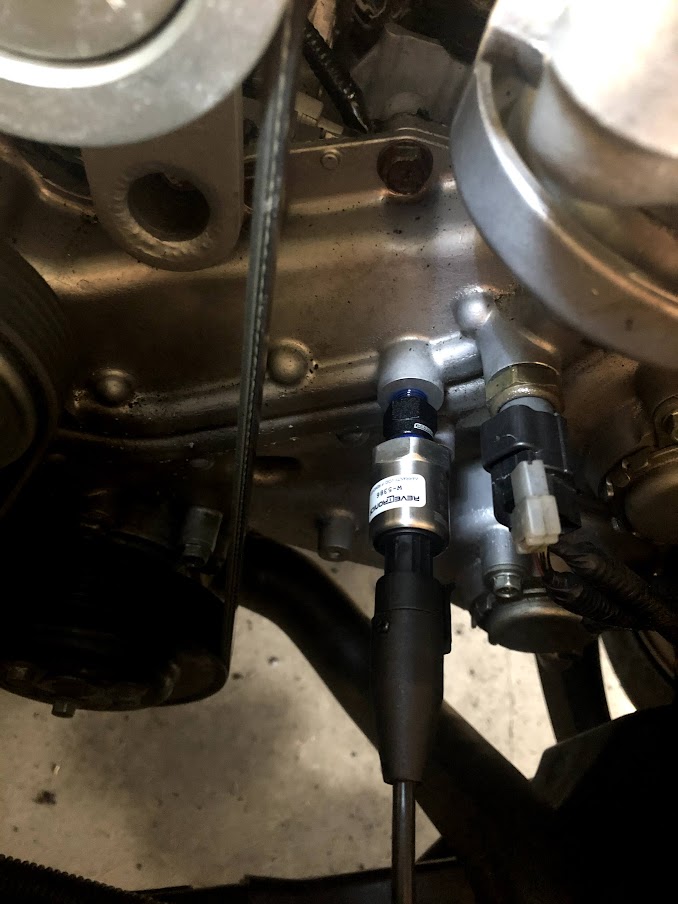
With that little job only taking a few minutes I turned my attention to something a little more experimental. With time on my hands I took a good look at my oil pressures from recent trackdays, and I wasn’t exactly loving the look of them.
My oil pressure sensor is installed on the mains and most people estimate the difference between the front cover where most locate their sensors and the mains is +10psi, but not being one to work on assumptions I’ve decided to install a second oil pressure sensor in place of the OEM oil pressure switch which I’ve ditched as its pretty much useless anyway.
I know the FA20 is never going to have the most impressive oil pressure given the OEM spec is 46.6PSI @ 6,700rpm @120 DegC which is only 6.9PSI / 1000rpm whereas an old general rule of thumb is 10psi/1000rpm, but I would like to see some more pressure at the main journals regardless.
I’ve already got a Reimax high flow oil pump installed but ultimately I think the real problem with the FA20 is the fact the oil supply is not direct to the main journals, after it leaves the oil filter it splits to feed the left cylinder head before splitting again to feed the mains and right cylinder head so essentially the main bearings, and subsequently rod bearing are down the pecking order.
So I set about finding a way to essentially create a priority oil feed to the mains, I’ve seen others attempt this in various ways but I was anxious to combine the best of what I’ve seen with something of my own making and see how it works.
What I’ve gone with is an adaptor that I’ve modified to fit the FA20. The adaptor re-orientates the oil filter 90 deg and provides a direct tap into the post filtered oil. The adaptor will allow me to run a bigger diameter and longer oil filters without fear of hitting the underside of the bonnet which should reduce any pressure drop
From the tap on the side of the modified adaptor I’ve run an oil line directly over and into the main journals where my existing accusump was plumped in. I’ve had to do a little reworking of the setup but it all fits nicely.
With this setup the first route available to the oil is now the main journals, before it heads back into the front cover and into the heads etc.
One fear with this setup is that too much oil goes to the bearings and you essentially starve the heads, hence the real reason for the second oil pressure sensor. The sensor is wired to my AIM dash so I can monitor both pressures and set up a math channel to monitor the differential between both.
So I guess the next trackday will be the test-bed whenever that turns out to be!
-
Managed to get the last two major Verus Pieces wrapped up over the last few days
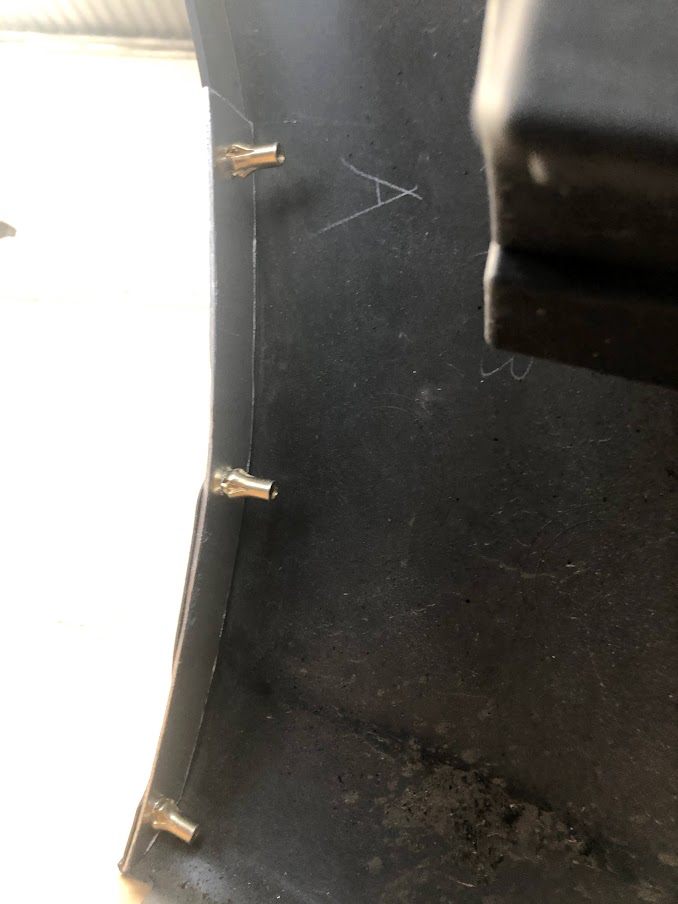
I tackled the bonnet vents first while I waiting on a few parts to arrive for the rear wing install. It’s always a little tense cutting into body panels so I must have checked my dimensions about 5 times before the drill and cutting disc were unleashed.
Once I had the holes cut out I taped up on both sides and sprayed all the cut edges just to seal them up and stop any aluminum corrosion taking hold.
After all the messing about the vents were finally bolted in, safe to say the front of the car no longer looks stock!
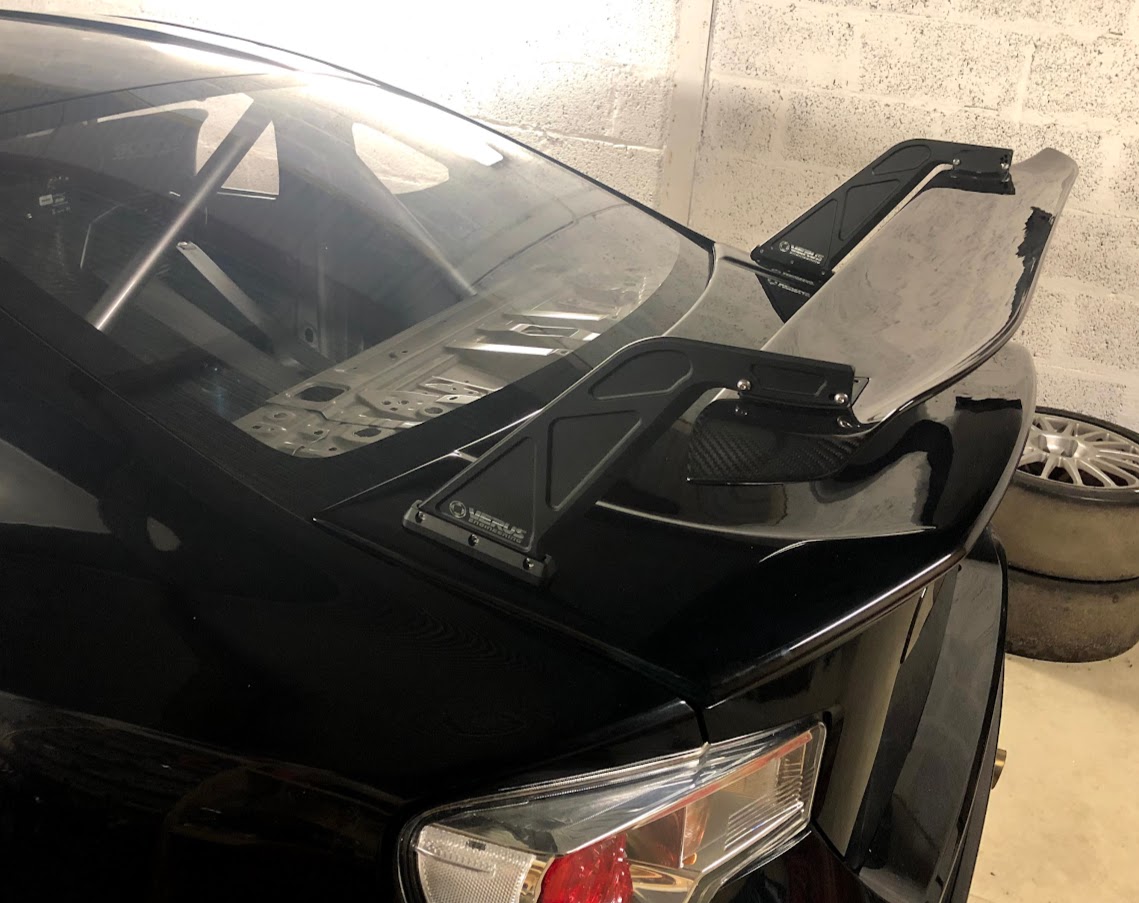
With the vents completed I tackled the rear wing install, I knew I was going to have to make some small alterations as I have a full fibreglass ducktail that covers the entire bootlid, and the Verus kit is designed to fit onto a standard bootlid. However funnily enough the Verus wing is designed to work with a ducktail and the profile of the wing should nicely tie in with it.
In order to get it to work I need to drill through the various layers of fibreglass and bootlid steel and use some extended aluminium spacers inside the boot with longer stainless steel bolts. The wing then uses a stainless steel backing plate on the inside and aluminium uprights on the outside to ensure there is no flex, which is helped by the fact the uprights are right out on the edge of the bootlid. A jacking nut is also incorporated that you adjust so that it is in contact with the OEM boot hinge stopper to further ensure no flexing.
When all was installed it does seem very effective, and ties in nicely with the ducktail like I hoped
-
As the lockdown tennis continues I took full advantage of Black Friday deals before Christmas and decided it was time to address a few items that were always on the list
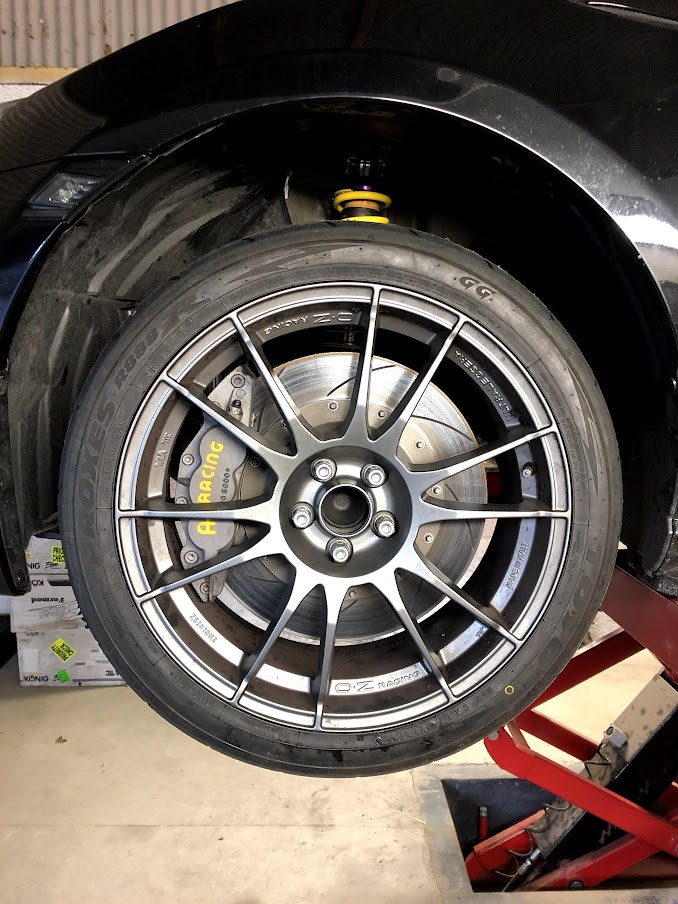
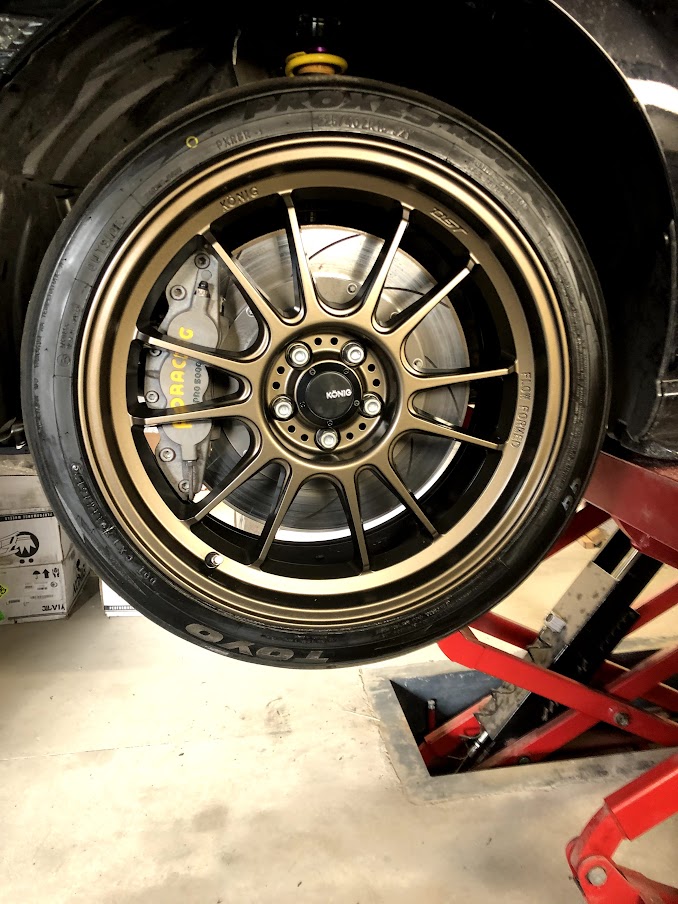
First up was getting a new set of wheels, I’ve been running a set of 18 x 7.5 OZ Ultraleggera for the last number of years and it’s limited me to 225 section tyres, and now with the extra grunt traction can be an issue on all but the newest tyres, I’ve got around this by running slicks in the summer but its limiting when you get a spot of rain (as we often do in Ireland)
So I opted for a set of Konig Hypergrams 18 x 8.5 et38, and later fitted some Nankang AR-1 255/35 so they should offer a nice bump in traction (the photo below is just the old set of R888R 225s I threw on for test fitting)
While I was fitting the new wheels I got distracted and decided to fit a tyre rack to my trailer so I could at least fit some wets to the old wheels and bring them with me
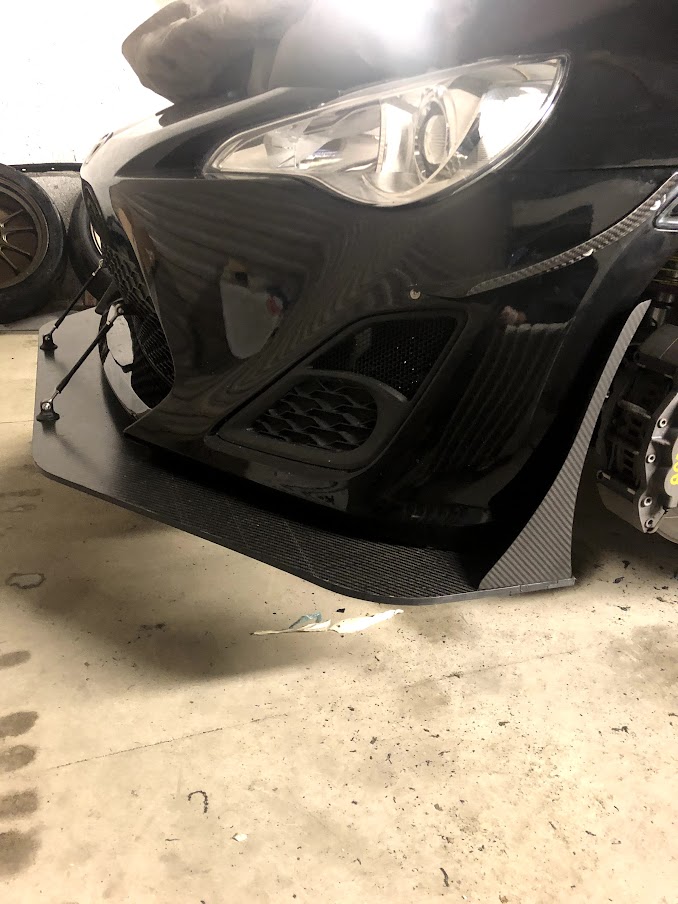
Upto this point I’ve kept the external of the car pretty standard looking, but I always intended to fit some functional aero and I’ve always been tempted by the Verus Engineering parts, so I took full advantage of their Black Friday deals and bought this lot!
First up was fitting the adjustable front splitter, I opted to install it at 5” extension just too see how it will work, However the install of the front splitter was not straight forward as anything beyond a 3” extension meant that two of the tie rods would extend beyond the bumper,
I ended up drilling two new mounting holes further back and making two offset brackets, I also ran into issues with the length of the tie rods, which at 5” were running at max extension with very little thread engagement left within the turnbuckle, so I installed some spacers behind the crash beam brackets to allow me to shorten them a little.
I also went with the accompanying end plate and canards, while installing the end plate I decided to reinforce the bumper edges with some aluminum backing plates just to give the rivet nuts a better chance of staying put!
Finally all were installed
With that lot sorted I’ve still got the rear wing, and bonnet vents to fit.
I’ve also bought the Verus steering angle limiting kit, as the wisefab kit has given me some extra lock but on full the tyres are touching the inner wheel arch
As my persistent 2nd gear grinding continues I also bought a new set of Verus carbon synchros that I’ll get fitted at some stage, and finally my battery was shot after 4 yrs of trickle charging and trackdays so I replaced it with a new Odyssey PC950
Deacon, Shad and AJ124 reacted to this -
To be honest the KWs were on the car when I got it and that’s the way JRM installed them, so I’ve left them like that, I don’t think it should make any difference really so I don’t think your missing a trick :-)
Luke reacted to this -
Those photos look fantastic. How comes the helper spring is fully compressed? Is that normal?
It’s just a consequence of the height the spring seats are set at, the shock is fully extended but the main spring is not completely unloaded so the helper remains compressed, it’s probably a good demonstration of the limited droop I was experiencing, the spring seats have been lowered a little since that photo but the helpers are still pretty much fully compressed -
It’s been a little while since I updated this thread
In between lockdowns here in Ireland I did manage to get the car to my friend who preps racecars and he kindly did an alignment and corner weighting for me before I hit the track for the first time since the wisefab install.
The car was actually sitting quite low by the time I reached my friends workshop before the setup was completed, mostly due to the car settling quite a lot in the trailer while I was transporting it. We just decided to leave it low and set up the geometry to see how it would work on track
The first day out was a revelation, I can honestly say the suspension made a massive difference in the cars handling, but in particular to the rear end grip levels, it was putting down the power so much better, and the lateral grip was excellent, I found just over 1 second within the first handful of laps just purely from the confidence it gave me.
While at the track-day the organizers asked if I they could take a couple of photos for a feature piece on their website, I was more than happy to oblige and got some really nice shots as a result
However all did not go to plan during the trackday and I was hearing a lot of wheel rubbing in the arches. The car was sitting quite low and it’s wasn’t a major surprise but it was a little bit of a headache.
The KW V3 suspension I’m running does not have independent ride height adjustment, the height set using the spring seats only. The wisefab kit had given a considerable ride height drop via the knuckles and as a result the struts at the rear were already wound up quite high, and in turn this was leaving me with minimal droop on the rear suspension which is not ideal.
I wasn’t sure what exactly I would do to remedy it, I was looking at changing my suspension setup but there are limited high end options that have independent ride height adjustment, and in truth I quite like the KW setup......so I kept searching until I stumbled across the Subaru obsession with lift kits
Thanks to the crossover fitment with the BRZ and a lot of it’s more rugged Subaru cousins I was able to find a set of shock tower poly spacers that would raise the ride height and actually let me drop the spring seats at the rear a little lower and regain some droop
I’ve yet to get back out on track with the ride height now raised, and I’ll also have to get the car realigned and corner weighted again once I get the ride height dialled in with no rubbing going on but at least I have a solution now.
BRZ-123 and Stutopia reacted to this -
Is that a Primo edition?
To be honest I’m not sure, it was actually a pre-production chassis from Japan (doesn’t even have a VIN) and it’s only ever been a fully stripped out racecar, so a lot (incl fog lights) have been removed over time for cooling/weight reduction) if that’s what suggest it’s a primo :-) -
-
You certainly won’t be sorry moving to the BBK, I’ve been running an AP BBK for the last four years on my track car and the performance is immense,
As it happens I also run the motul fluid and have zero issues, and I really do lean on the brakes very heavily.
Your only challenge now will be recalibrating your braking points with the new kit fitted, fun times ahead :-)Deacon reacted to this -
Incredible thread, thanks for sharing!
Cheers Mate -
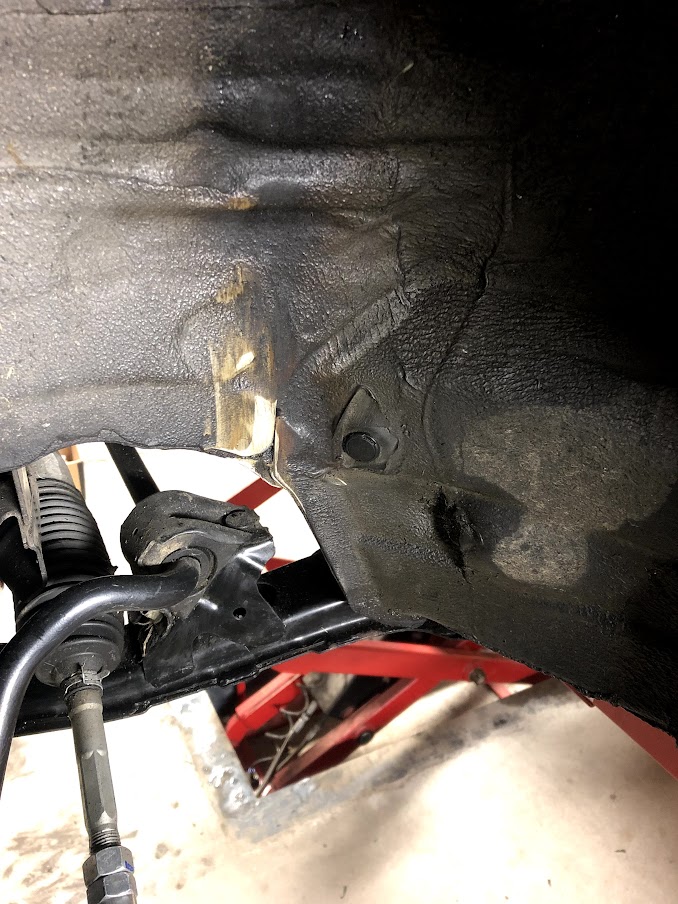
Over the weekend I got around to installing the front track kit.
In theory it’s a more straightforward install than the rear as you have less components to deal with, however the design of the lower control arm requires a small cut to the chassis to give it clearance.
I tackled the LHS first, and in a way I’m lucky that I tackled this job now as I noticed that my camber bolt on the passenger side was very loose!!! Not sure how, and really surprised I didn’t feel it on track.
I tried to minimise the cutting required to the chassis, as I’m not a fan of removing OEM material/spot welds.
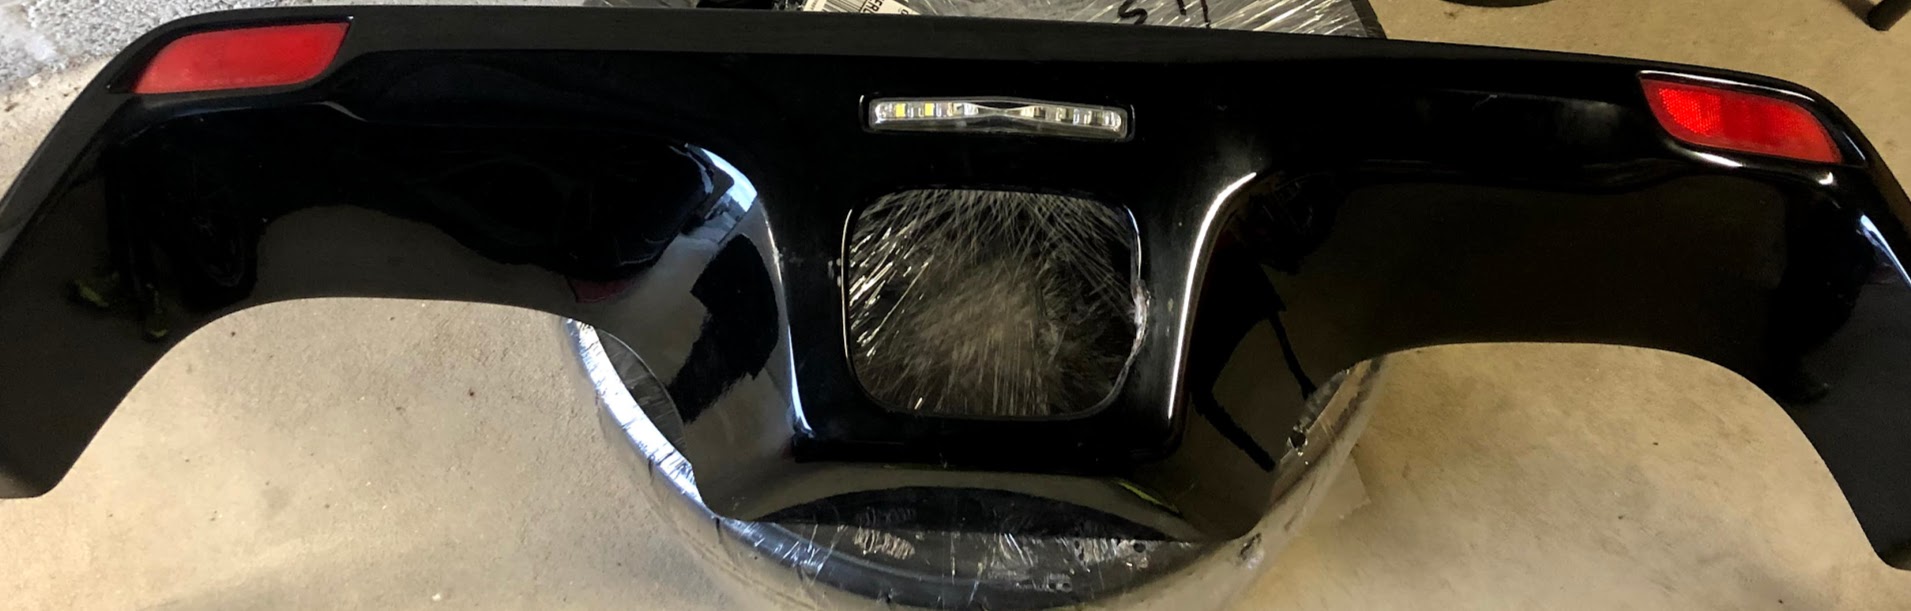
Finally got the rear bumper back from painting too, and couldn’t resist throwing it on to see how it looks with the rain light installed.
Deacon reacted to this -
What’s the quality of the Wisefab kit like? I’ve frequently found myself looking at the wide steering angle kit wishing I could justify the cost
I’ve found the overall quality to be superb, the billet uprights and front lower control arms really look great,
I can’t find fault with anything in the kits to be honest. -
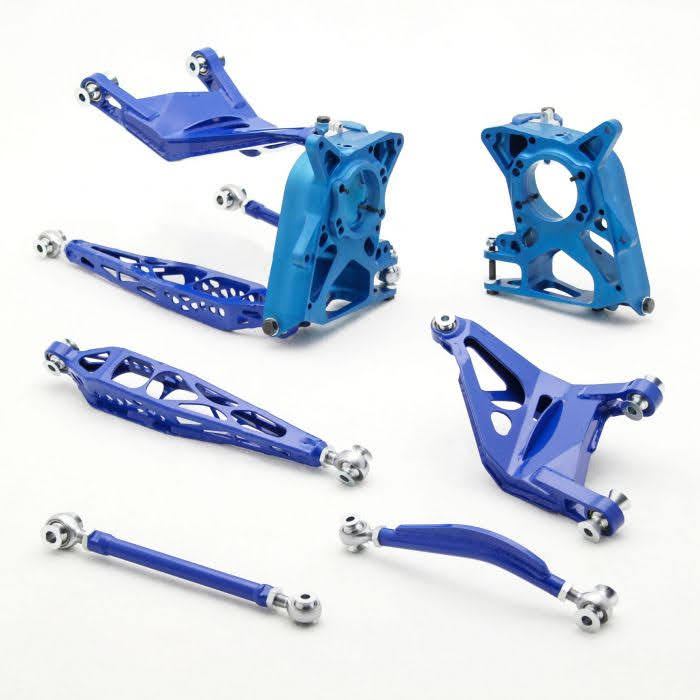
I hadn’t really planned the next mod but a little man maths and my inherent weakness for billet parts was just too much to resist
Initially I was thinking along the usual route of buying individual suspension parts control arms, toe rods etc but the Wisefab kits actually make more sense and they have the added benefit of beautiful billet uprights which have a built in 25mm drop on the knuckles all round.
I always associated Wisefab with drifting parts but they also make track kits that maintain the original track widths front and rear, giving pretty much all the adjustment you could ever want. More important for me though was that fact the kits correct the suspension geometry for lowered cars, whilst also saving 14kg on the rear and 7kg up front which is pretty significant on a suspension system.
Rear Kit
Front kit
I’ve only managed to fit the rear so far, unfortunately I couldn’t source the rear kit in black. Its a relatively straight forward install, but did require a few tweaks to the AP racing 4 pot calliper bracket to make it work with the billet knuckles mounting points.
Side by Side of the old OEM components and new Wisefab rear kit
New Bits installed on the rear, you can really see just how high the hub is placed in the new knuckle
Hopefully I’ll get a decent run at the front over the next week or so, and then carry out a quick alignment before the next track day.
-
Great thread mate, long time lurker but I don’t post much.
However I’ve a lot of experience with both the Nankang AR1’s and Toyo R888R’s, both are great tyres, when the AR1’s were first released the price difference made them a good choice, however they have recently crept closer to the R888R and for the money in my honest opinion the Toyo’s are the better of the two.
I’ve found the R888R to hold up better when lapping hard, where as the AR1’s would tail off faster, don’t know if that helps in anyway but just my 2 cents worth :-)Deacon reacted to this -
So it was time to address the noise issue ahead of any more trackdays. I wanted to go with something that would work in Mondello@106db, but also be able to work on stricter tracks too. The solution I went with is a large repackable rear silencer, with a V-band on the exit for installing a removable secondary barrel silencer
So with the new exhaust fitted the rear bumper valance was looking a little odd with no center exit tailpipes, I toyed with a few ideas but in the end I decided it was probably just easiest to block up the hole and mount a rain light in it. While I was at it I decided to repair the damage caused by the heat of the old exhaust.
I got as far as repairing the damage and mocking up the rain light but will have to send it off for painting before refitting to the car
Deacon reacted to this


GT86 RaceCar
in For Sale GT86 / BRZ Cars
Posted · Report reply
Located in Rep Ireland (Co. Meath)
GT86 race car built on a factory-supplied pre-production 2012 GT86 by renowned JRM UK and extensively upgraded in recent years. Weighing 1,160kg and running 335 BHP (engine capable of handling much more) with only 5,000KM on chassis and less than 2,000KM on the fully built engine and gearbox. Immaculate condition throughout, only used for trackdays, never raced. One of the most highly upgraded FA20 engined GT86 race cars around, extremely capable and fast, built to an extremely high spec, upgrades include:
Fully Built Engine: Carrillo Rods, JE Pistons, Upgraded valve train with GSC spring and titanium retainers, ARP hardware throughout, Cosworth head gaskets, King race bearings
HKS Supercharger & HKS oil cooler
Fuel: Upgraded fuel pump, Injectors and Ignition projects coil packs
Oil: Electronic accusump system with cCustom oiling system, Electronic pre-oiling, Upgraded oil pump, Baffled RacerX sump
Lightened flywheel Stage 2 Exedy clutch
Upgraded radiator, shroud and fans
PAR Eng Straight cut H Pattern gearset gearbox Carbon Synchros, IRP short shifter
Pneumatic Air-jack system
Plumbed Extinguisher (electronic FES system) and Electronic electrical cutoff
Motec M150 ECU with bosch wideband AIM Dash and Smarty Cam
Full Verus Engineering functional Aero kit
DAMD body kit Custom Exhaust, with repackable silencer, extra v-band removable silencer (for noise restricted Tracks)
Front and rear WiseFab grip kit, with billet uprights on front
KW V3 dampers
Konig 18 inch Wheels
AP Racing Big Brake Kit front and rear
Carbon Sparco bucket seat, Flocked dashboard, Polycarbonate side and rear windows, Carbon fibre door cards,
Ctek comfort lead
Full custom roll cage
New tyres (Nankang AR1s) , all fluids and new HKS spark plugs just fitted
Price: £ 34,300 (40,000 Euro)
Feel free to PM with any questions, please note that car is not provided with a V5, as a pre-production chassis it does not have a chassis number and not possible to road register